Scan the QR code, download and install the HOVER X1 App.
Press and hold the power button for 3 seconds until the green light turns on.
Open the 'HOVER' page in the X1 App, then tap the green 'Activate' button to complete the activation.
*Note: Enable location and Bluetooth permissions for the X1 App to connect to your device.
Watch the video below to learn how to activate your X1 PRO or PROMAX.
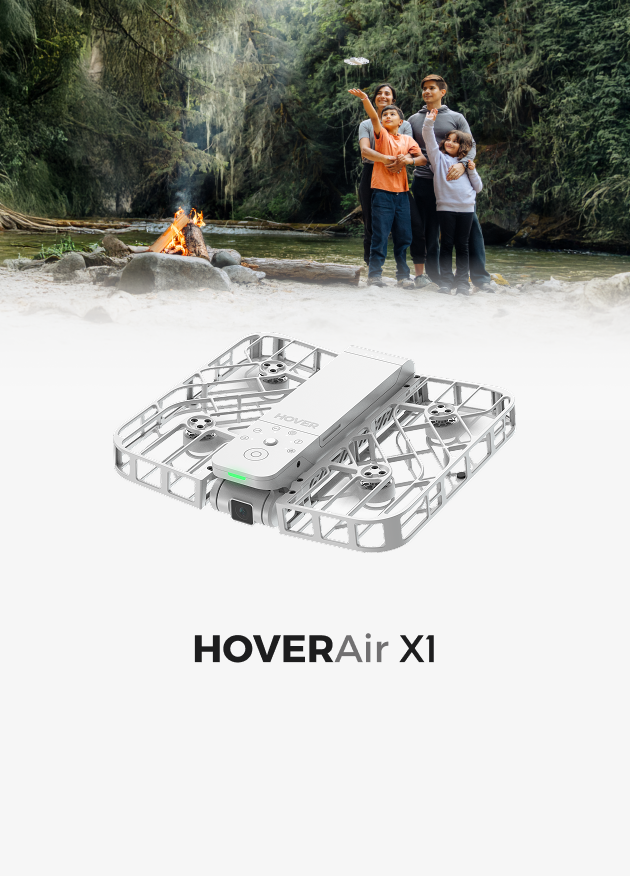
How to fly?
Digital Screen
The Digital Screen will display the current flight mode and parameters.
Short press the left or right button to change the flight mode;
Long press the left or right button to toggle through parameters, such as distance or height.
You can also configure more settings through the app and customize the flight modes displayed on the Digital Screen.
Watch the video below to learn how to switch flight modes and adjust parameters using the Digital Screen.
Takeoff
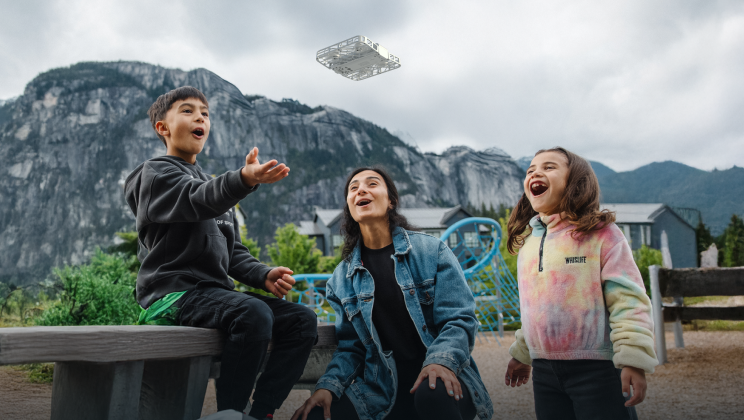
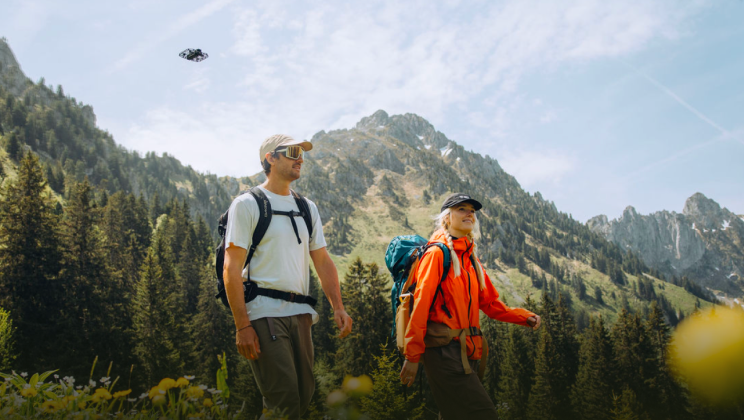
Power on the device, unfold it, and select flight mode. Point the camera towards your face. Short press the power button or use the voice command: "HOVER, take off." (Coming soon in an upcoming OTA update.)
Or you can also use the Beacon and Joystick for more precise flight control.
*Before takeoff, ensure the battery is fully charged.
*Make sure there is enough space for flight, and avoid areas with pedestrians to ensure safety.
Landing the X1 PRO and PROMAX is simple: place your hand about 20 cm (8 inches) below the device, and it will automatically land. You can also land it manually with the X1 app.
RTH (Return to Home)
1. You can activate the Return to Home feature by tapping the Return button in the X1 App in manual control mode or by long-pressing Beacon's function button.
*Note:
a. The flying camera will automatically return when the battery is low. You can also manually activate the return-to-home function and customize the return settings to your preference.
b. During the return process, the flying camera will fly in a straight line back to the take-off point. Please be mindful of any obstacles in the way; take manual control if necessary.
c. When operating manually, please confirm the return altitude in the control settings to ensure the flying camera can navigate without obstacles during the return.
2. Long Distance Flight: When in manual control using the X1 App or remote control, please note that different environments may affect the signal strength, which in turn affects the actual transmission distance.
Environment
Android
iOS
Beacon/JoyStick Transmission Distance
Interference, No Obstructions
Strong Interference (City Center, Office Buildings, Residential Areas)
30-100 meters
30-100 meters
50-200 meters
Medium Interference (Suburban, Open Spaces like parks)
100-300 meters
100-150 meters
200-500 meters
Weak interference ( suburban, seaside)
300-450 meters
150-200 meters
500-1000 meters
No Interference, No Obstructions
Open Environment with no electromagnetic Interference
500 meters
250 meters
1 kilometer
*When there is strong interference or obstructions, the transmission distance may significantly diminish.
Flying environment
If you need to fly in special conditions, like fly over water, cliff, and in low-light environments, then you need to place the device face up in an open, unobstructed area and wait for about 30 seconds.
Once the OmniTerrain icon lights up, HOVER is ready to fly over water, cliffs, and in low-light environments. If the icon is not on, avoid flying in these complex conditions, but you can still fly safely in well-lit areas with sufficient ground texture.
*Note: X1 PRO and PROMAX aren't waterproof, so be sure to use it with caution. When flying over water, keep it at least 1.5 meters (5 ft) above the surface for safety.
APP Introduction
Download Your Videos:
Tap 'HOVER Album', and after connecting to your device's Wi-Fi, you can preview videos you've shot and download them quickly to your phone.
You can also use the below methods to download your videos:
Use a USB-C data cable to connect your computer and the device while it's on, and download the videos directly.
Note: Sound recording is currently only available when exporting videos through the X1 App.
X1 PRO and PROMAX support SD cards up to 1TB, so you can remove the SD card and transfer videos directly.
Parameter setting
In the top left corner of the HOVER page, you can see the HOVER's battery level and storage space.
Tap the 'HOVER Settings' button and select a flight mode, such as Zoom Out, to adjust distance, flight height, resolution, slow motion, and more.
In Smart Preview mode, you can monitor what the camera is capturing, and set flight and camera parameters through the X1 App, such as flight height, frame rate, and 2x digital zoom.
Camera parameters
In manual control mode, tap the camera button on the left to adjust settings like ISO, EV, and shutter speed.
In manual control mode, you can pilot the X1 PRO and PROMAX using the virtual joystick or directional buttons. And you can configure the settings by clicking the small gear icon in the top right corner.
On the 'Flight Mode' page, you can explore different flight modes, view details, and adjust settings. Tap 'Create' to use HOVER's special templates and make cool videos with just one click!
Customize & reorder flight modes
X1 PRO and PROMAX offer more than 10 automatic flight modes, which you can customize and reorder through the X1 App>Hover Settings>Change Flight Modes.
AI Sound Recording
The HOVER X1 App supports AI noise reduction for sound recording using your phone, earbuds, microphone, or the Beacon, automatically eliminating propeller noise. You can choose between light and deep noise reduction in the app settings (Hover>Sound Recording).
Or go to HOVER Settings>Sound Recording
Please do not turn off your phone screen or switch to another app while recording.
And use the X1 App to download the video with sound recording.
OTA Update
Power on the device and open the X1 App. Tap the 'Update' button and wait a moment for the OTA update to complete. Once it's done, your device will automatically restart.
*Note: During the OTA update, make sure the device stays powered on.
Watch the collection of tutorials on the X1 PRO & X1 PROMAX in the videos below:
You can download the HOVER X1 App from the Google Play Store or by this official store link: [link here https://hoverair.com/pages/x1-pro-and-promax-support](https://hoverair.com/pages/x1-pro-and-promax-support)
Android: [link here https://play.google.com/store/apps/details?id=com.zerozerorobotics.hover&hl=en
](https://play.google.com/store/apps/details?id=com.zerozerorobotics.hover&hl=en)
iOS: [link here https://apps.apple.com/us/app/hover-x1-self-flying-camera/id6443398815](https://apps.apple.com/us/app/hover-x1-self-flying-camera/id6443398815)
Good morning, what is the APP to work with the drone for iOS?
Dear, you don’t need to any password to connect flying camera’s Wifi.
Salutare tuturor!
Cum aflu parola pentru conectare wifi?
The device uses a number of on-board sensors and our proprietary sensor fusion algorithms to enhance the bottom VIO sensors, allowing it to enhance its flying performance. When Omni-Terrain function is turned on, it supports to fly over more senarios such as water surface.
Most drones handle the sky beautifully, but they become fragile the second they encounter a lake or a heavy splash of sea spray. If you want to know what kind...
Most drones handle the sky beautifully, but they become fragile the second they encounter a lake or a heavy splash of sea spray. If you want to know what kind...
Ever searched for a drone that can automatically follow your kayaking trips? If you ask around, most people will tell you it's impossible without a skilled pilot on the beach...
Ever searched for a drone that can automatically follow your kayaking trips? If you ask around, most people will tell you it's impossible without a skilled pilot on the beach...
The HOVERAir AQUA has been designed with the water fully in mind. In addition to the technical challenges of creating a fully waterproof drone under 250g, we also carefully considered...
The HOVERAir AQUA has been designed with the water fully in mind. In addition to the technical challenges of creating a fully waterproof drone under 250g, we also carefully considered...
The standard advice for filming a solo water session is always the same: skip the drone and buy a 360 camera on a long stick. Until recently, that was the...
The standard advice for filming a solo water session is always the same: skip the drone and buy a 360 camera on a long stick. Until recently, that was the...
The Beacon and JoySticks serve as HOVERAir's all-new remote control solution, fully compatible across our entire lineup—from the X1 and X1 PRO/PROMAX to the AQUA. Acting as a unique tri-state...
The Beacon and JoySticks serve as HOVERAir's all-new remote control solution, fully compatible across our entire lineup—from the X1 and X1 PRO/PROMAX to the AQUA. Acting as a unique tri-state...
The intuitive design of the HOVERAir AQUA makes the repair process incredibly straightforward, allowing you to handle minor hardware maintenance right at home. This blog provides a clear, step-by-step guide...
The intuitive design of the HOVERAir AQUA makes the repair process incredibly straightforward, allowing you to handle minor hardware maintenance right at home. This blog provides a clear, step-by-step guide...