


HOVERAir X1 Review: The Autonomous Flying Cameraman
- The HoverAir X1 is a lightweight and portable drone with decent image and video quality for personal use.
- It offers five shooting modes and triple stabilization for smooth and high-quality footage.
- The drone has limited camera control, low battery life, and no obstacle avoidance, but it is beginner-friendly and perfect for quick vlogging moments.
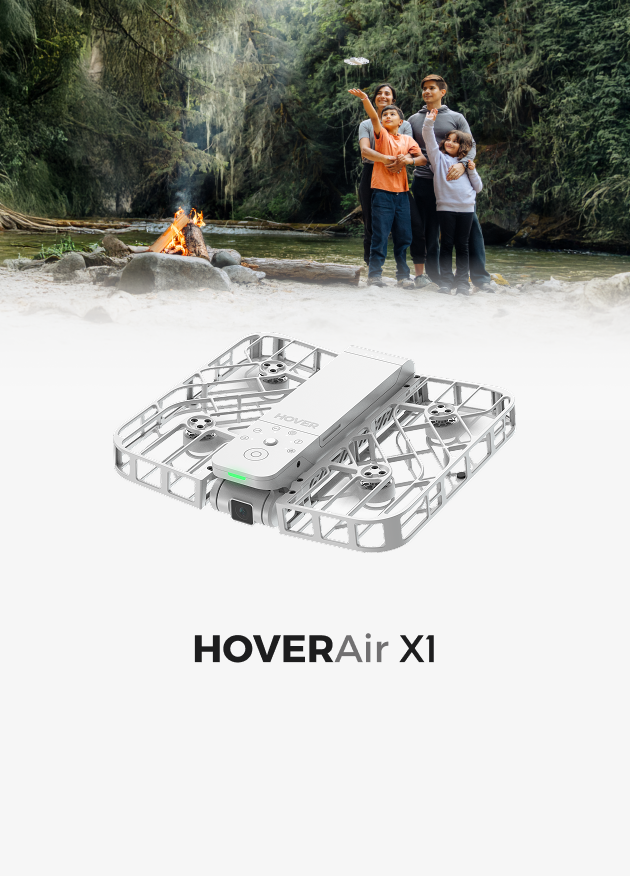
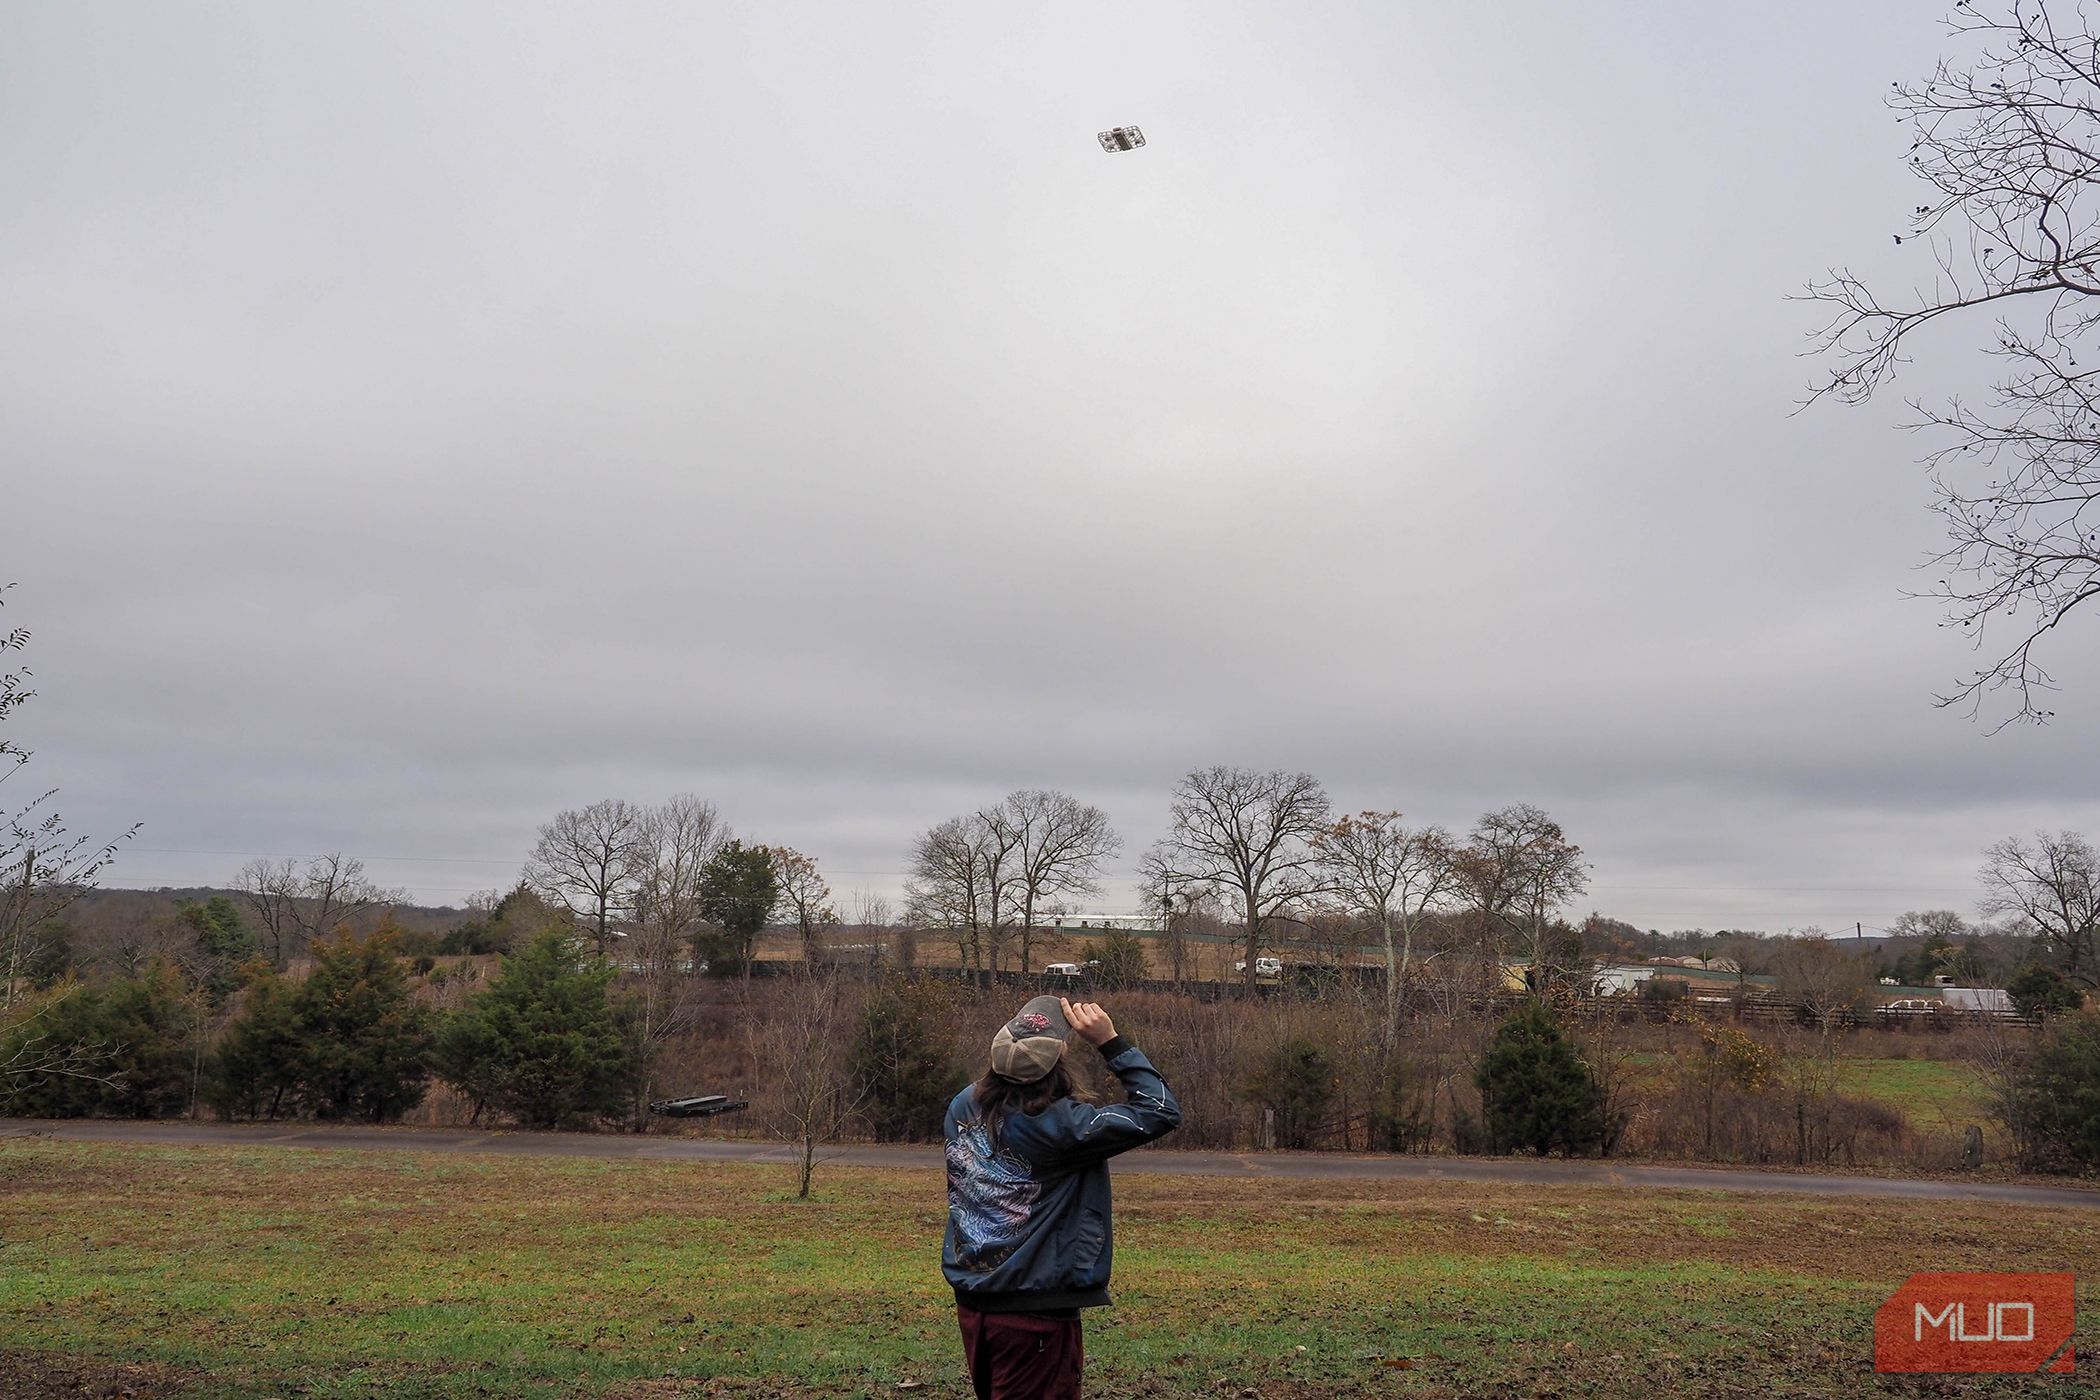
The HoverAir X1 is a foldable, lightweight device that can be launched from your palm and operated with just two buttons to select from its different autonomous flight modes. It's highly practical for those looking to ditch pre-flight calibrations and get those quick vlogging moments on the go.
As a trade-off for its mini-size, the Hoverair X1 doesn't offer the highest image quality, flight range, or flight time per battery. However, it is a beginner-friendly device that lets you get secondary images and videos without a hands-on camera operator.

HOVERAir X1
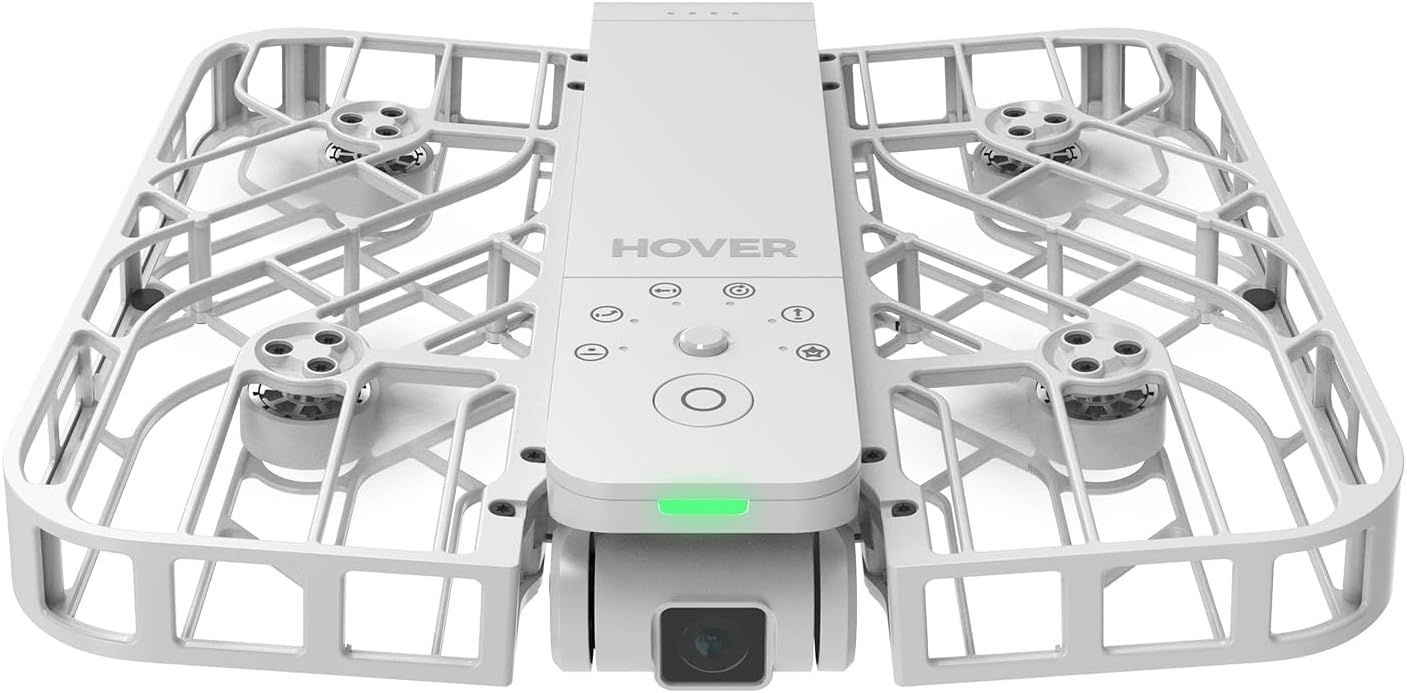
The HoverAir X1 is a personal-use class drone designed to fly autonomously to capture video and images. It can be operated from only two buttons or taken over for manual flight within its companion app. For further convenience, it offers a fully enclosed design with safety guards while still being lightweight and foldable to allow for easy transit. In addition, its five shooting modes offer video options of 2.7K (30FPS), 1080P (60 and 30FPS), or 12MP photos to store on its internal 32GB of storage. The drone camera attempts to get the best shots while triple stabilization smooths out the process alongside level-four wind resistance.
- Lightweight and portable
- Triple stabilization
- Intelligent flight paths keep the subject in view easily
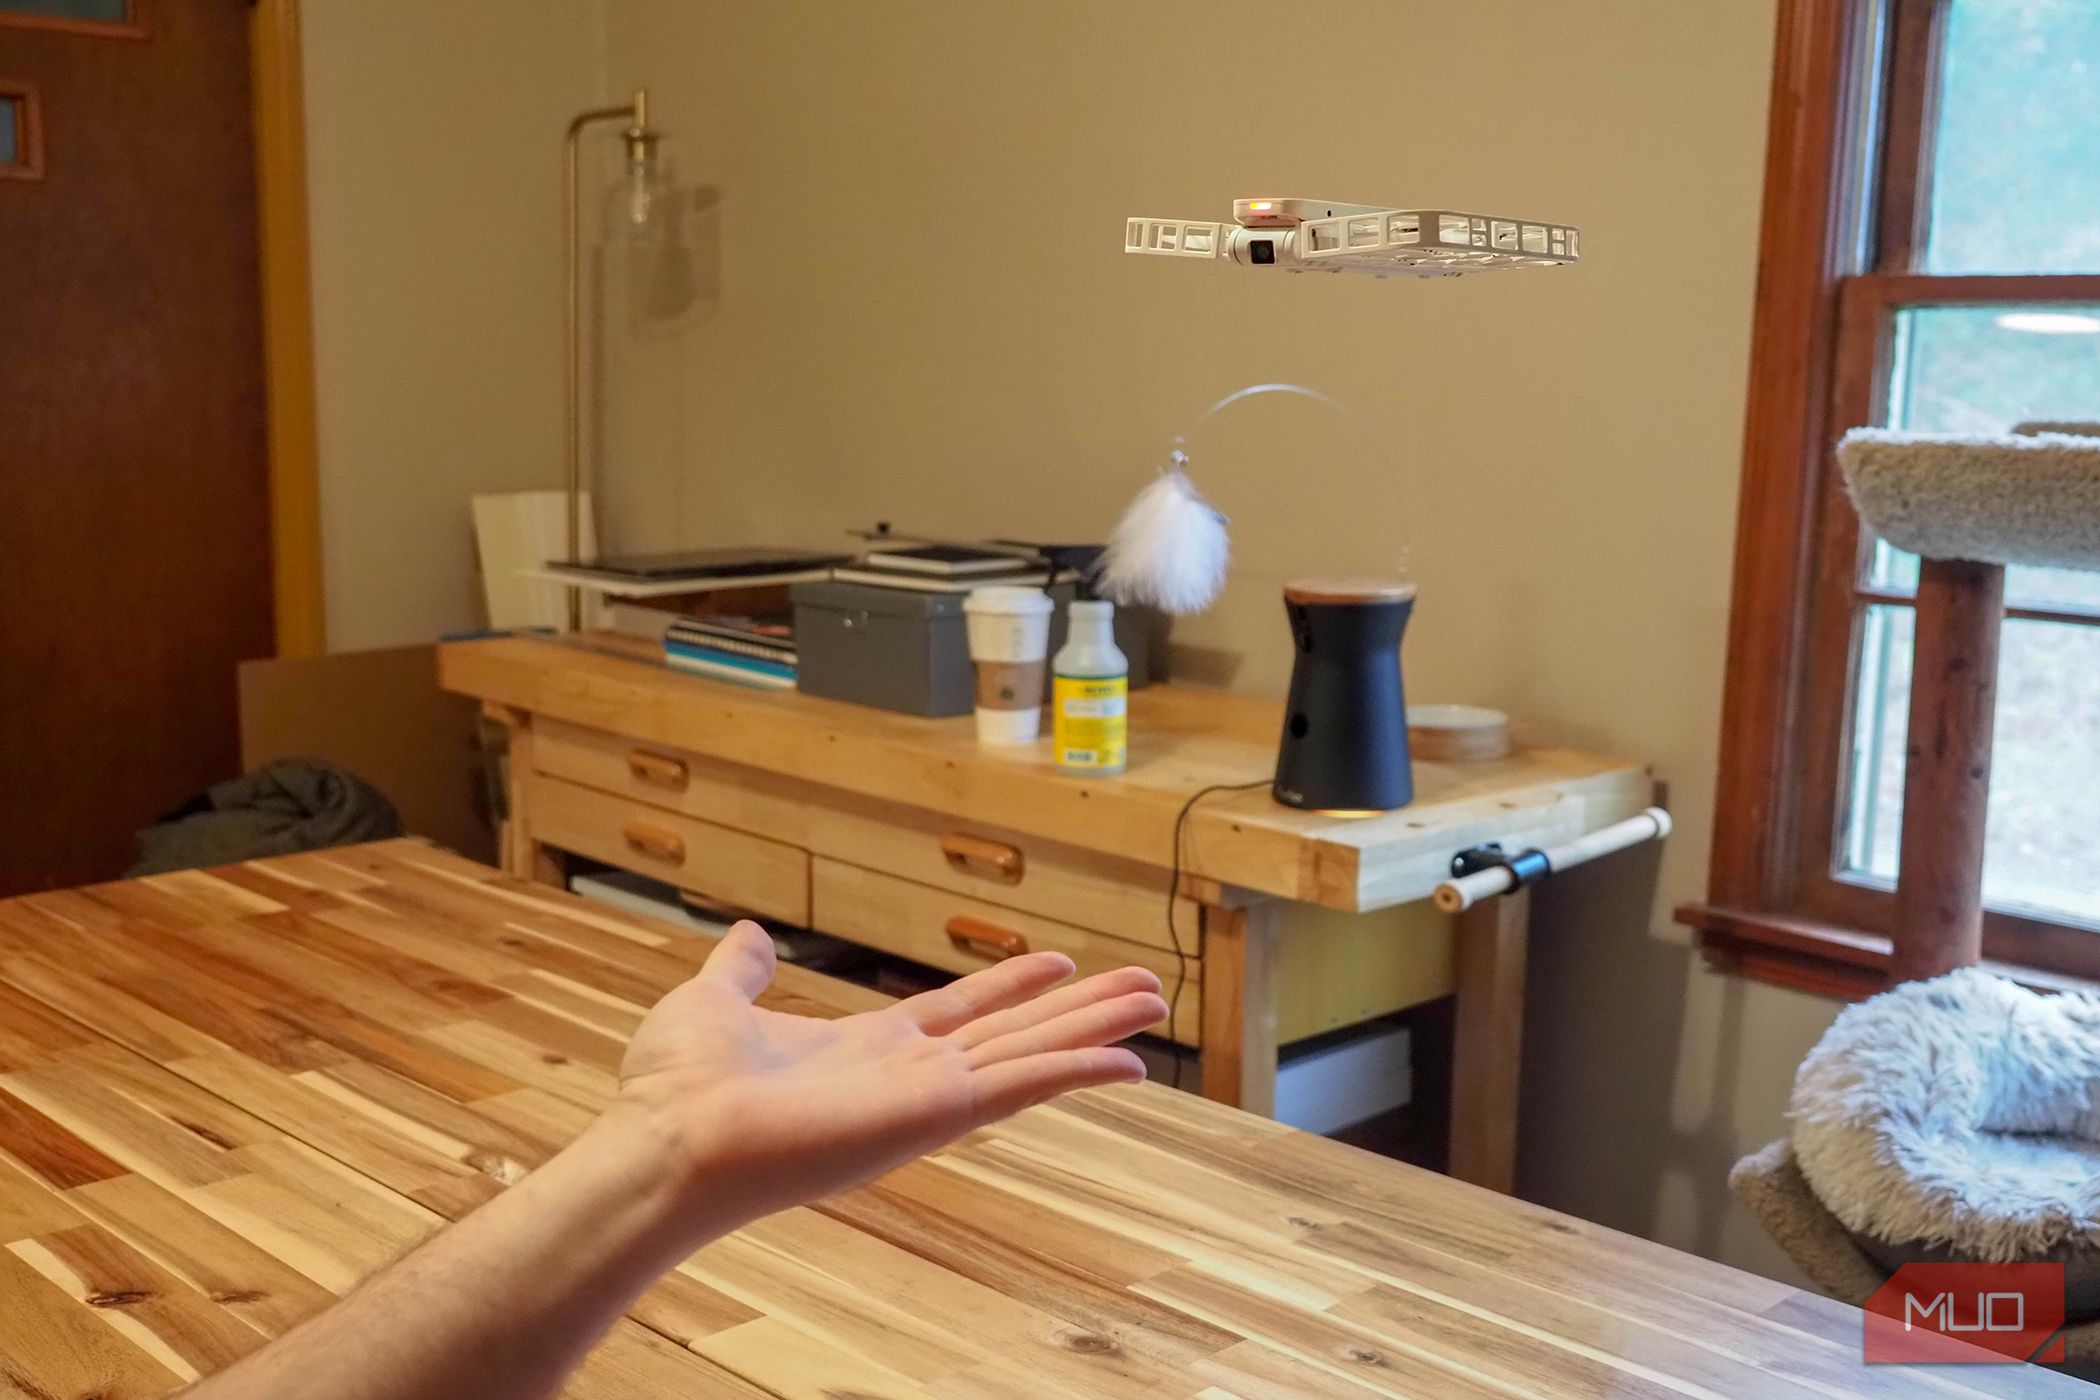
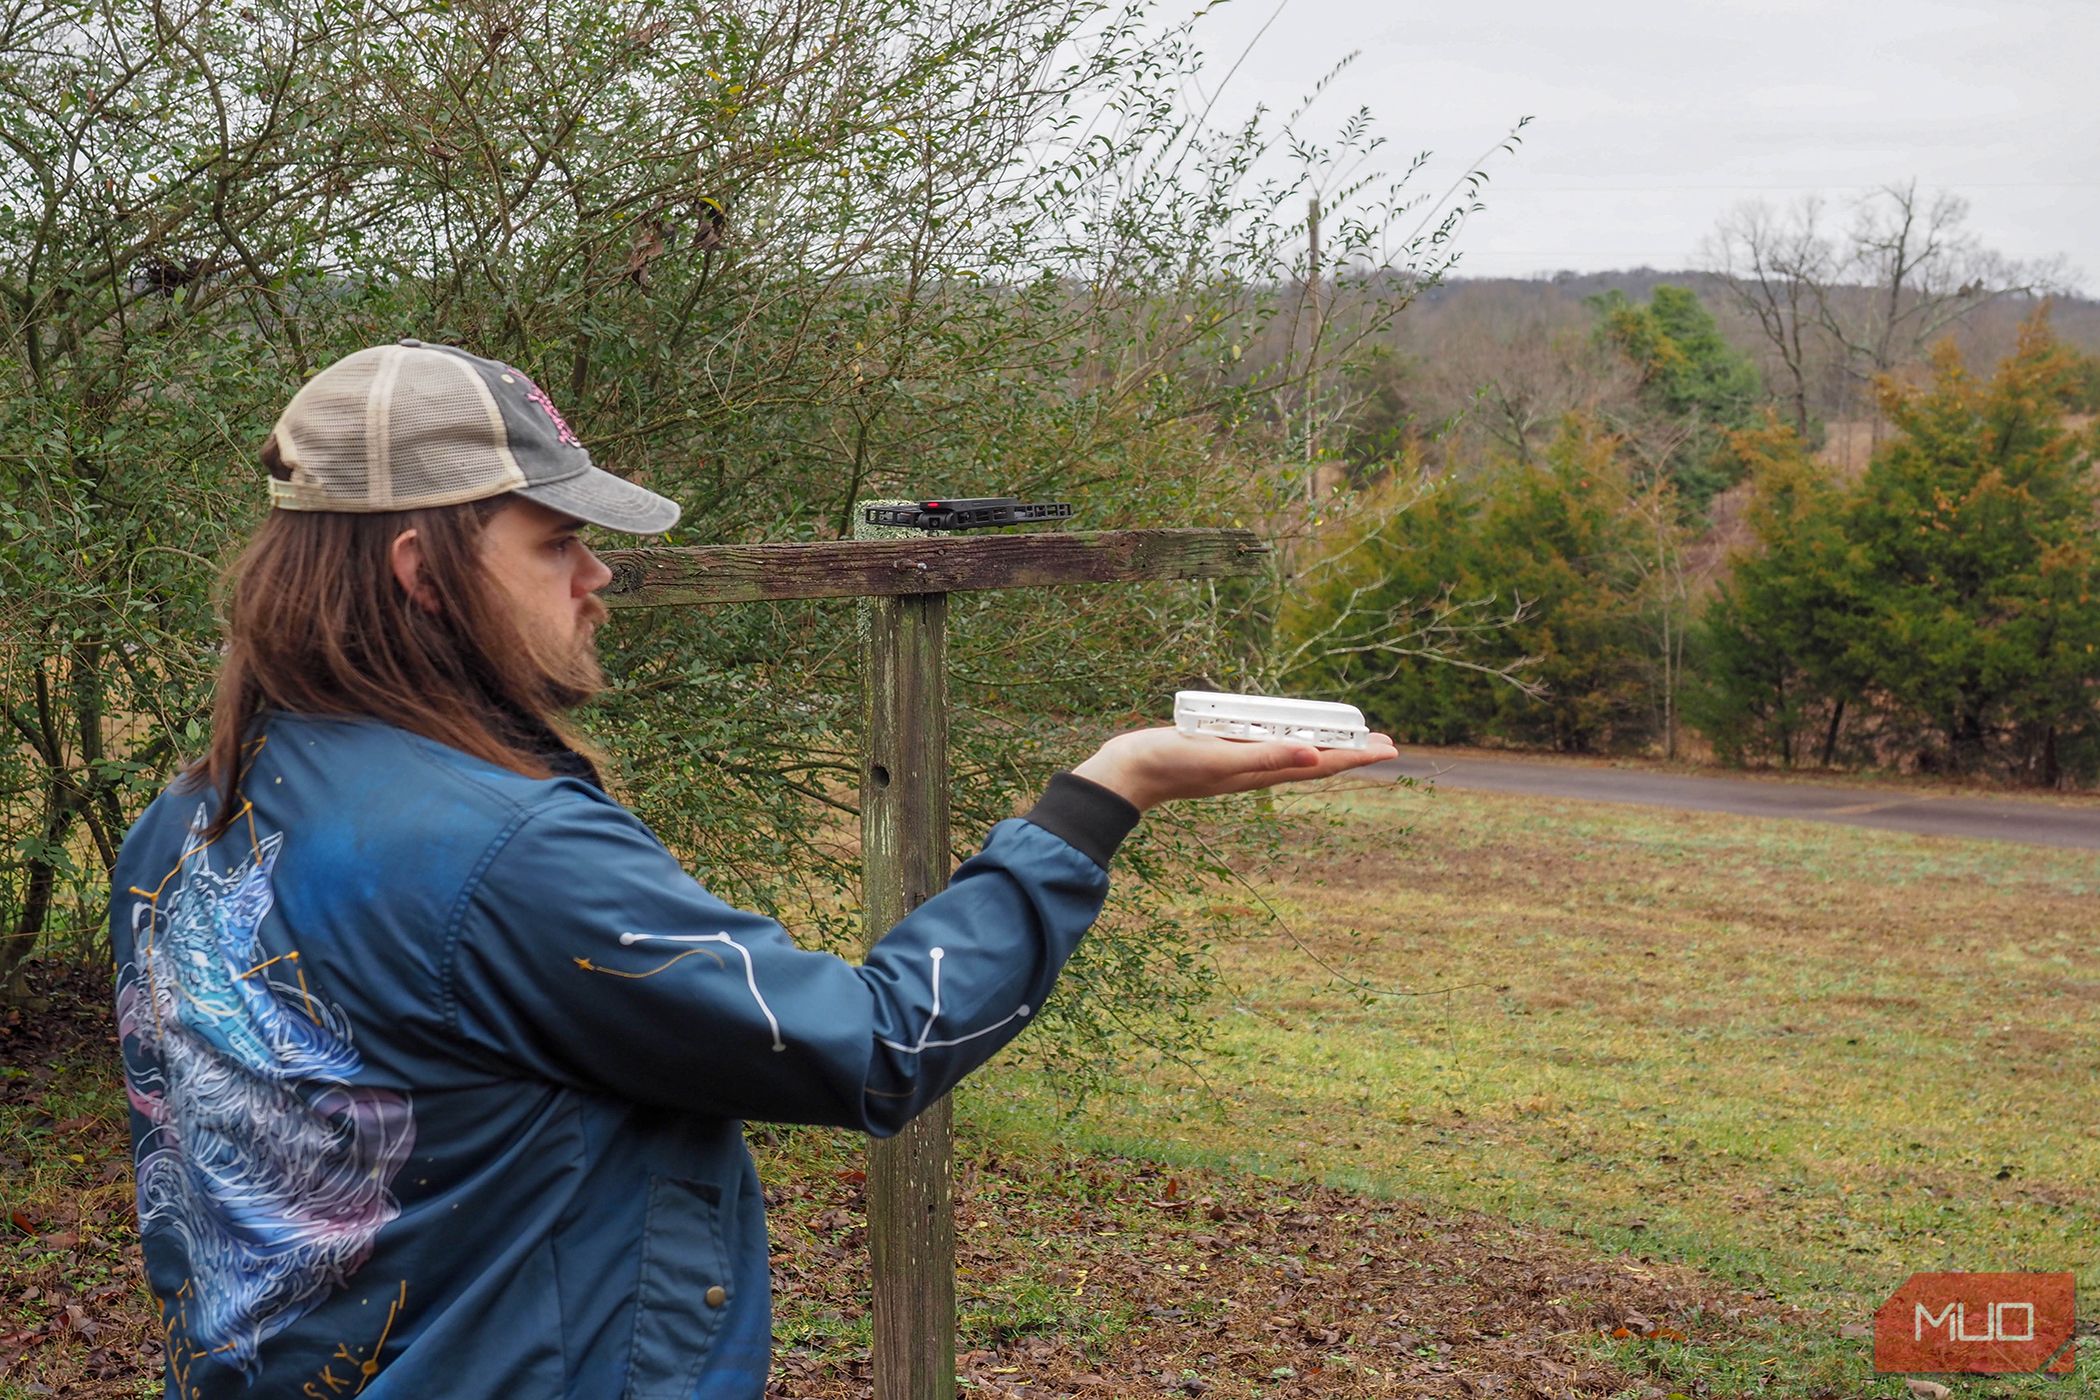
- Palm launching is simple
- Detects when wind conditions are too volatile
- Manual flight option with a live view via the app
- Low battery life (9 to 10 minutes)
- Limited camera control
- No obstacle/collision avoidance
- Occasional app or connectivity glitches
Setup: Mostly Seamless
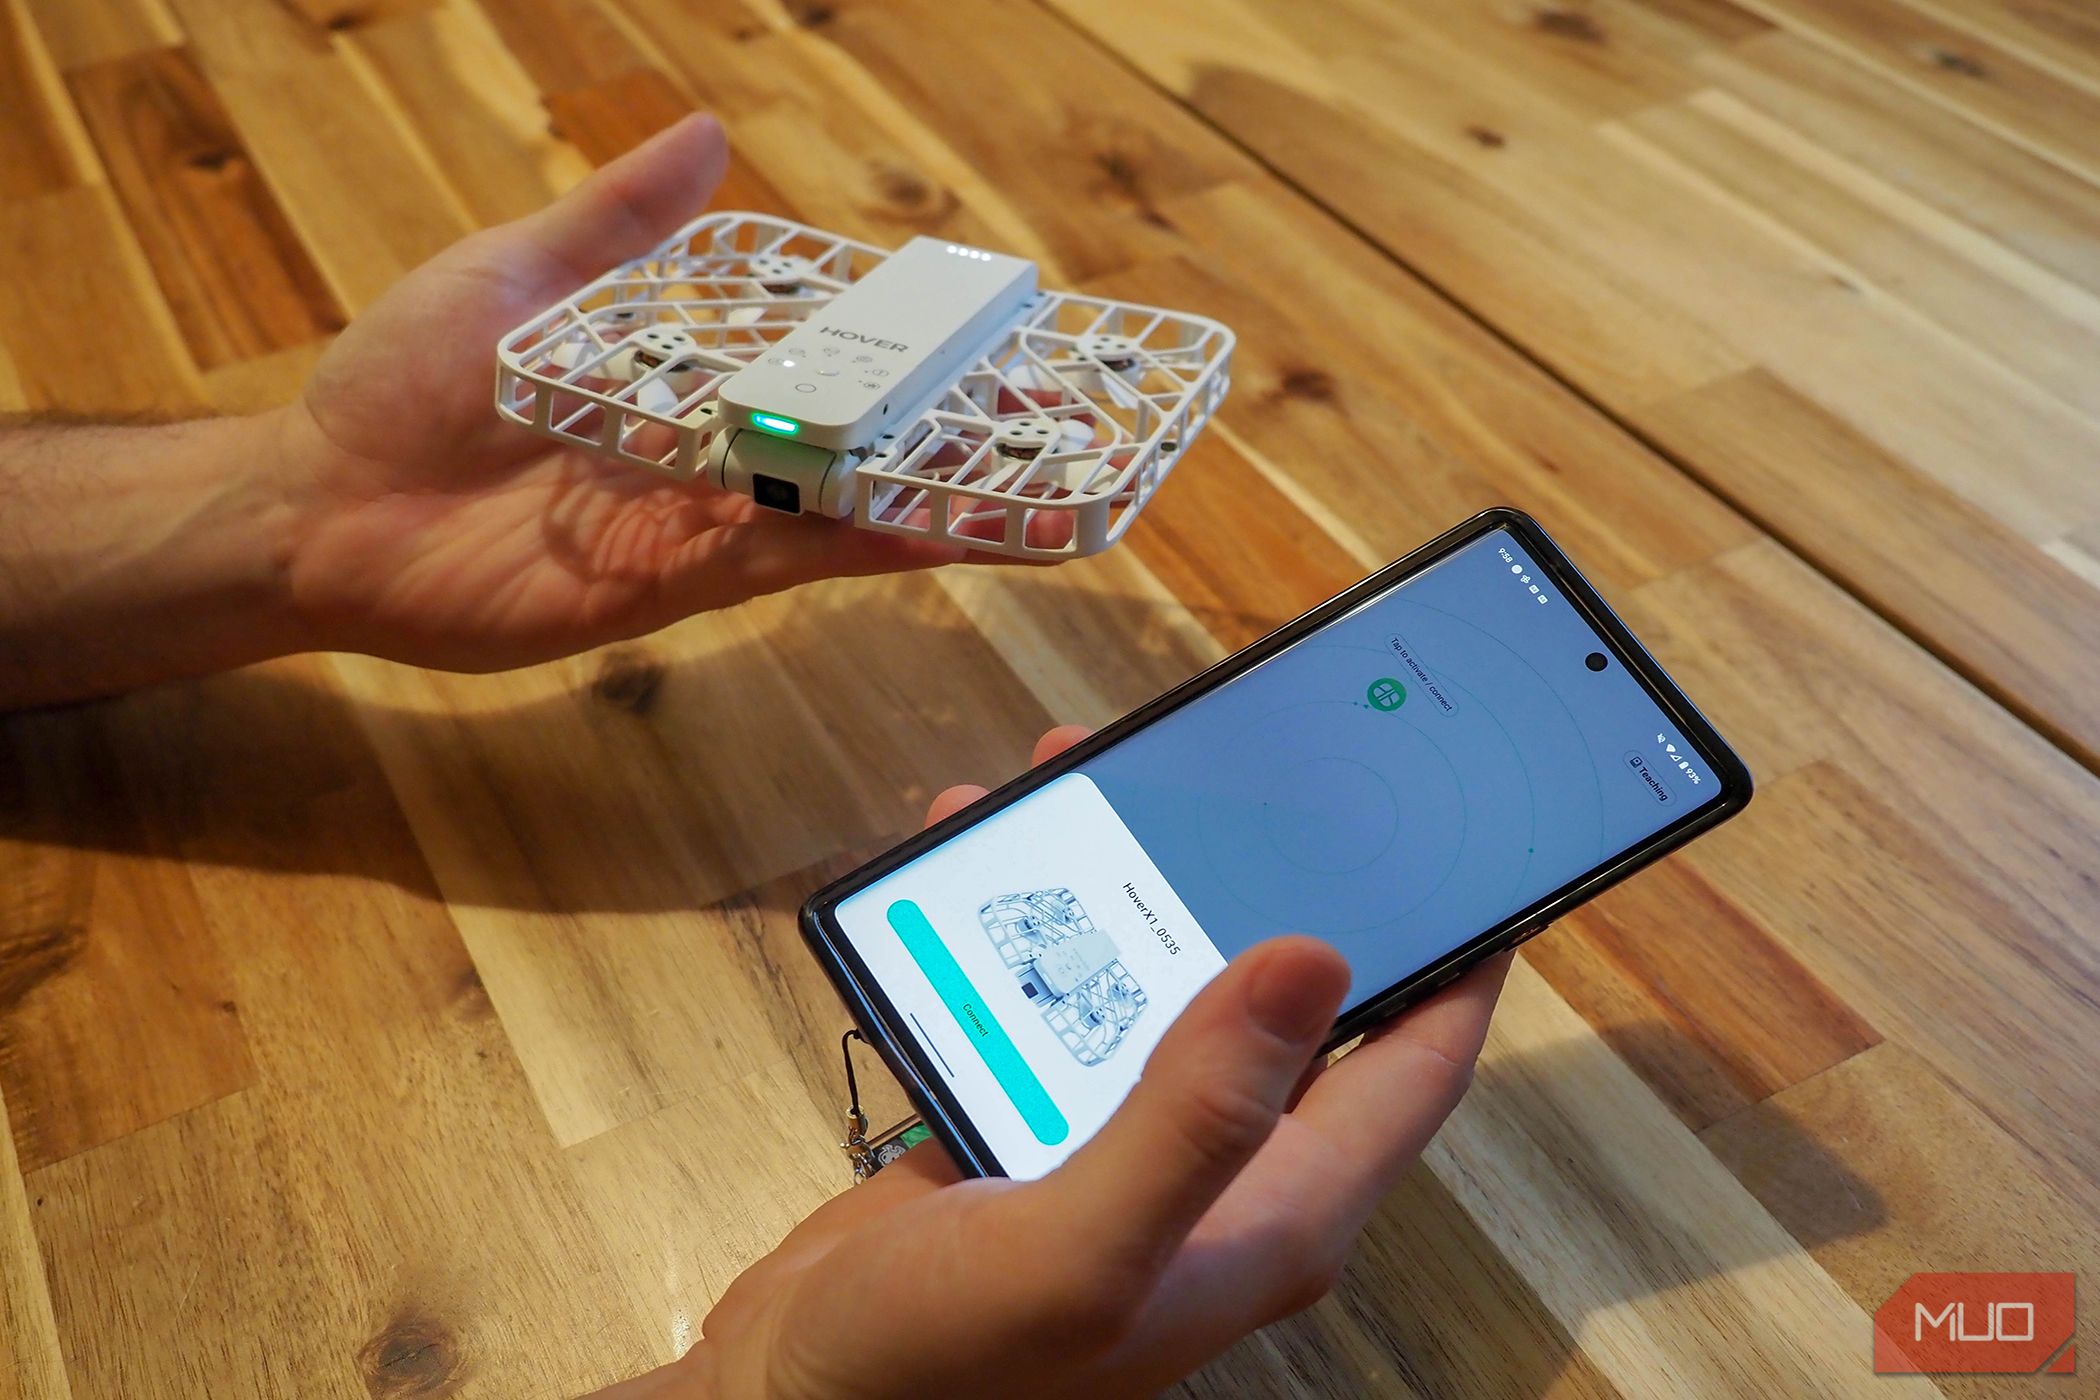
After unfolding and charging the battery to full, the Hoverair X1 needs to connect to the Hover X1 app. This will ensure you can grab the necessary firmware updates, access the device's storage, and review any pre-flight tutorials.
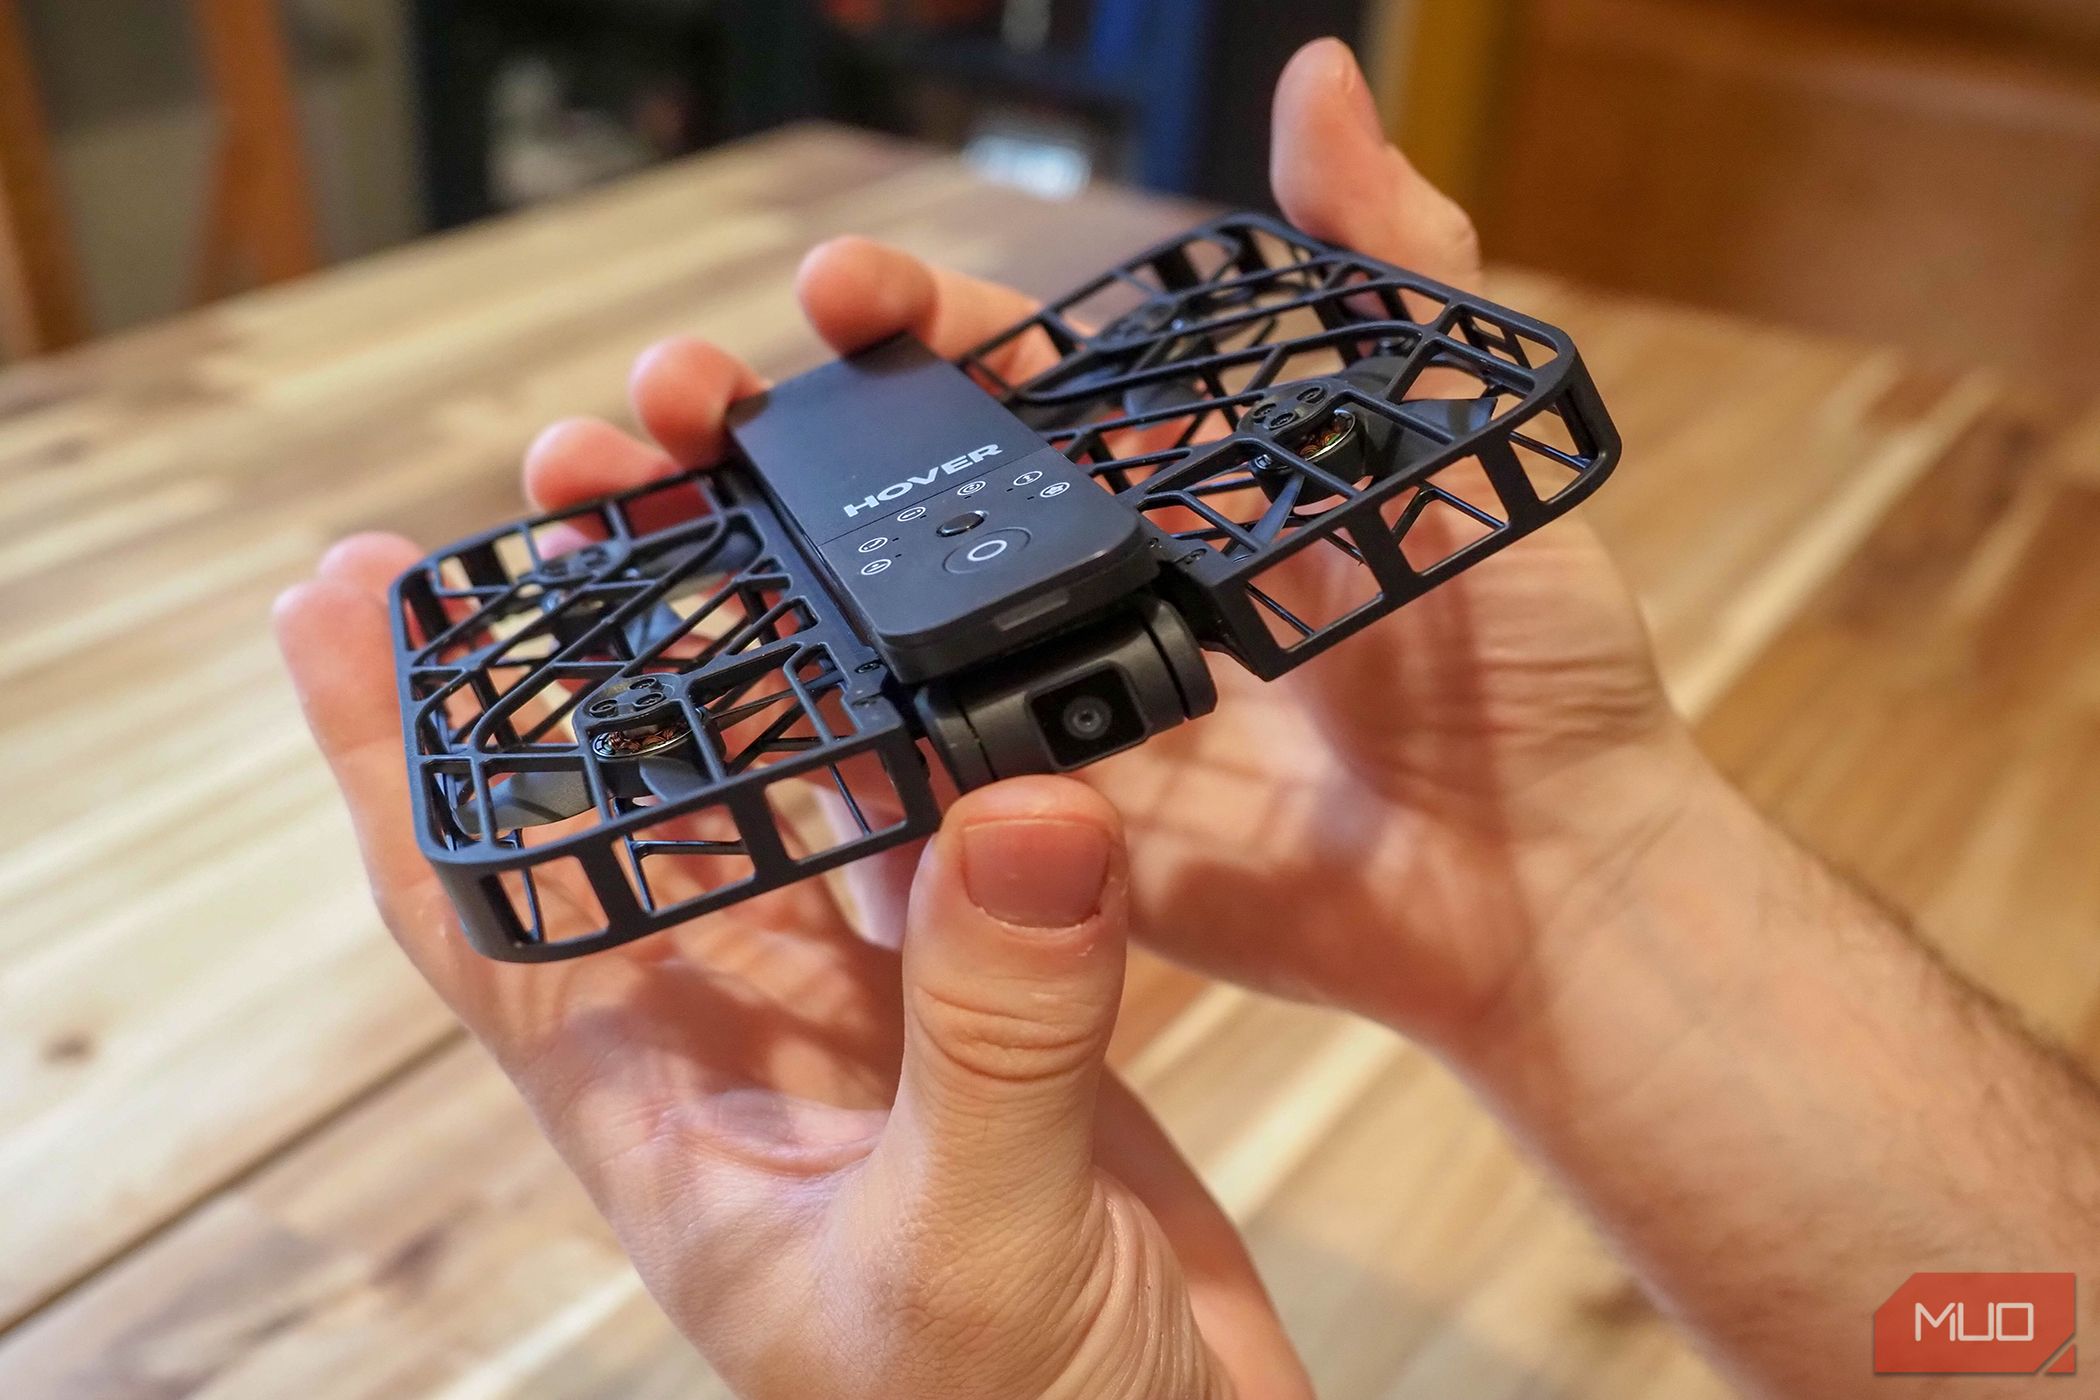
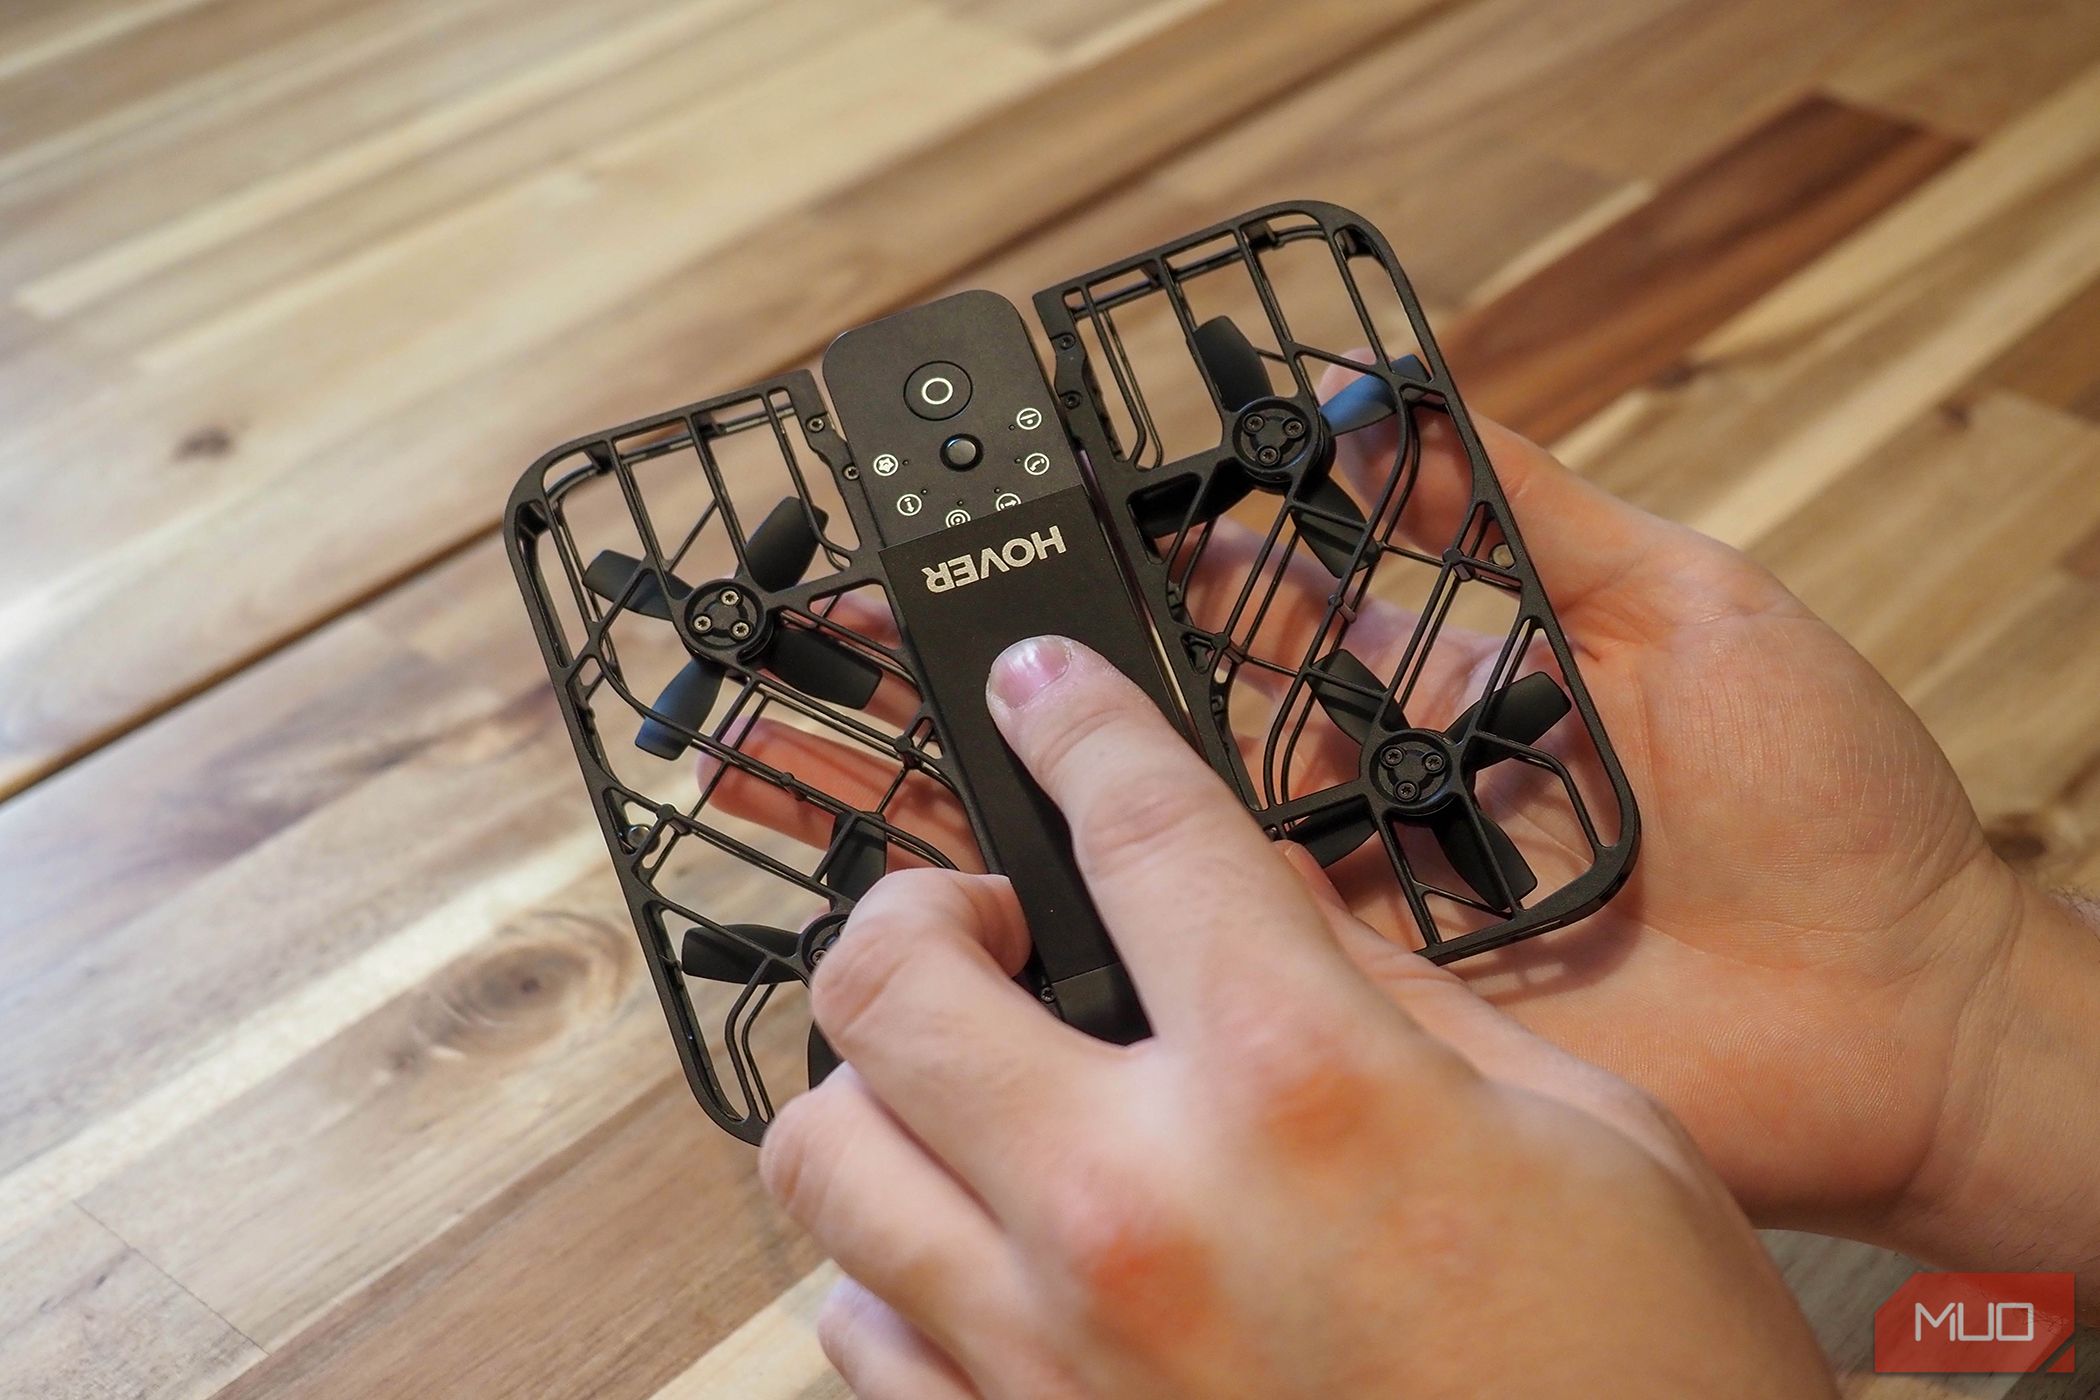
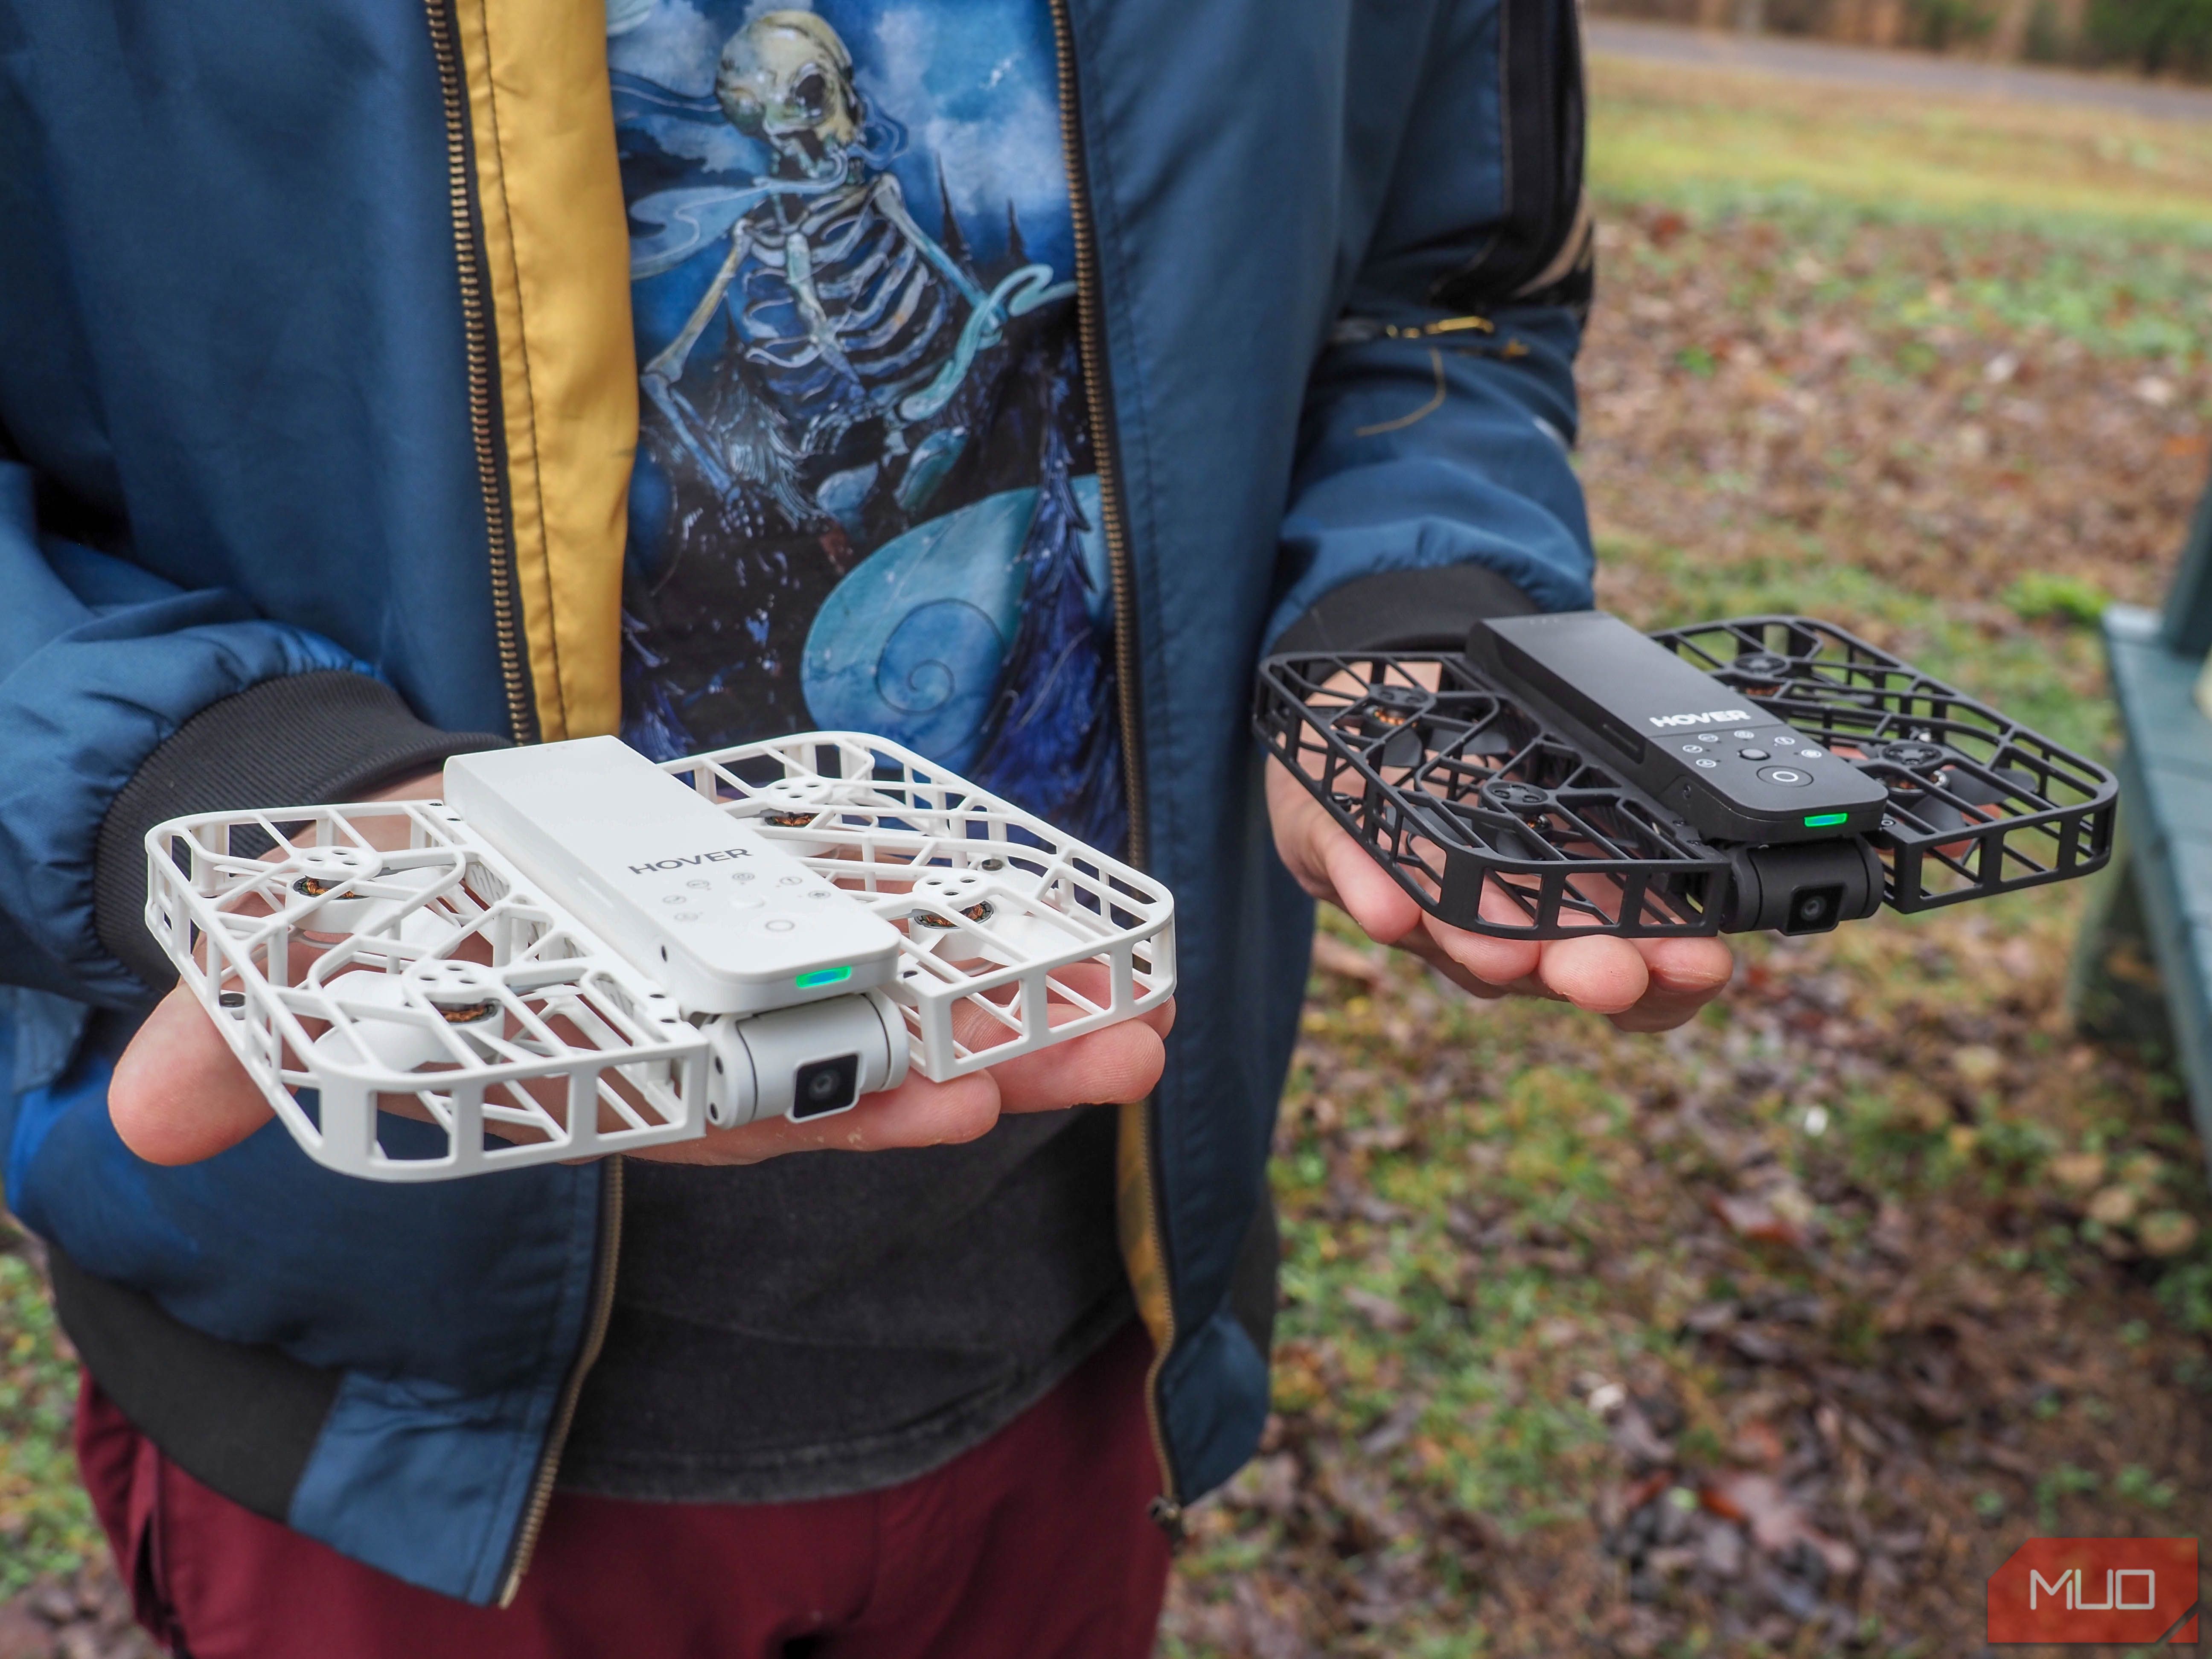
Design: Lightweight and Foldable
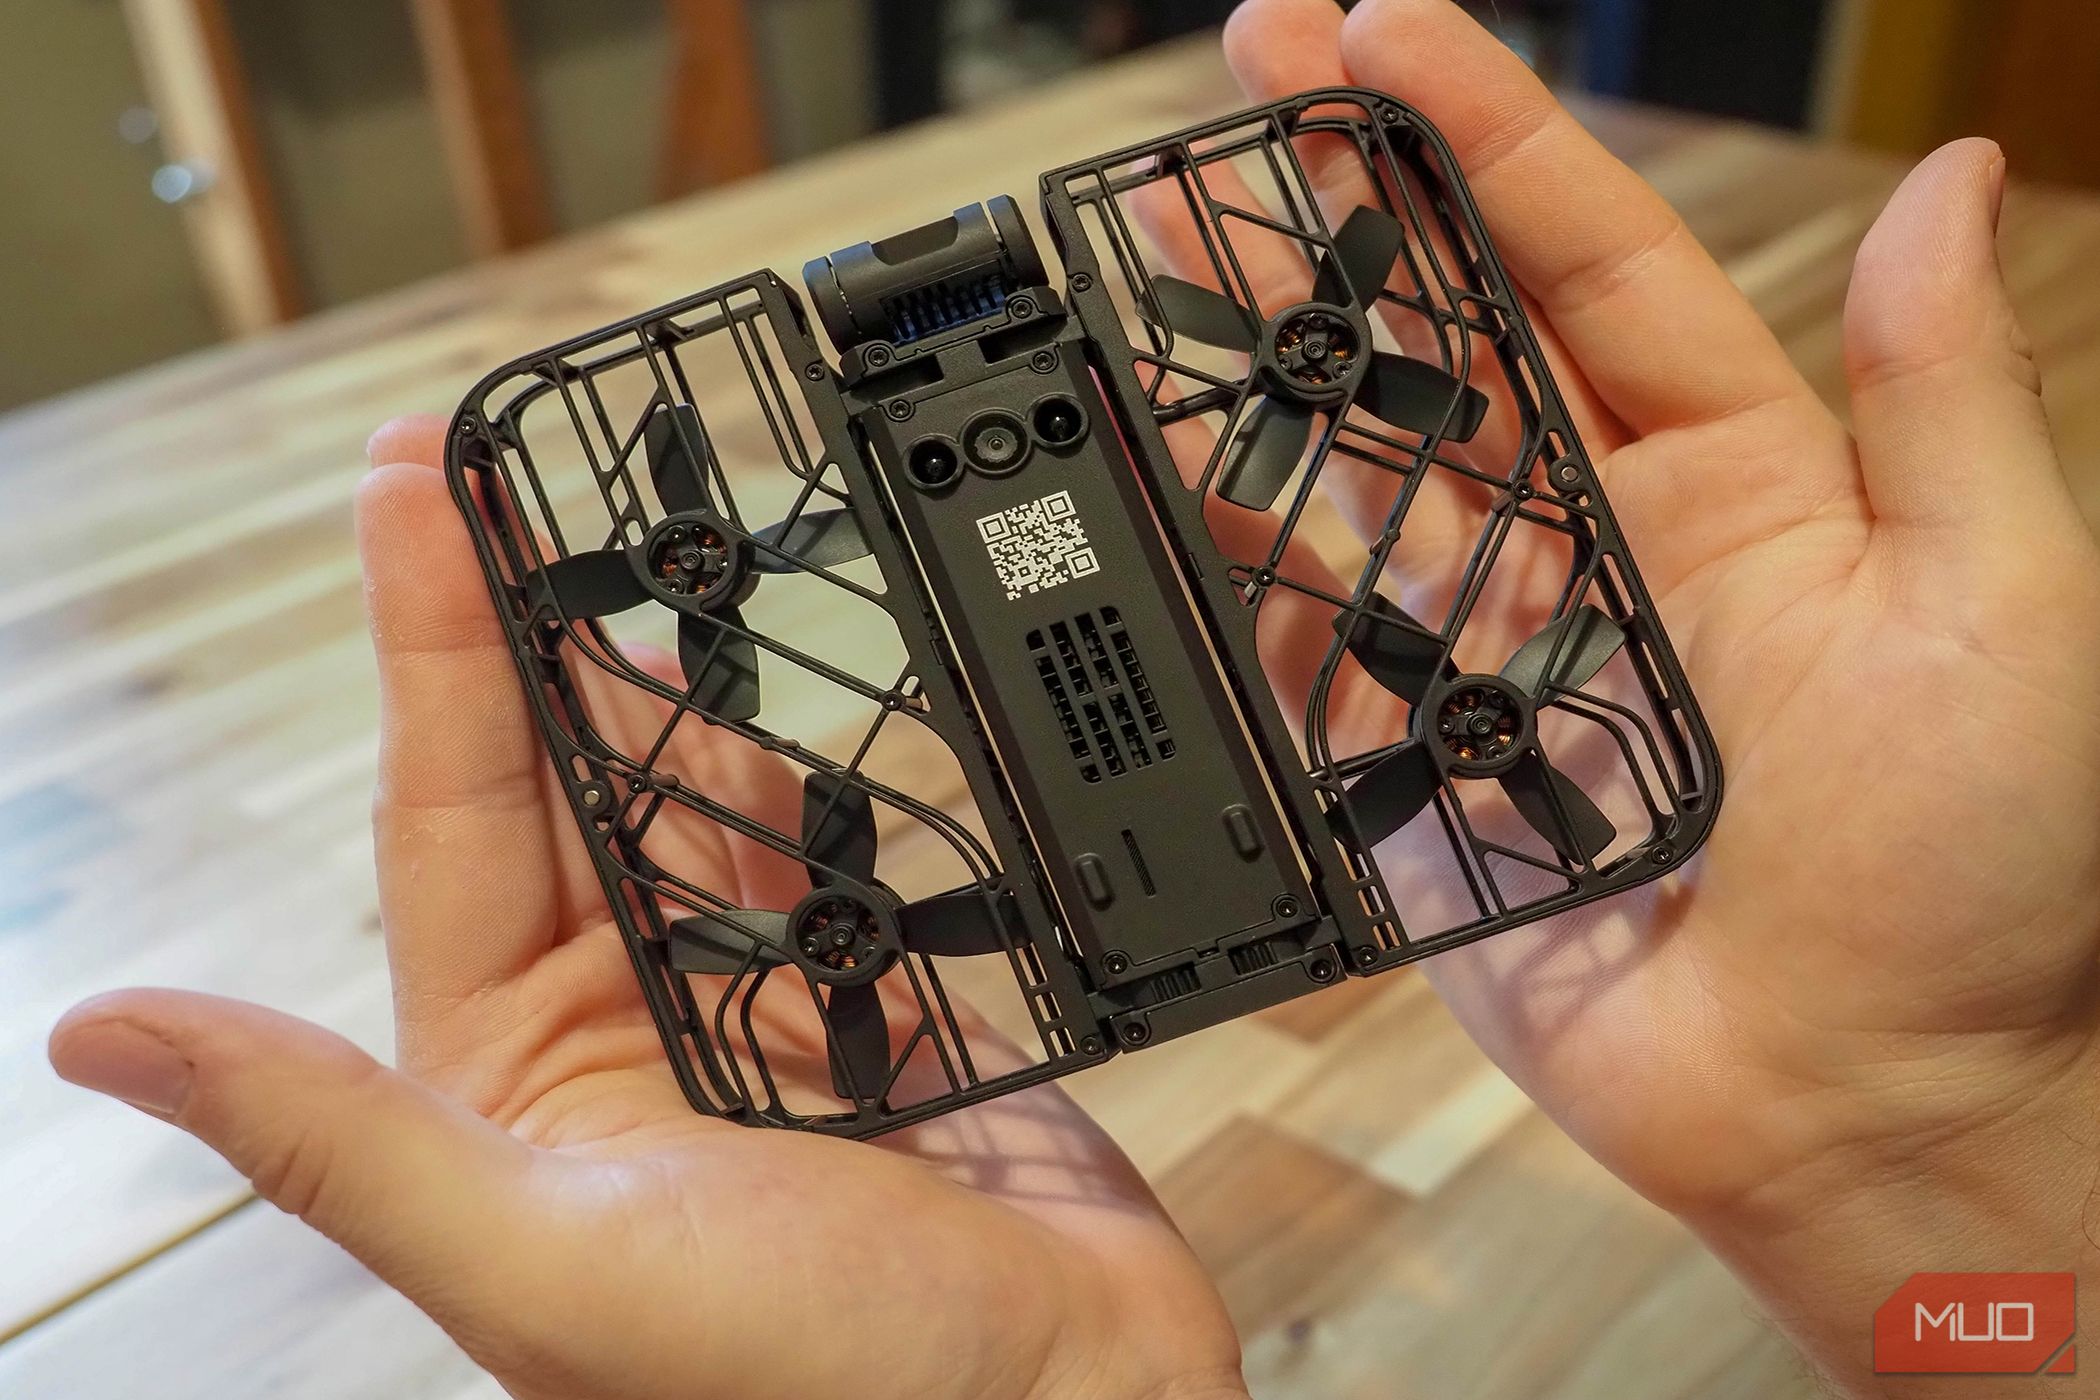
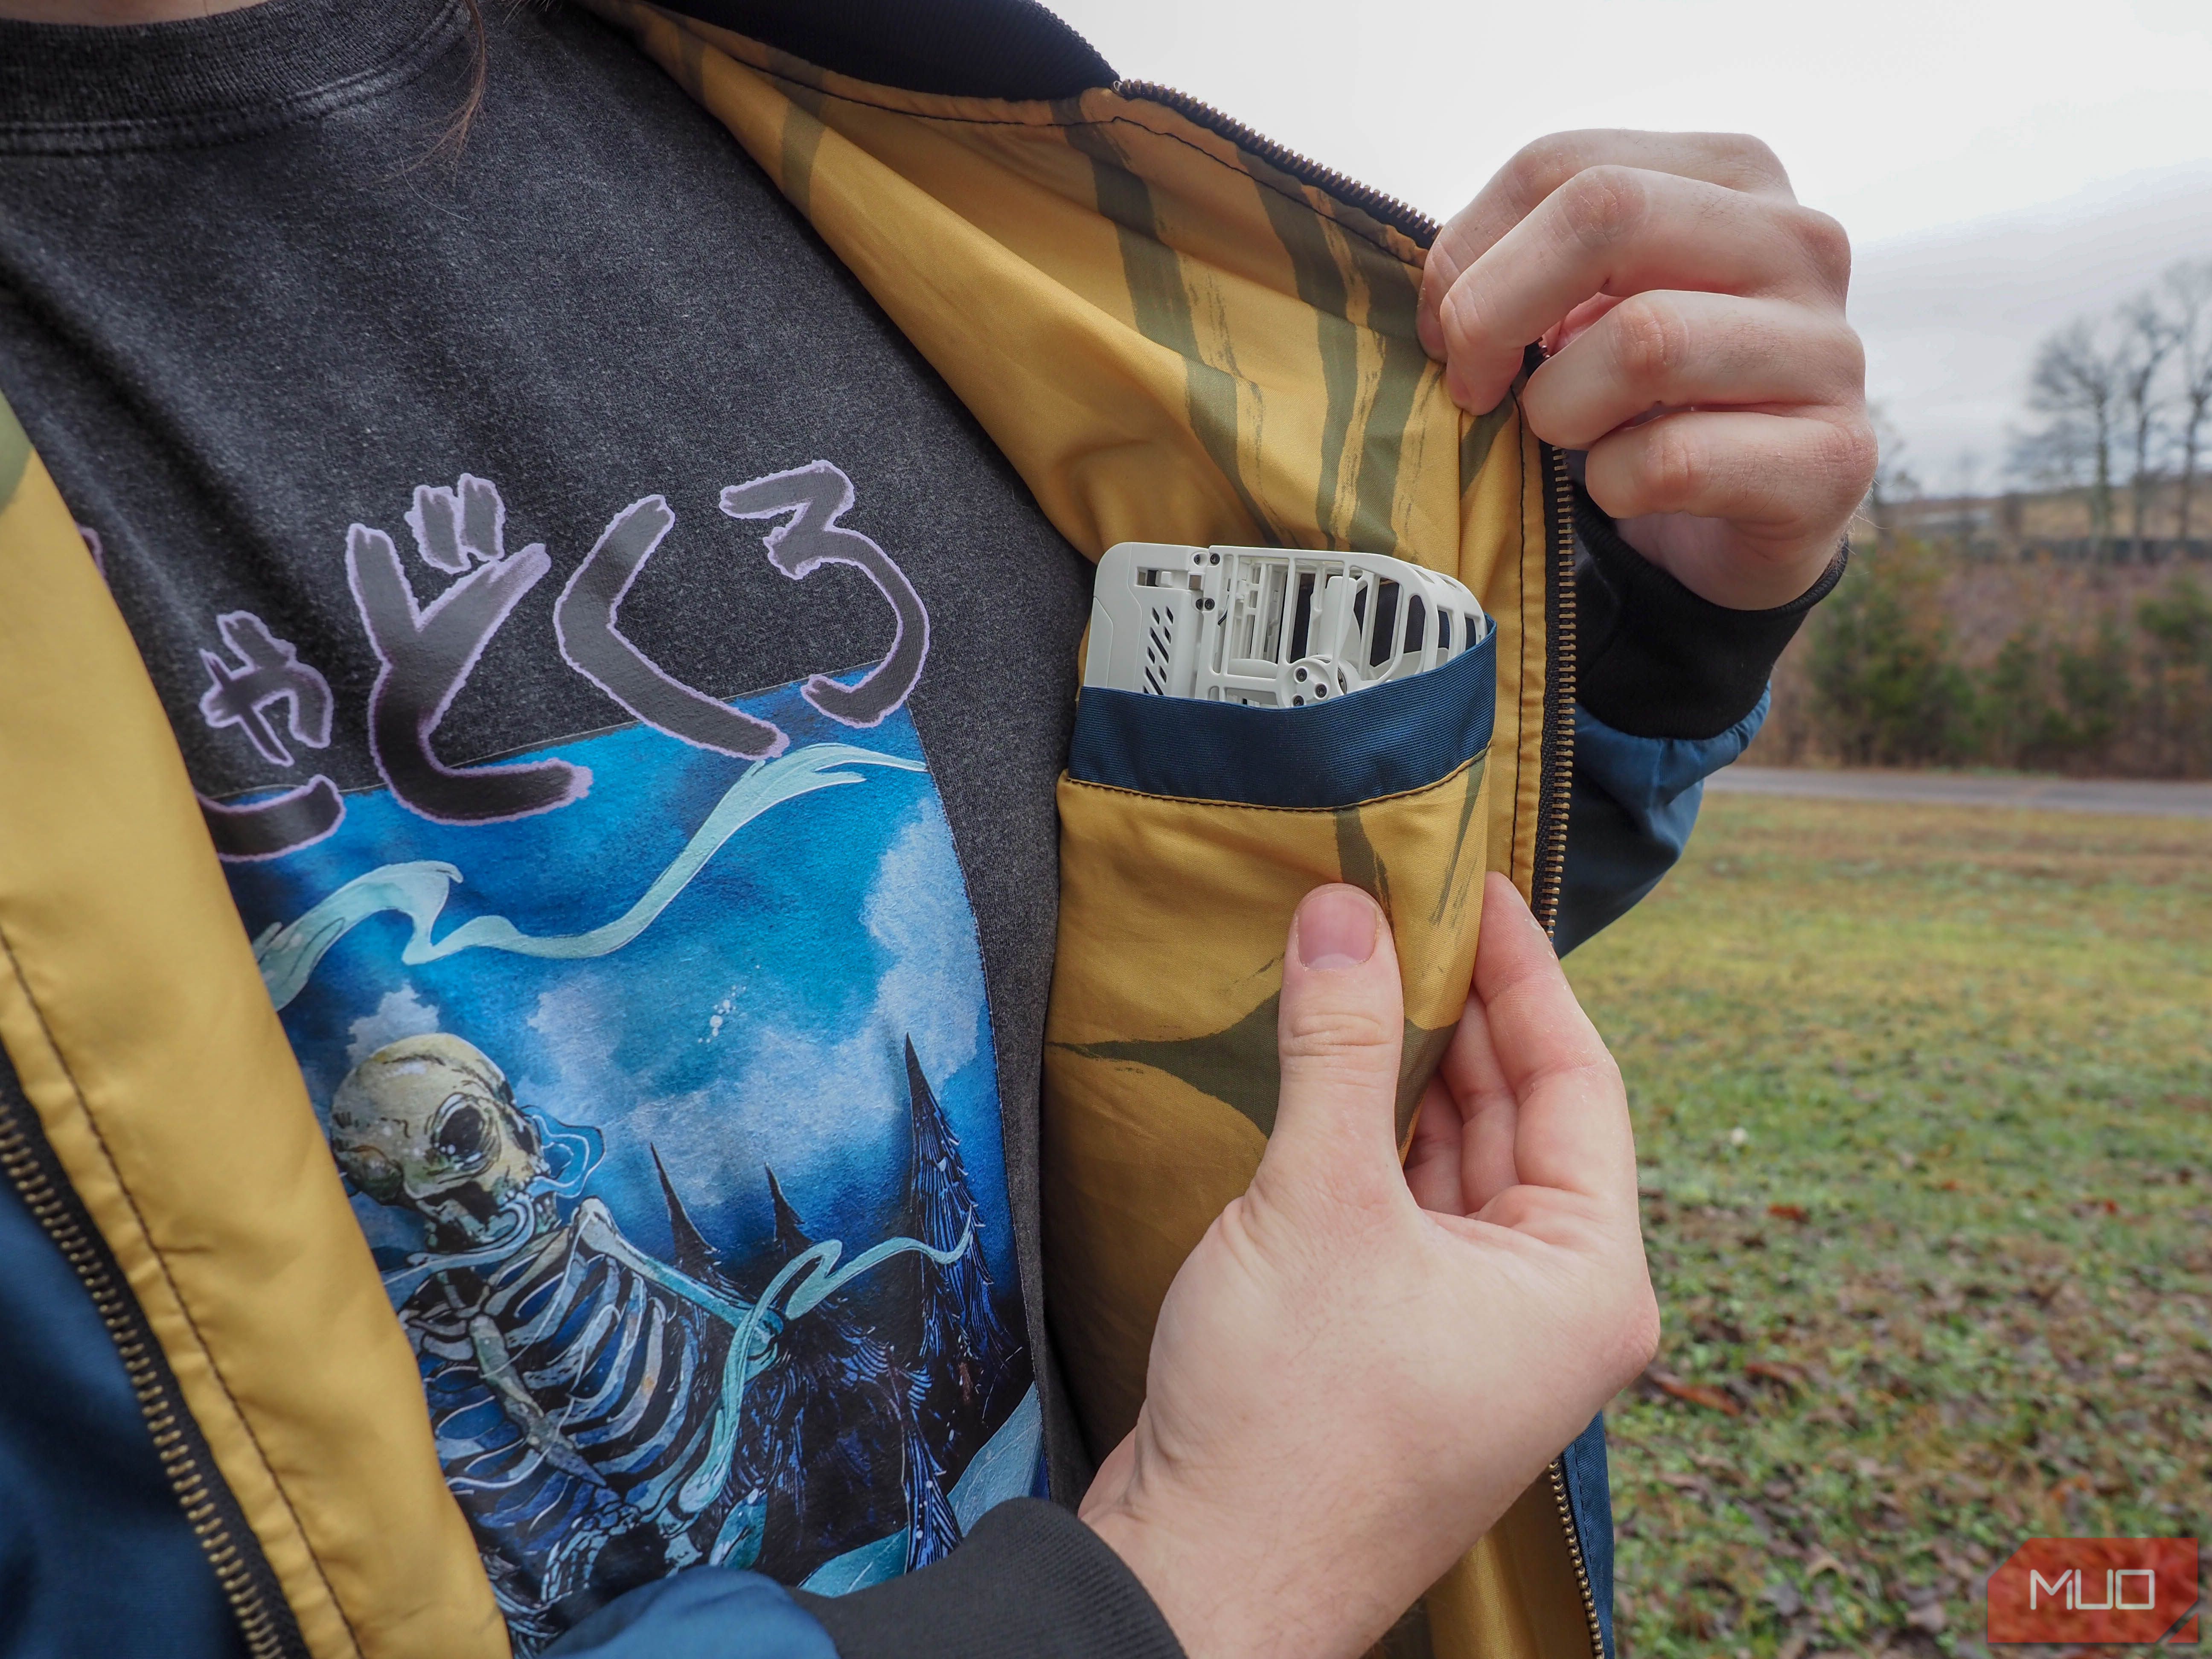
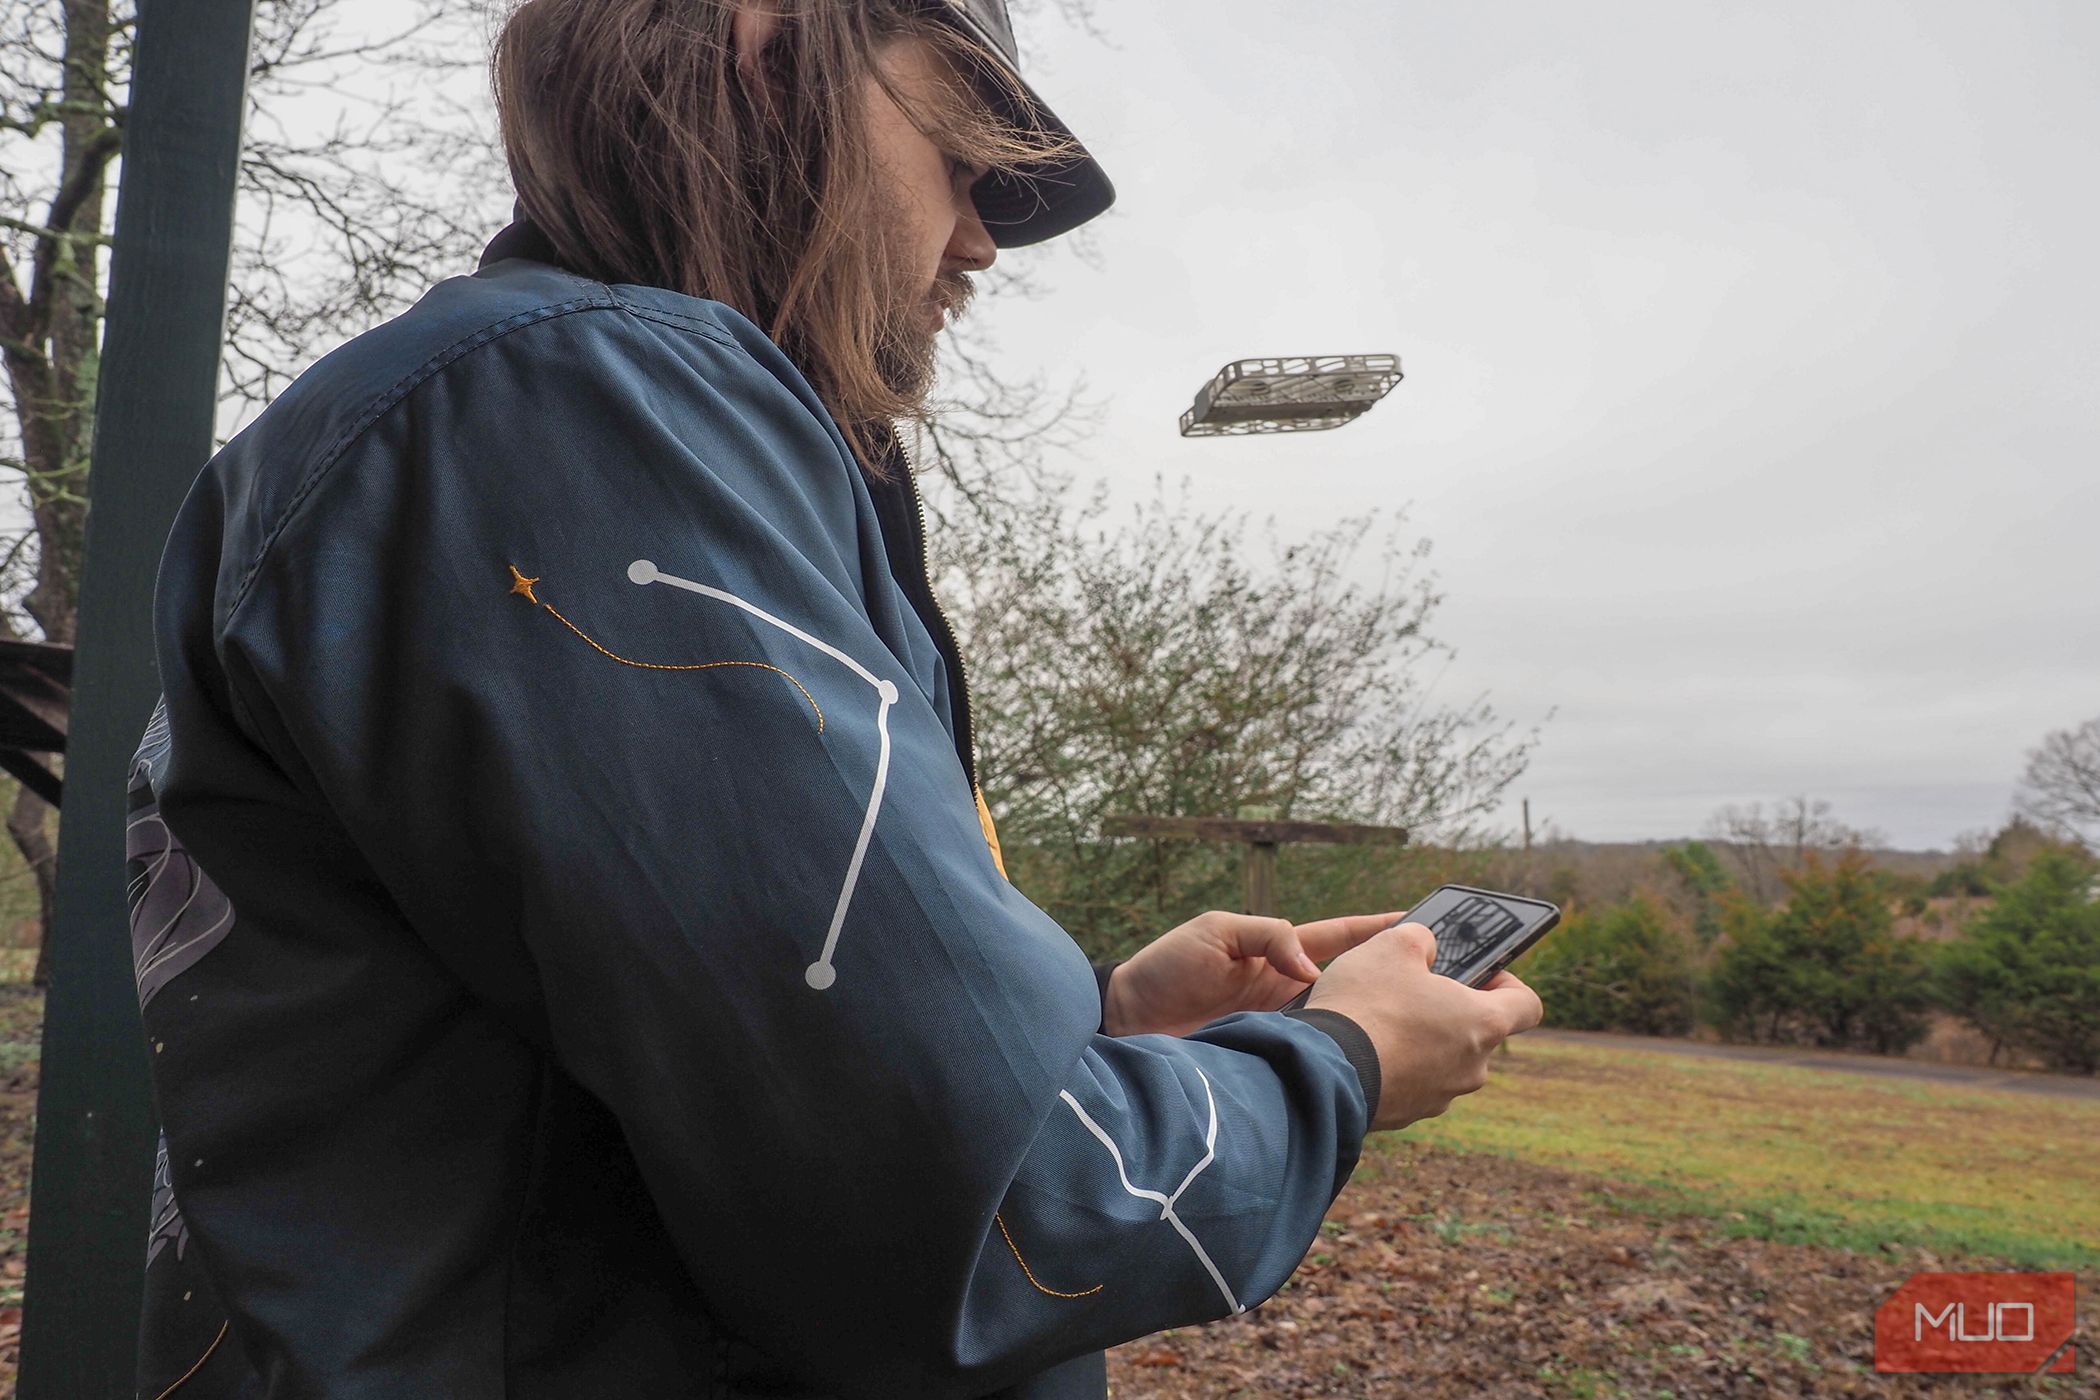
As a mini drone, the HoverAir X1 folds up to around 5 x 3.4 x 1.2 inches (127 x 86 x 31 mm), and expands to 5.7 inches wide (145mm) when unfolded. The hand-sized nature of the drone coincides with its weight of 125g (0.28 pounds) with the battery installed, which makes it suited for either a pocket or small-sized travel bag and also keeps it below the weight requirement for FAA registration. The fully-encased design uses a sturdy and slightly elastic plastic to keep the propellers extra safe during transit or if the drone should happen to nudge too close to a tree branch.
Beyond its petite design, the front LED will change colors and blink to indicate its current status or any problems. This typically coincides with a voice announcement, so you can both reconfirm your flight settings before sending the Hoverair X1 to the sky or notice a live problem if you should take your eyes off the drone.
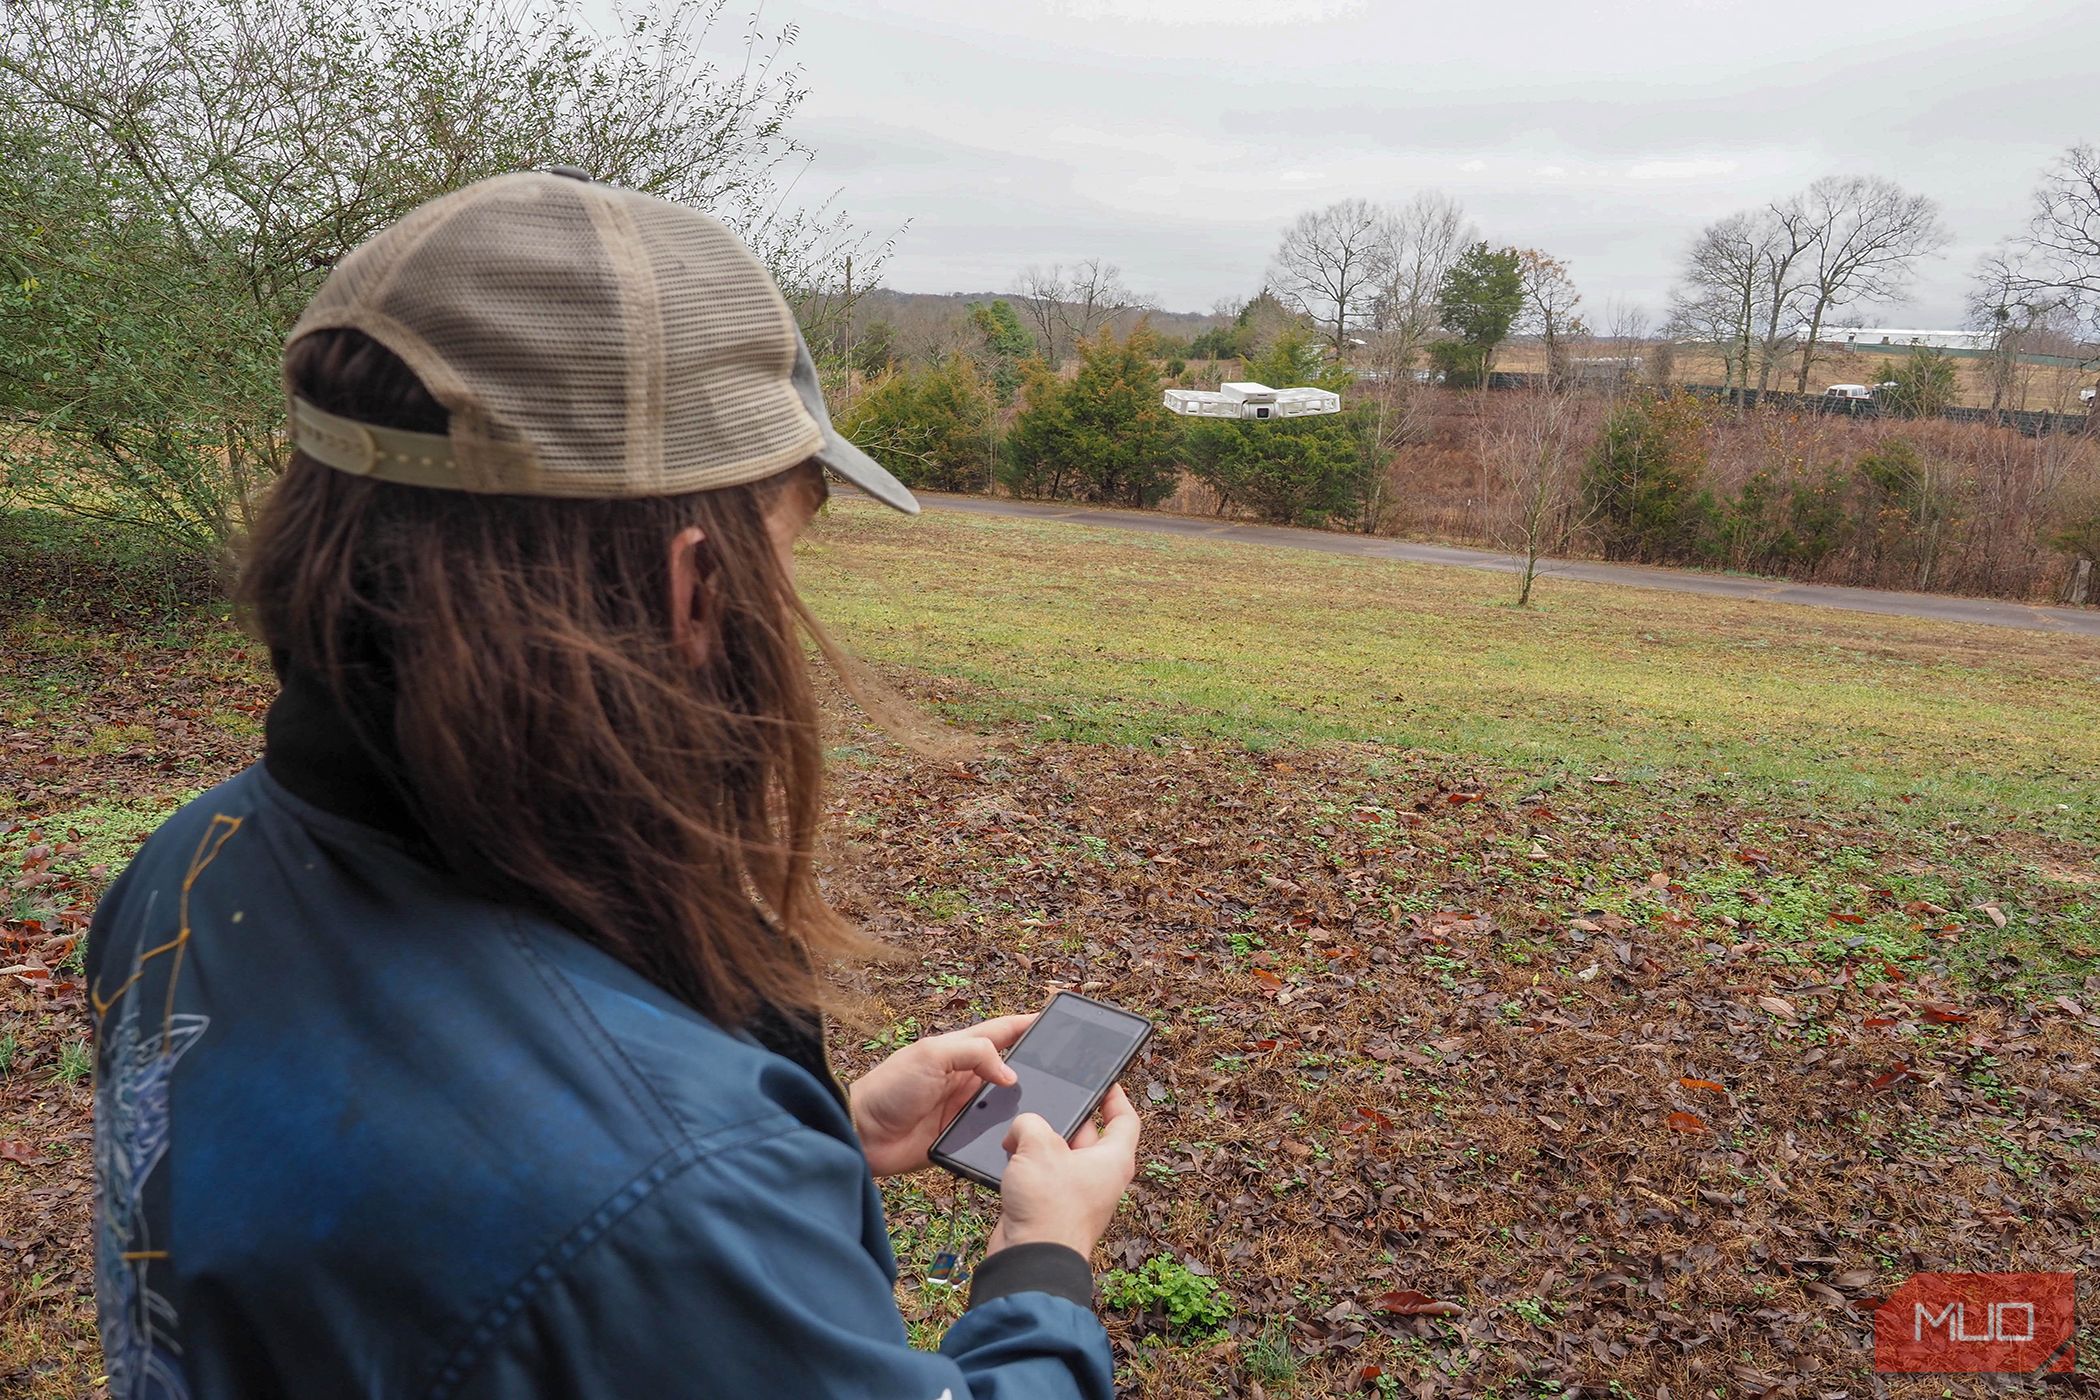
During flight, the HoverAir X1 can depart around 98 ft (30 m) from the user. Meanwhile, its flight speeds hit 7 m/s (15.6 mph) whilst flying horizontally or 1.5 m/s (3.3 mph) when ascending or descending.
To navigate, the HoverAir X1 uses the VIO positioning system rather than any GPS navigation. This offers the option to fly indoors as well, provided sufficient lighting is available. As a trade-off, there's no true obstacle avoidance, and you'll only receive a warning as the drone gets itself into a problematic scenario, so it's best to keep your eyes on it.
For stabilization, the HoverAir X1 uses a triple system consisting of a gimbal, horizon leveling, and electronic image stabilization (EIS). This is combined with its computer-based vision algorithms which are supposed to keep the subject in frame during its intelligent flight modes.
Testing Out Flying Conditions
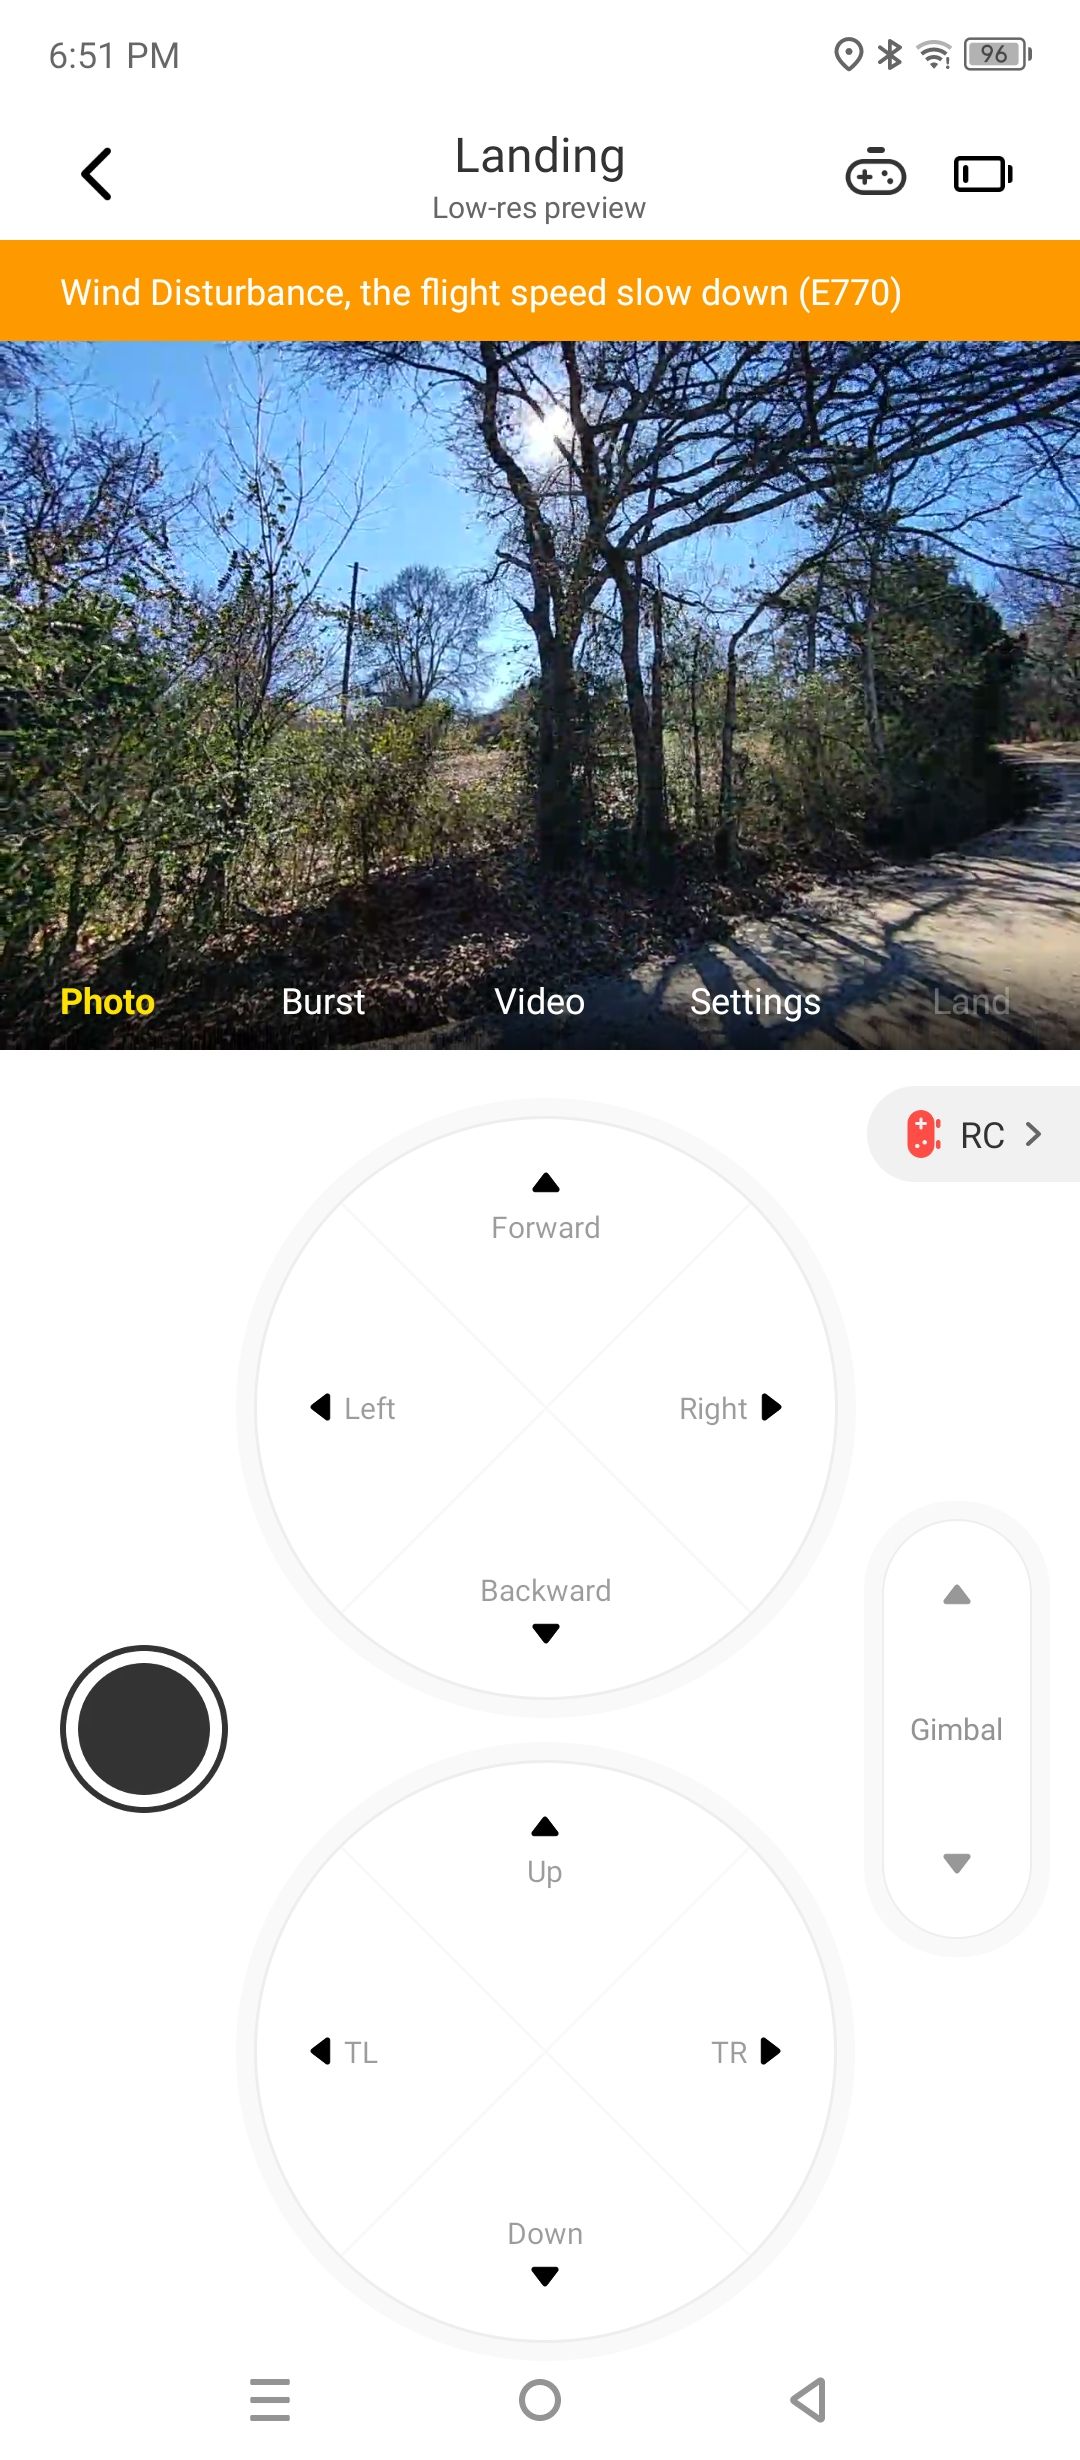
If you're flying in insufficient light (below the ≥15 lux range), the HoverAir X1 will alert you and not take off. Similarly, if you take the HoverAir X1 out on a day that exceeds it's level-four wind resistance (7.9m/s), it'll either slow its flight speed as it nears its wind speed threshold or end the flight and begin landing if hit by winds exceeding its resistance.
Neither safety measure is oversensitive; it's quite apparent as you watch the Hoverair X1 combat sudden winds and correct itself. The triple stabilization system does its job as well; you'll only notice camera jitter if it's really beyond normal wind tolerances.
While it's best to fly the HoverAir X1 in pleasant weather, it's good that it can monitor some conditions for newer flyers.
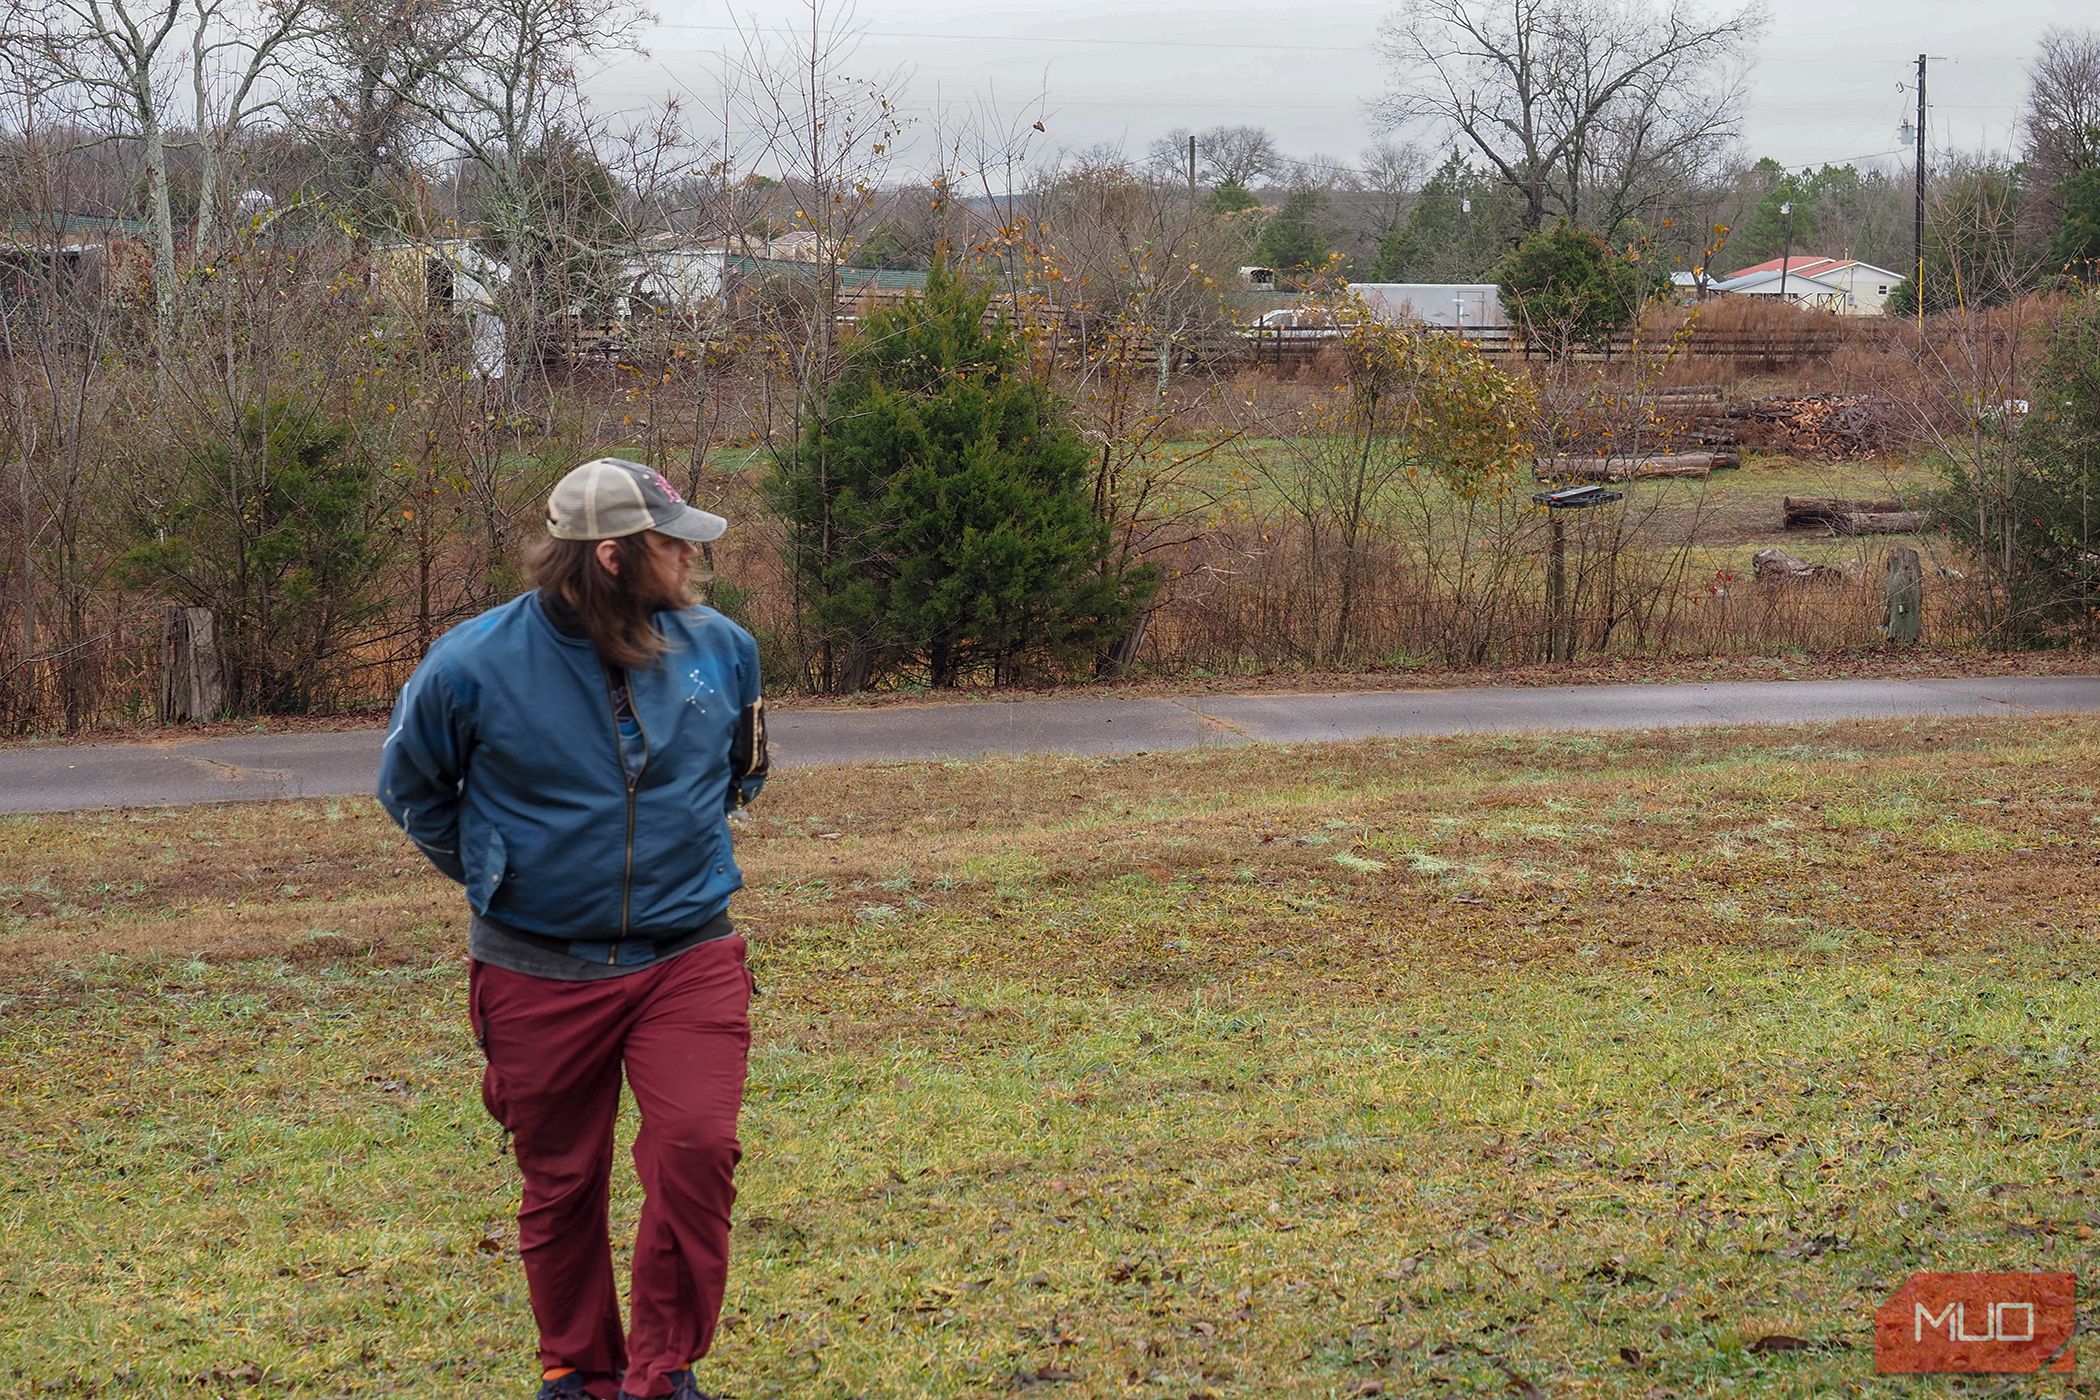
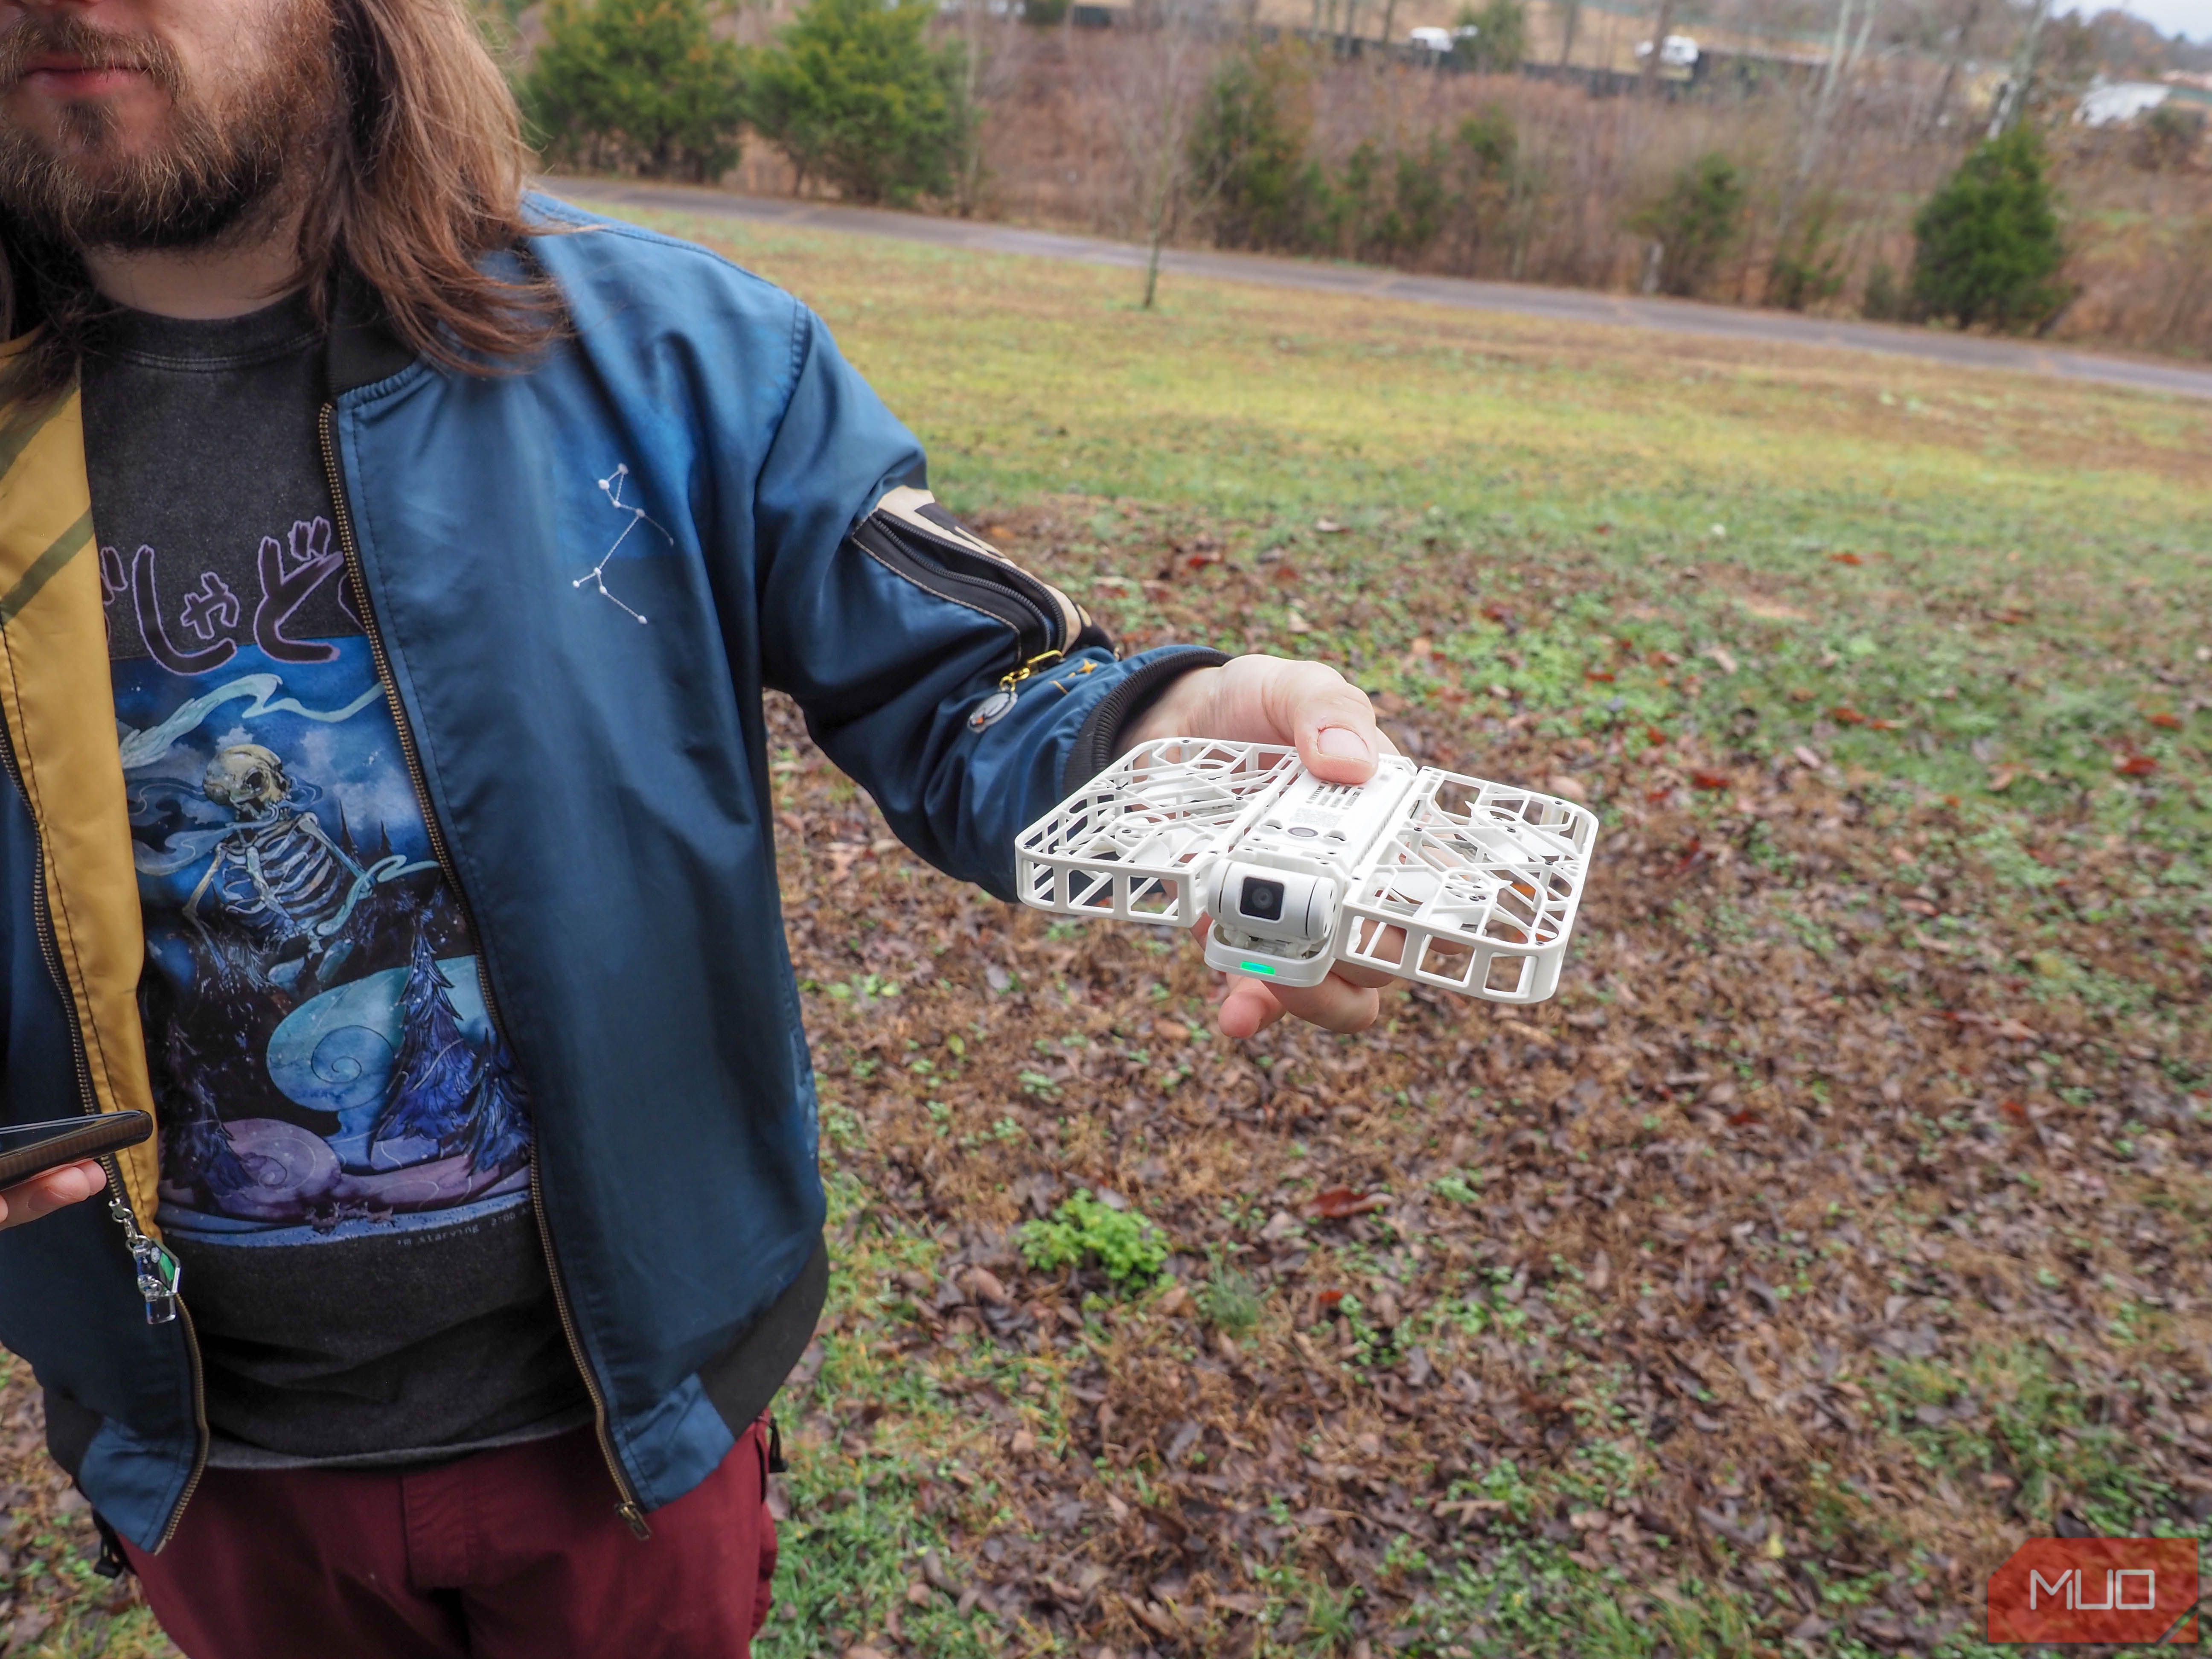
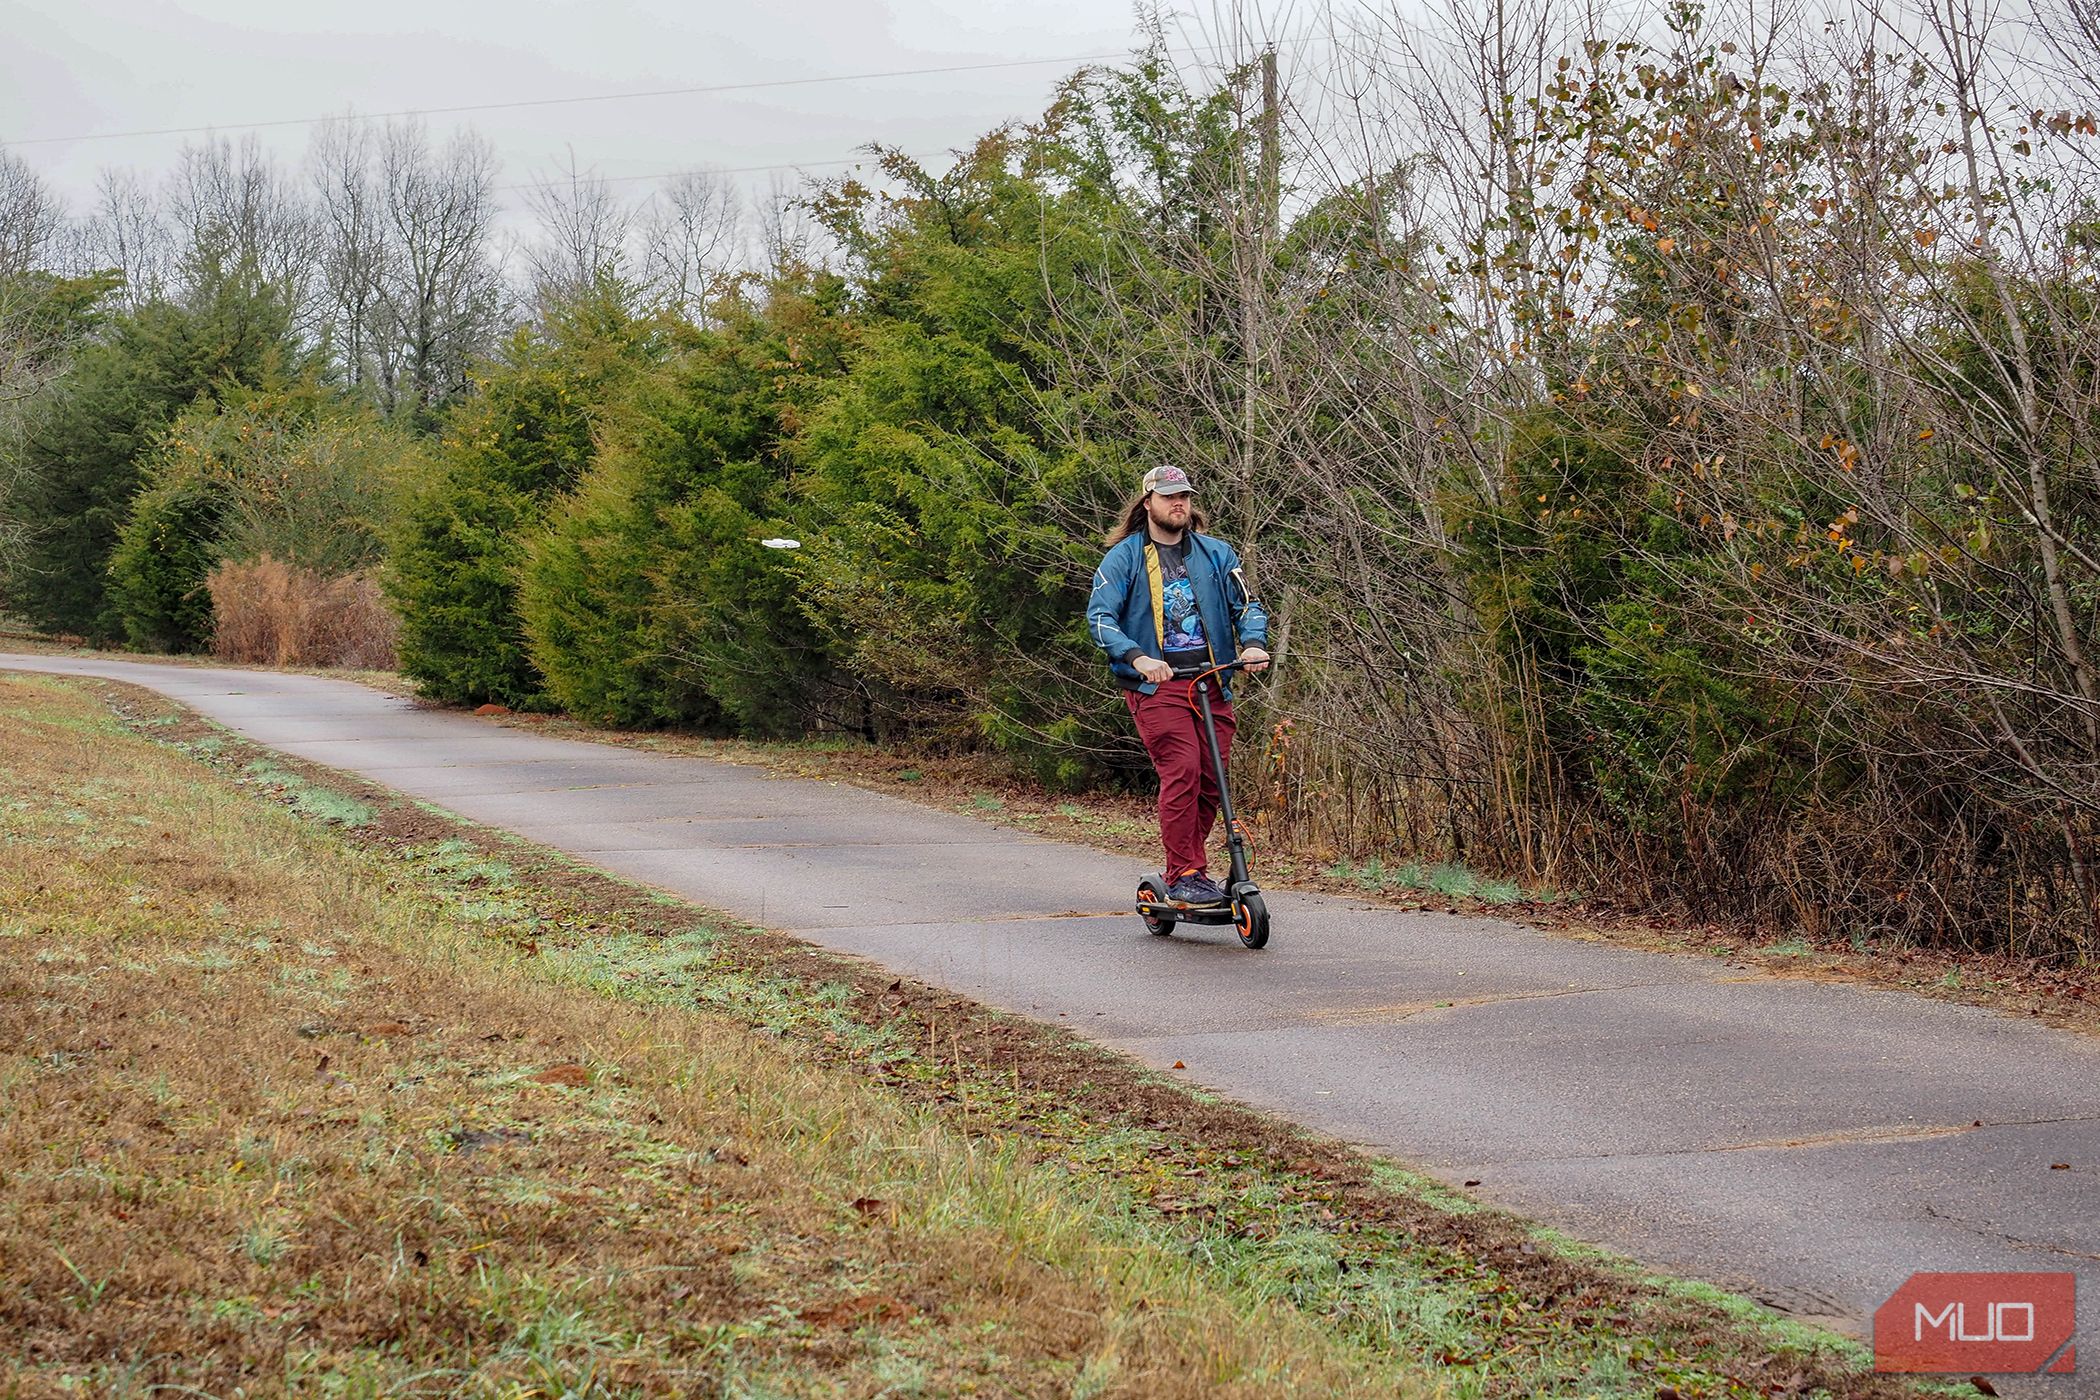
Before taking it on any longer shoots, it's best to really get a feel for the environment you'll be working in. For instance, if you have the HoverAir X1 following you while riding or running, a sharp turn may lead it into an obstacle. The fully encased design will allow it to free itself to a degree, but you're best avoiding obstacle-laden areas or keeping a close eye on it during action shots.
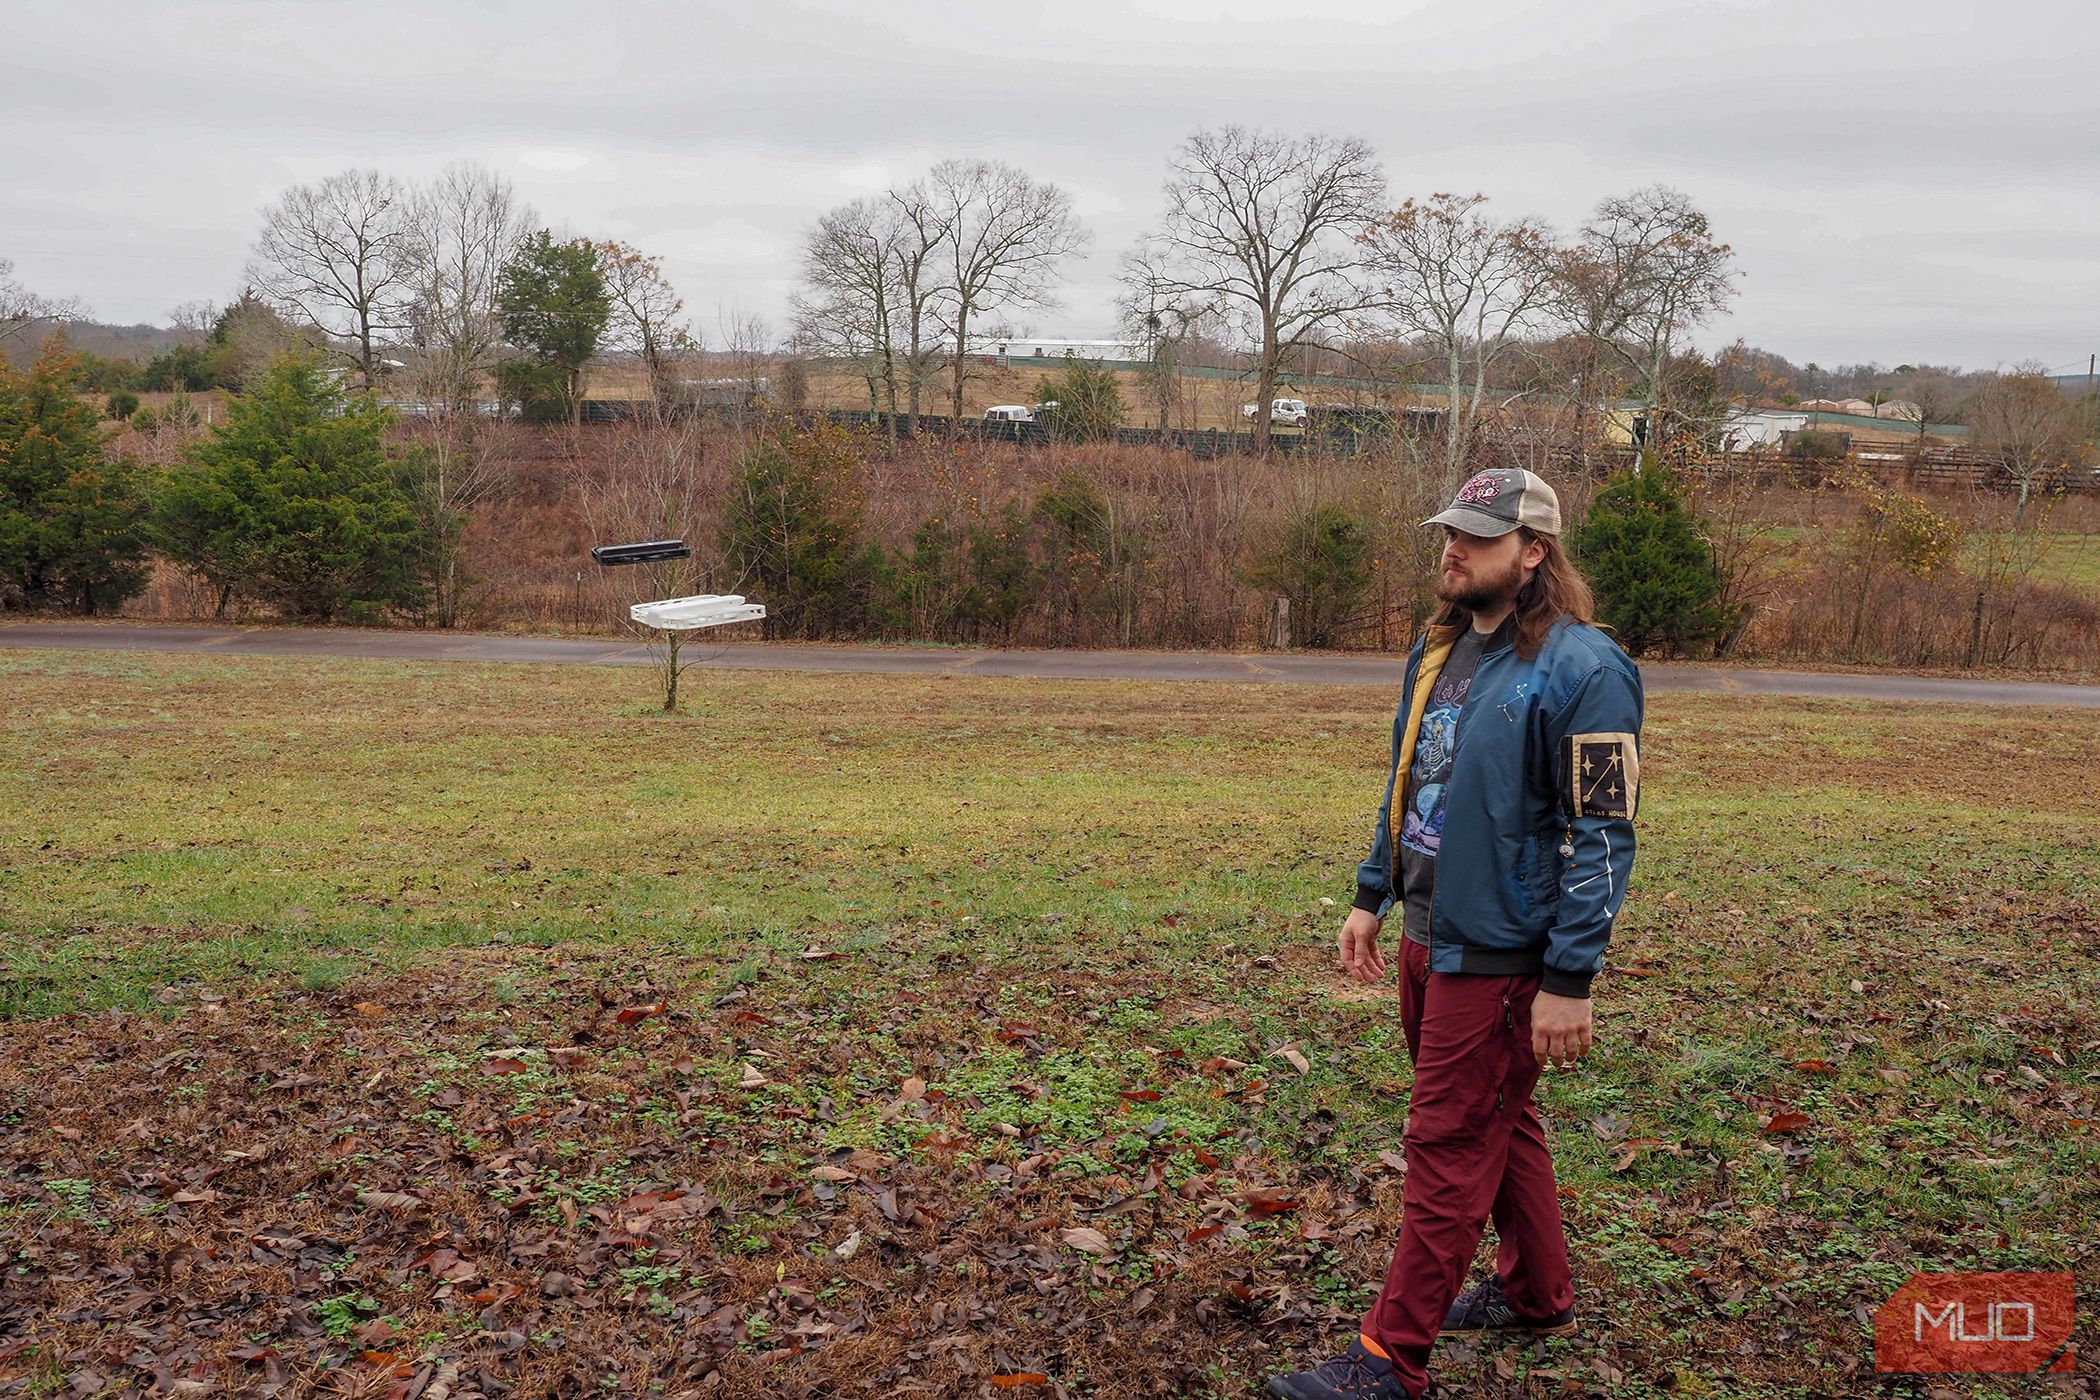
Trying Different Flight Modes
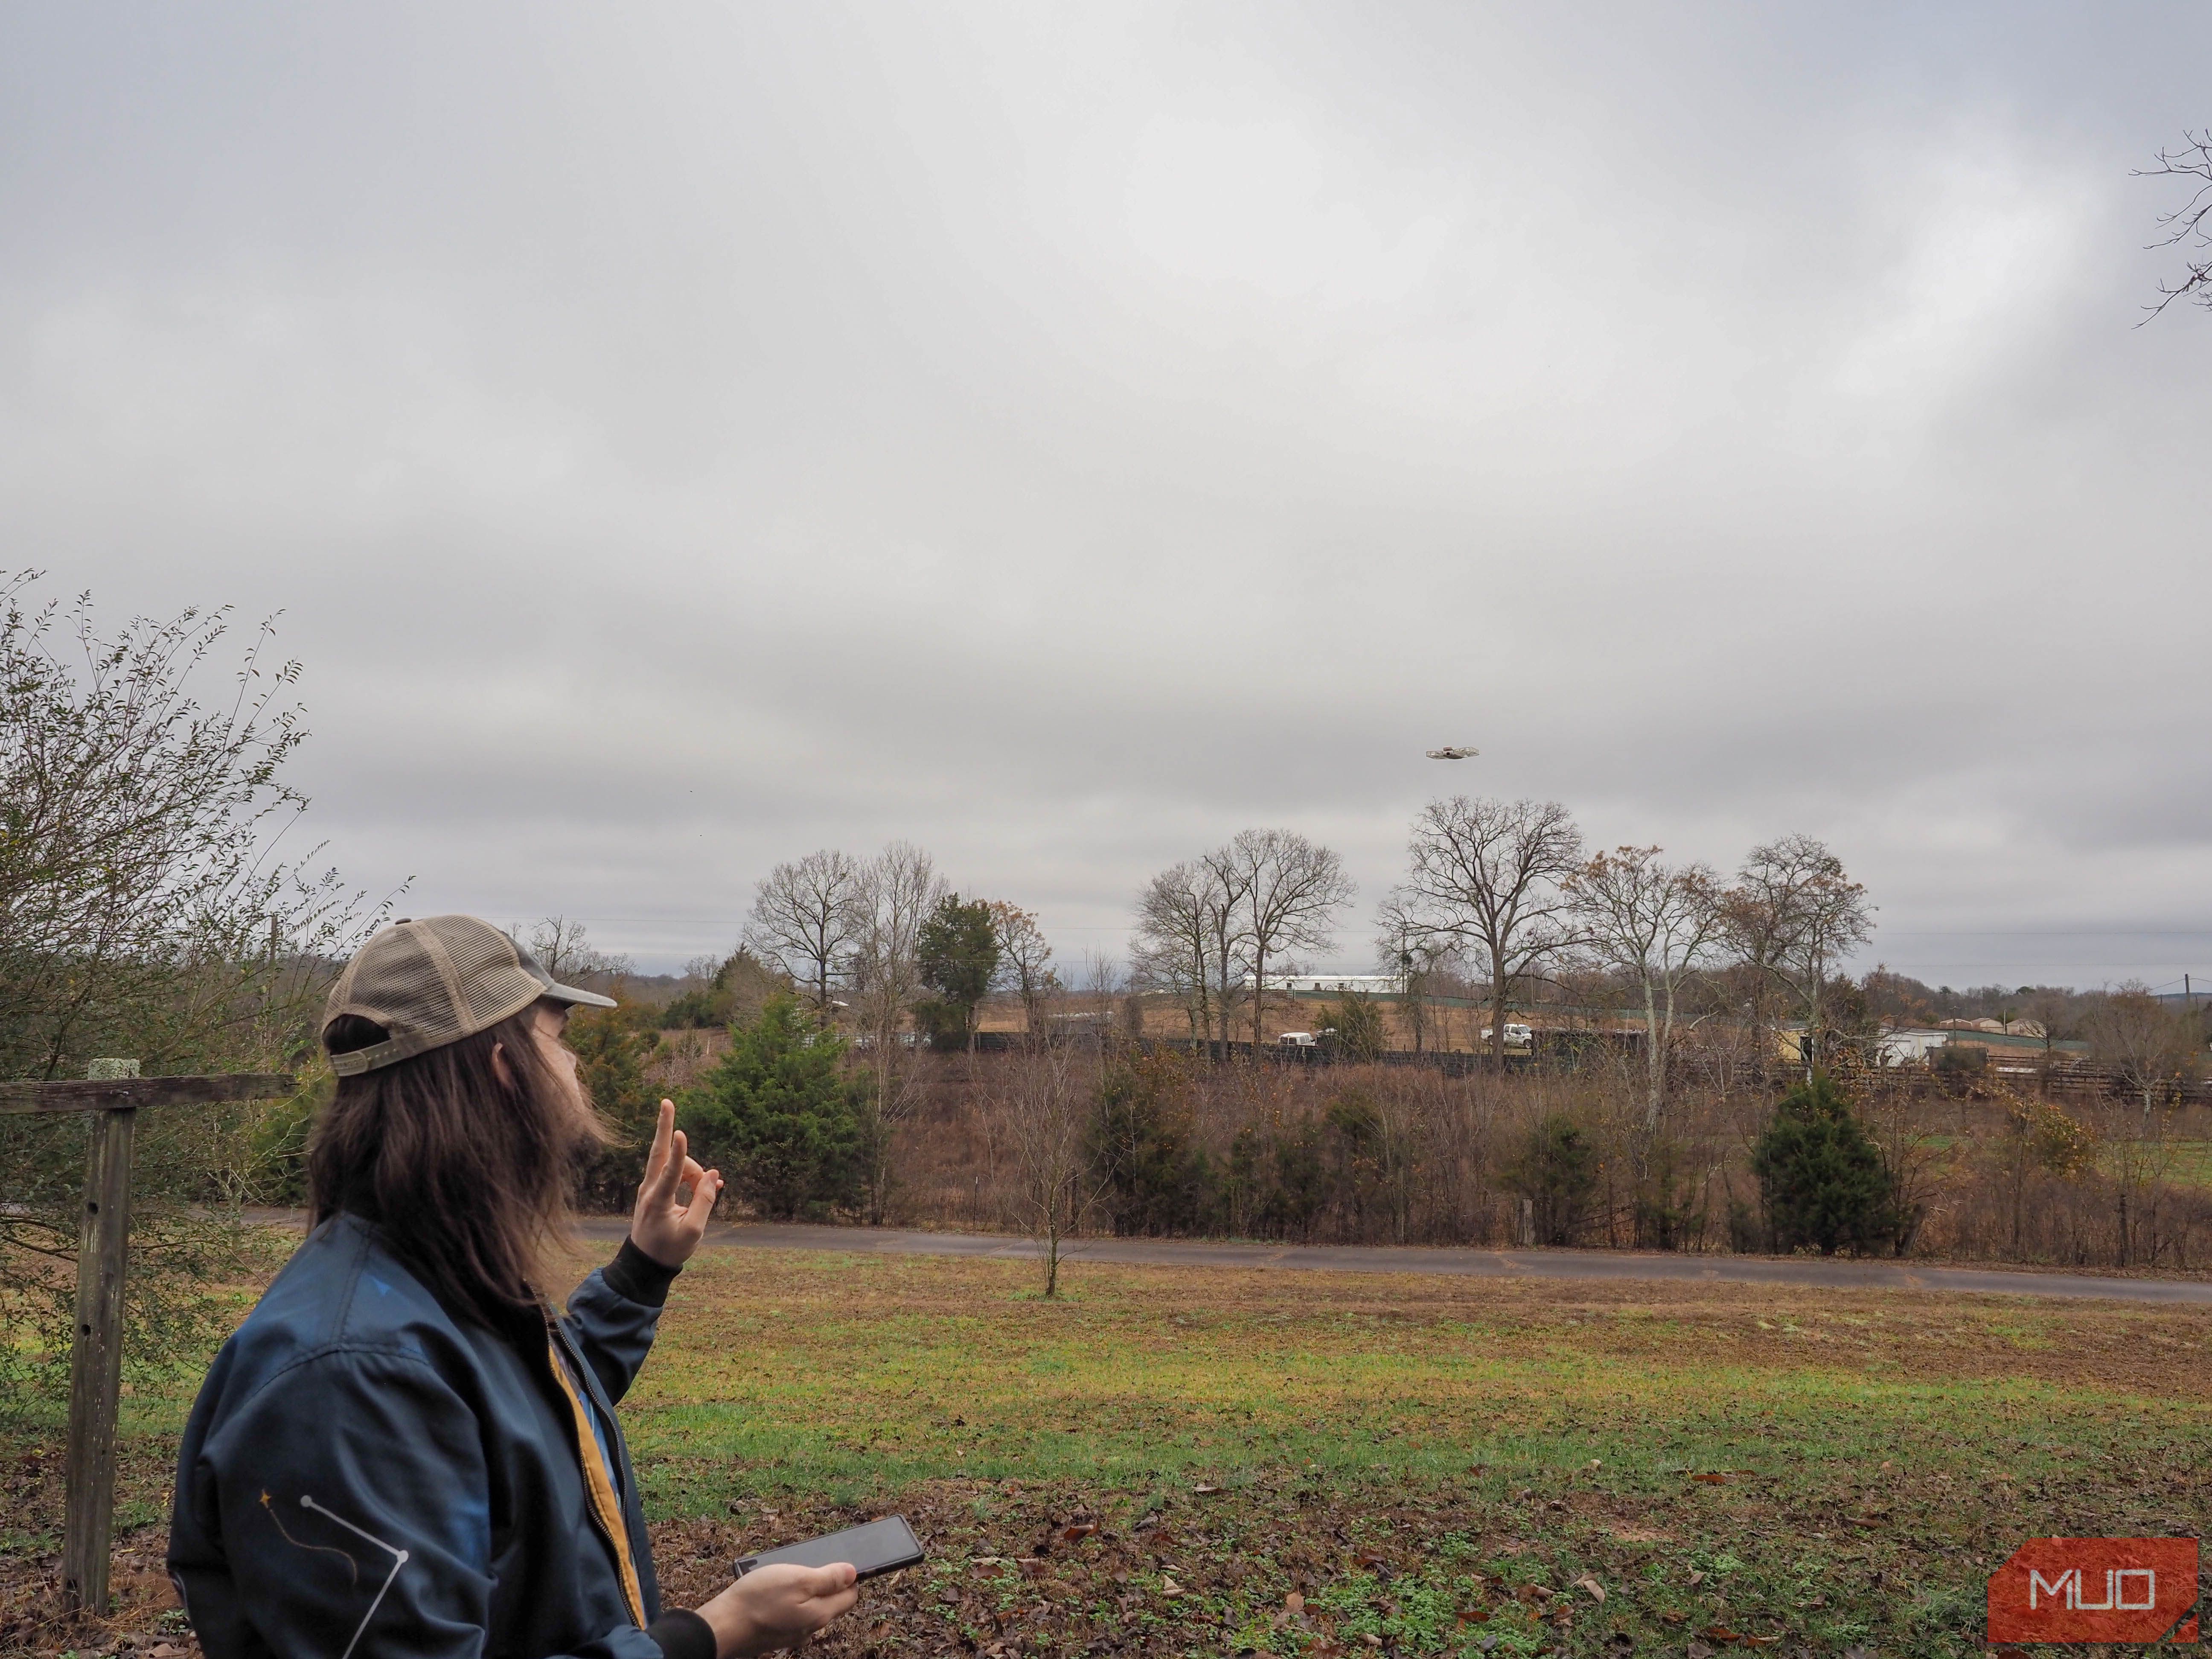
Once you know how the Hoverair X1 operates, you'll want to experiment with its five primary flight modes: hover, follow, orbit, bird's eye, and zoom out. For new flyers, the Hover X1 app also keeps track of the number of flights performed under each mode and only unlocks manual control after a set number of successful flights.
When trying out the modes for the first time, the Hover X1 app features safer settings for the drone's altitude, distance out, or even rotation speed. This provides a built-in safe metric for newer users looking to try out what different settings look like. You'll need to adjust the settings to reach higher thresholds like the maximum altitude of 15 meters under certain modes. If you shoot in vertical video mode, you'll also see the Hoverair X1 locks at 1080P (30 fps) for video. There aren't a lot of settings for each mode, however.
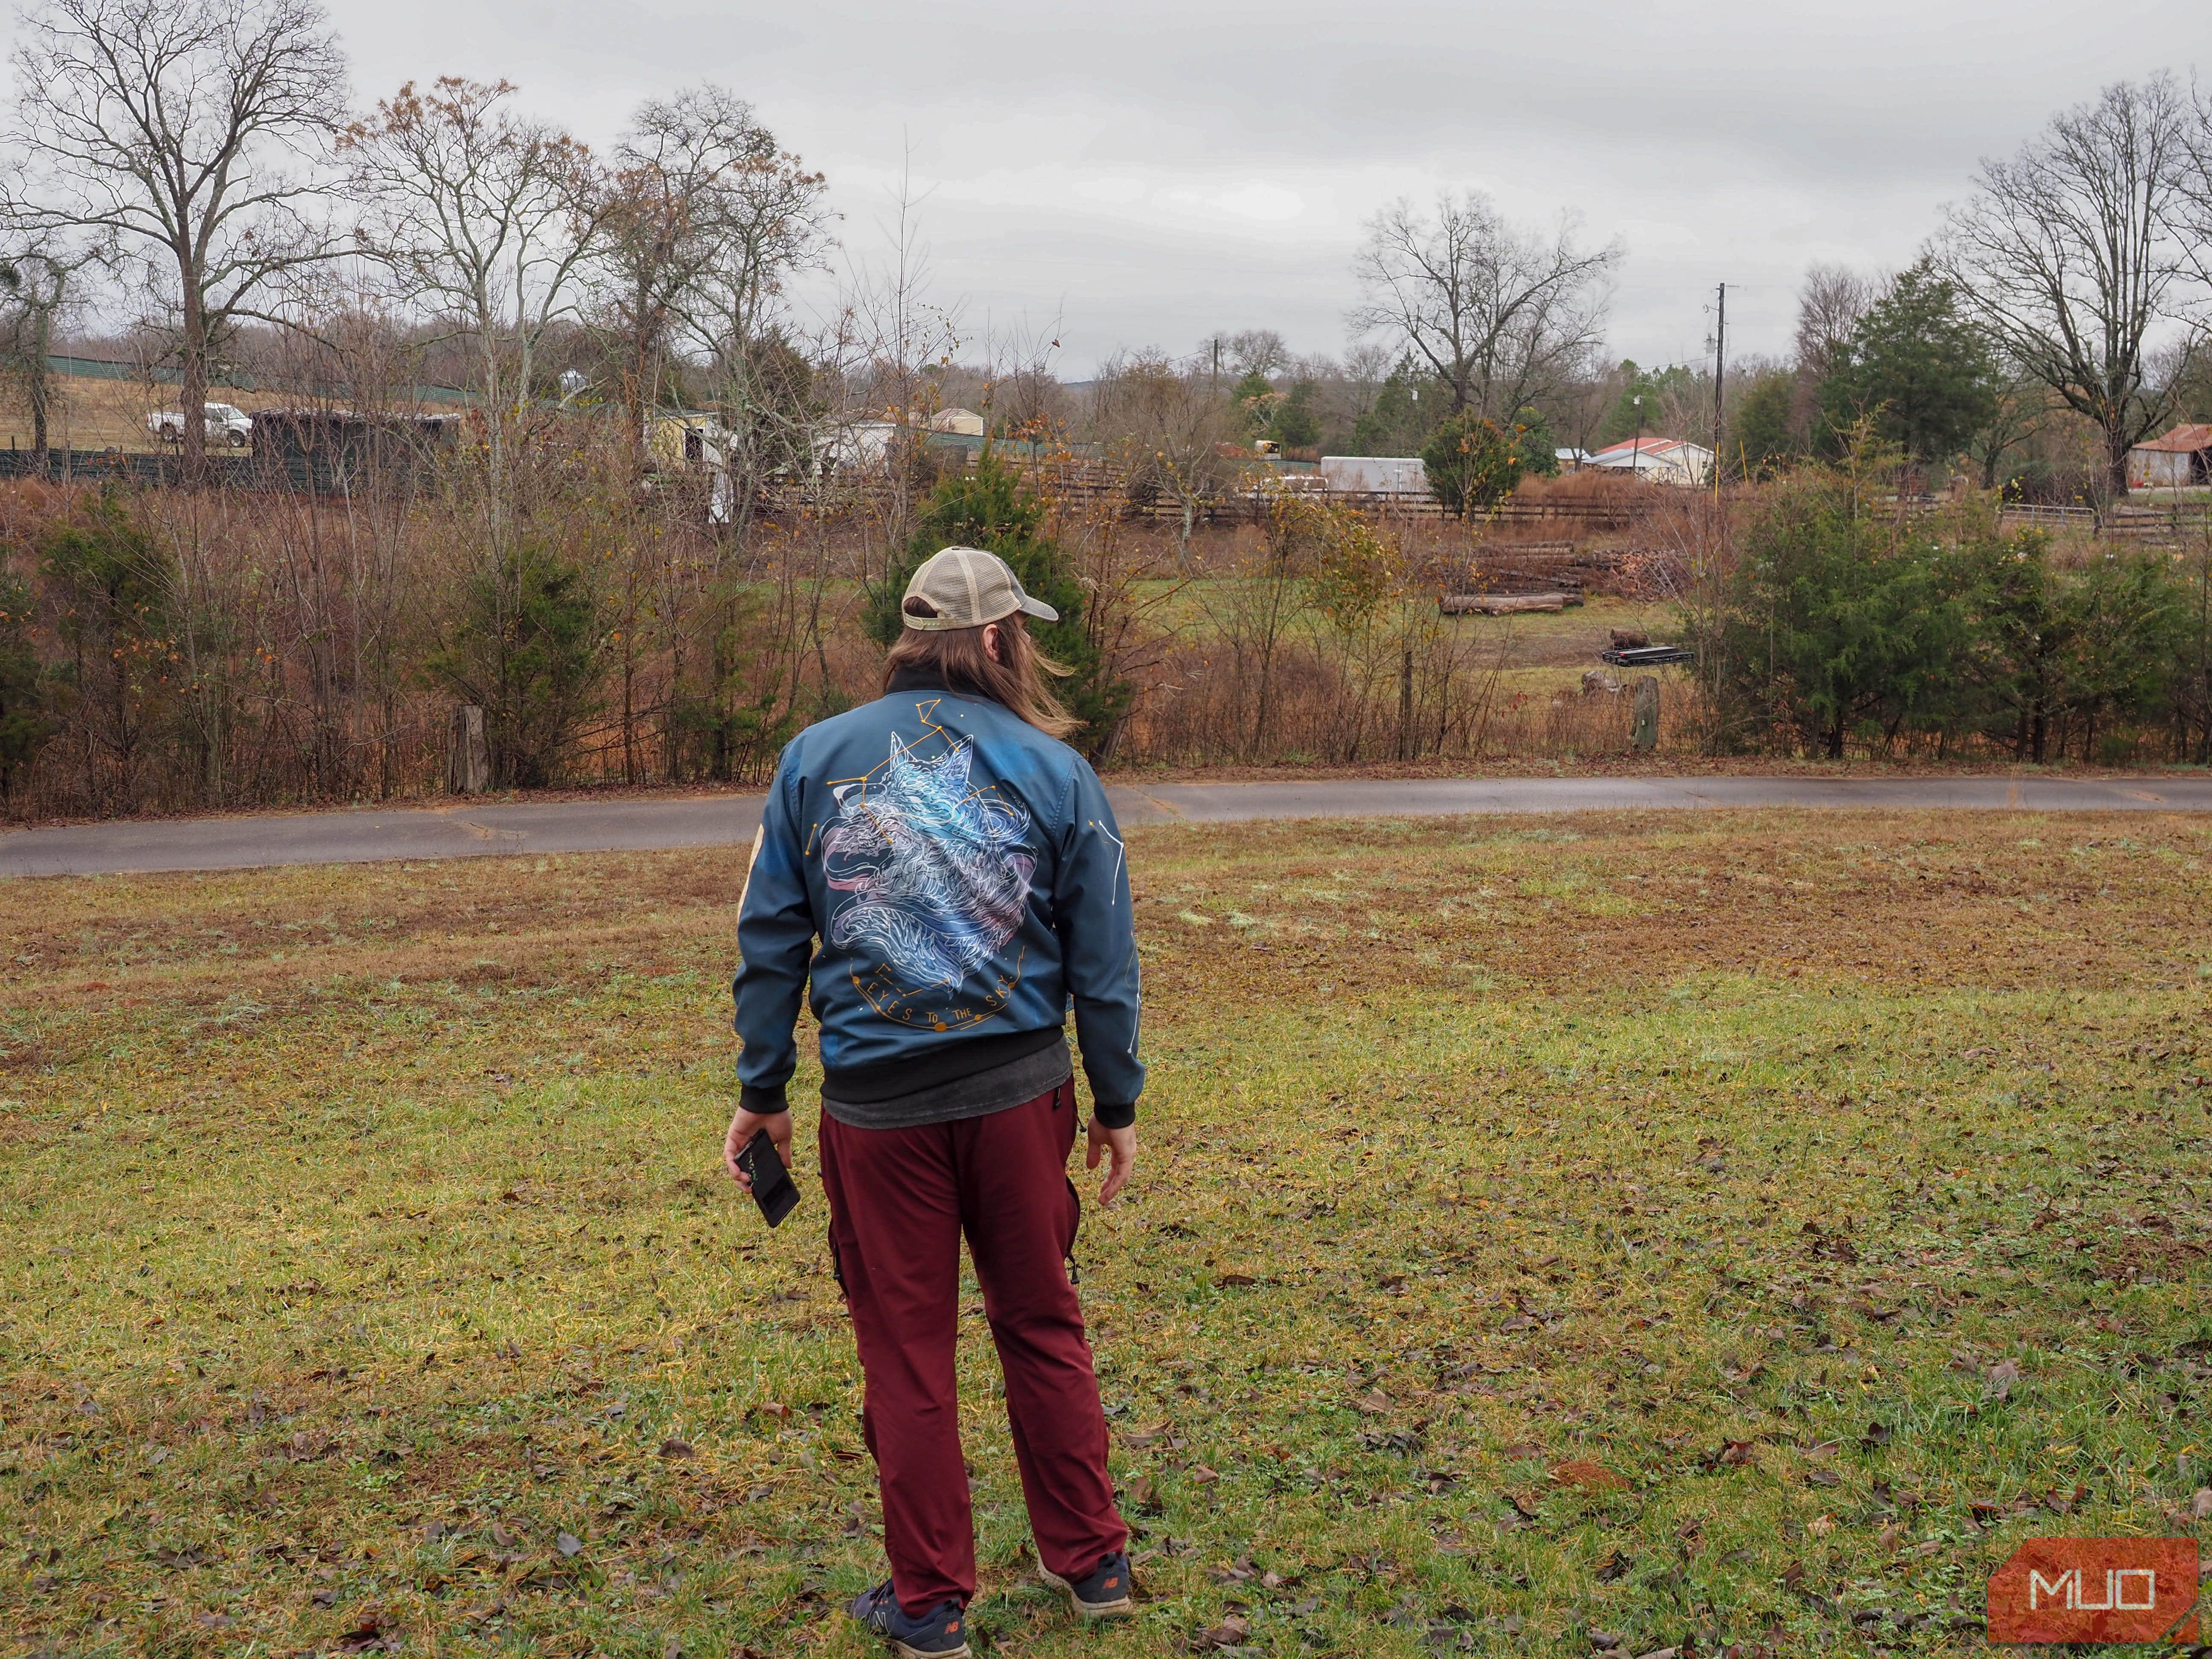
If you want more control, you'll be better off using the live preview and manual control within the app. The preset modes rely on tracking one human subject and following it very closely without using GPS.
This makes the HoverAir X1 great at focusing on a human subject in different settings. To introduce other subjects, they'll need to stay in your vicinity. To shoot pets and other non-human subjects, you'll need full manual control.
Battery Life: Very Limited
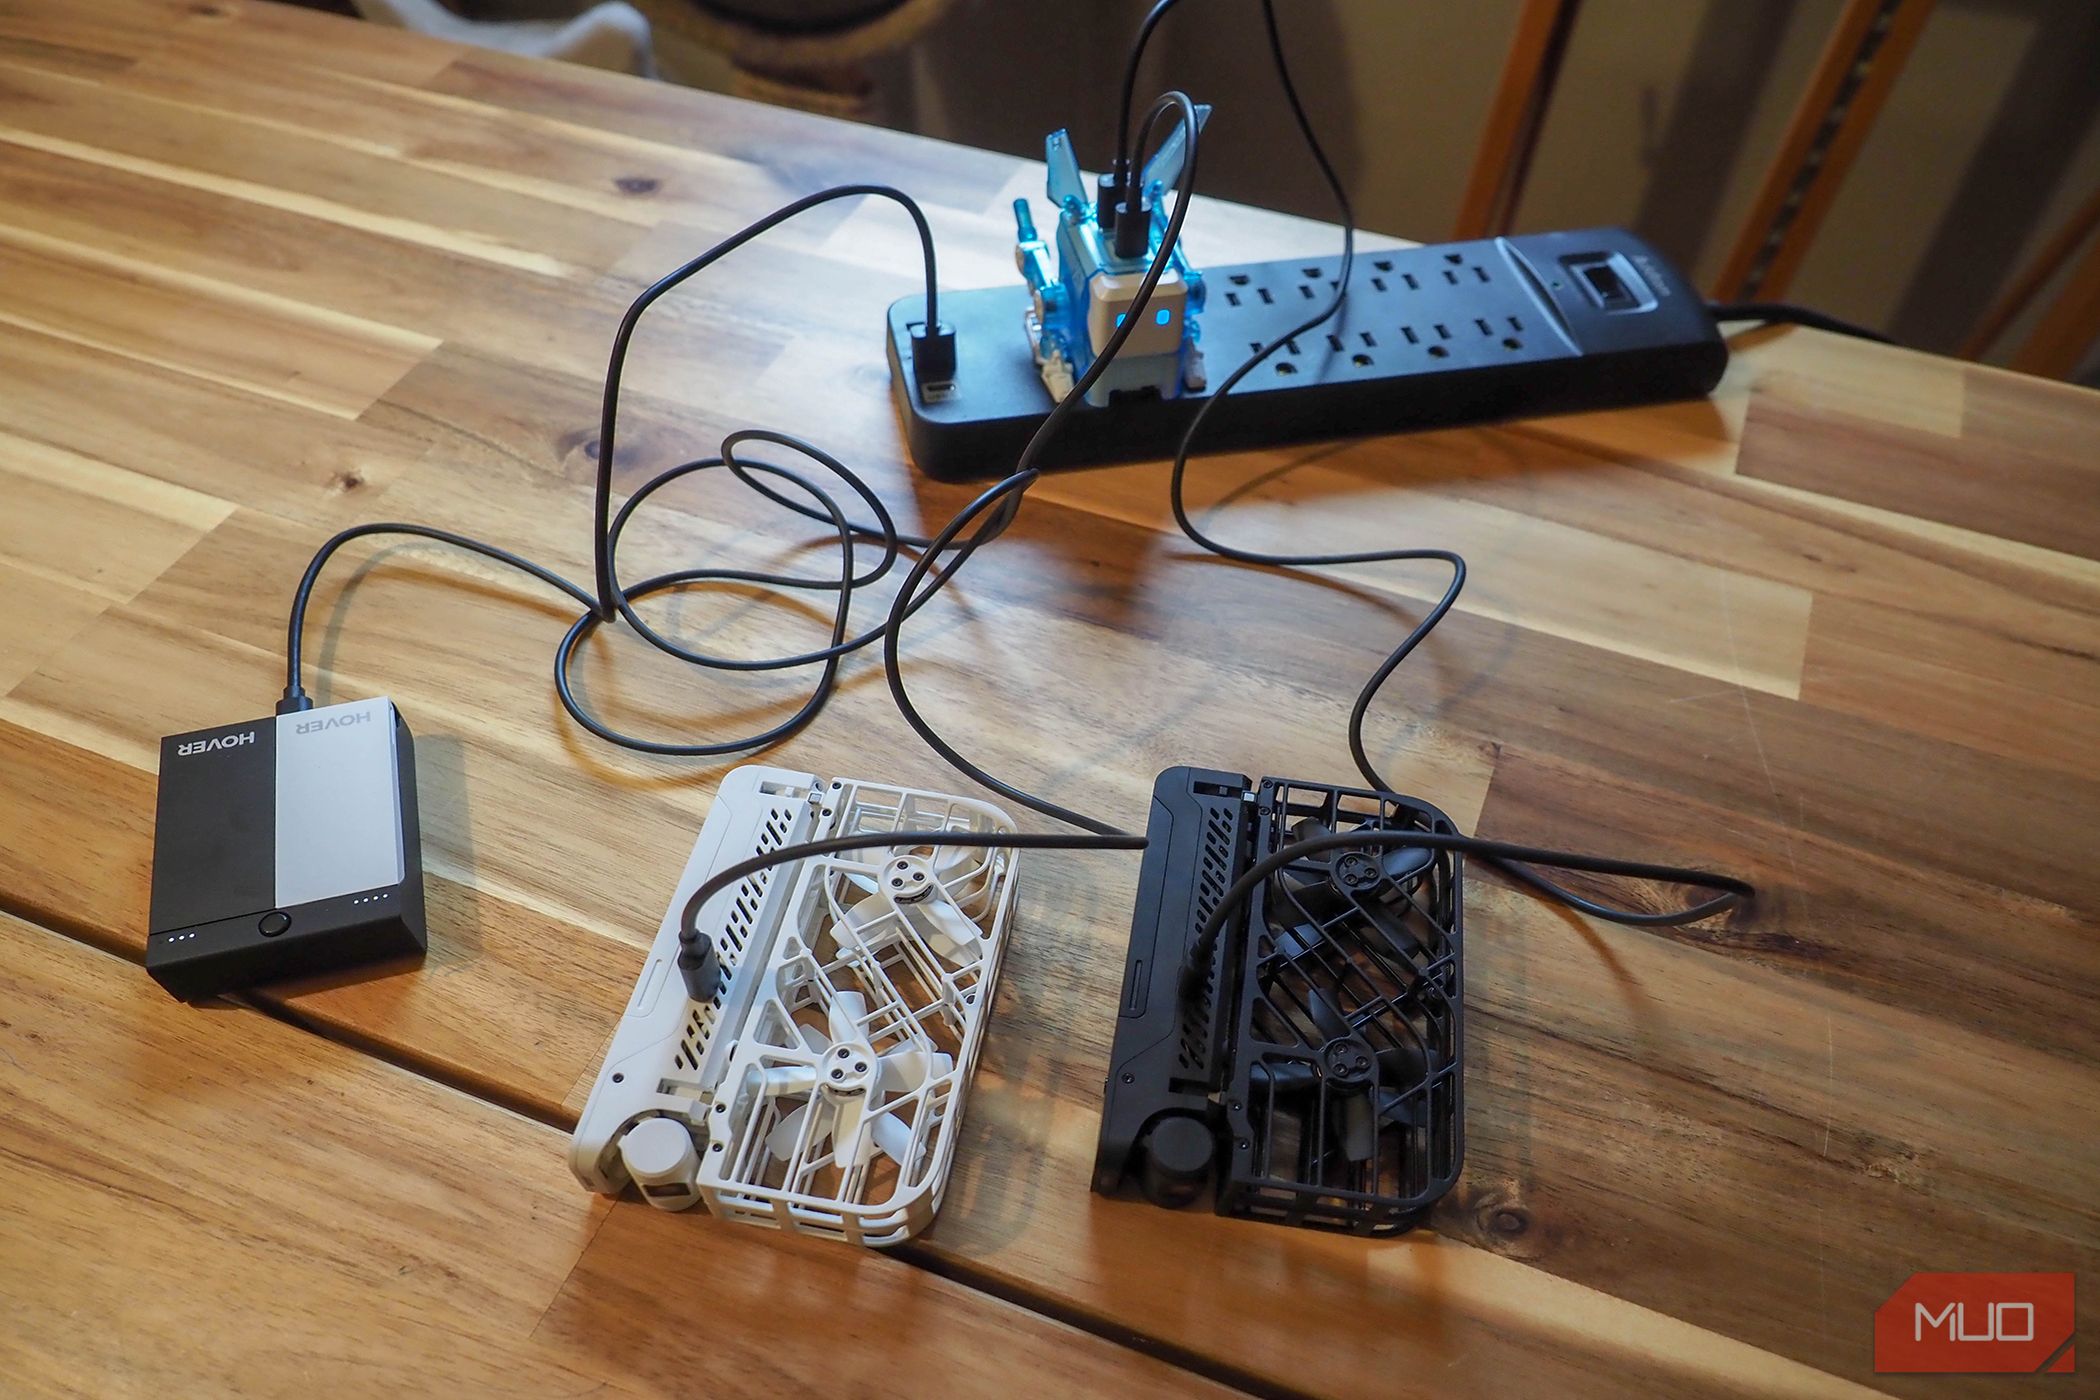
A downside of the X1 is its average flight time. As a trade-off for its lower weight, its installed battery capacity is only 1050mAh; this typically leaves you with an operating time of 11 minutes per battery. During more stressful flight conditions, you'll see this drop down to around nine to ten minutes, such as during manual flights with higher winds or more complex flight modes.
HoverAir offers combo packages that come with two or three batteries; or you can just purchase another as needed. But if you get a combo package, it also comes with a battery charging hub to charge multiple batteries simultaneously.
For charging times, HoverAir notes that to reach full charge it takes 35 minutes per battery with the charging hub, or 55 minutes when directly charging onboard the X1 via a USB-C cable. To achieve these recharge ranges, you'll want to use a PD 18W adapter at least. After installation, you can check the current battery level by tapping the power button on the X1 or connecting to the app for a full percentage estimate.
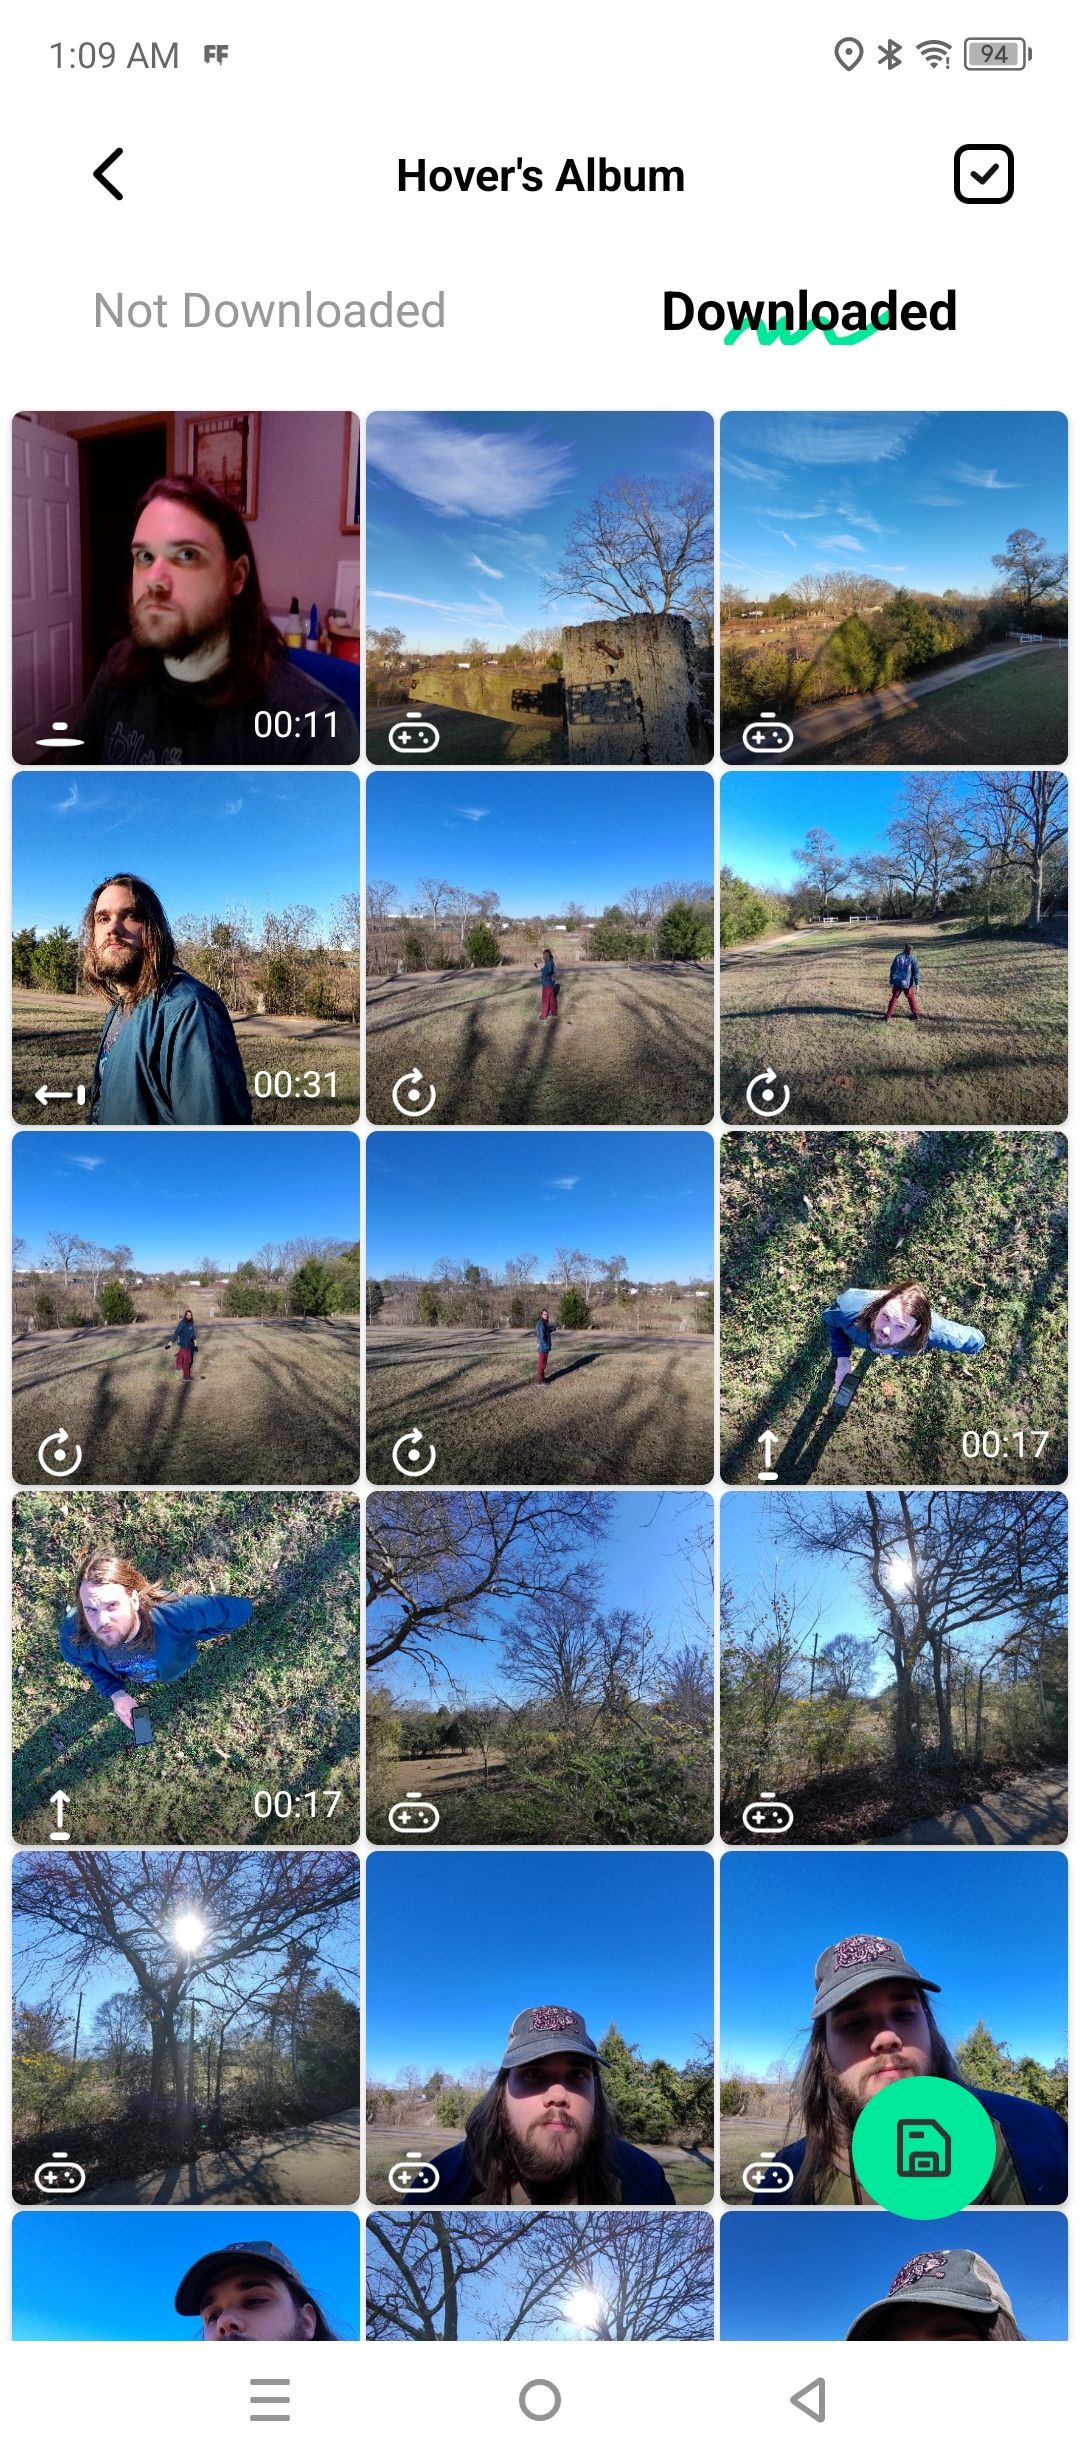
At this point, the X1 won't fly, and its voice alert will say it's too low to take off, but you're able to use any remaining battery to download images or video from its on-device storage.
Hover X1 App: Manual Control, and Not a Lot Else
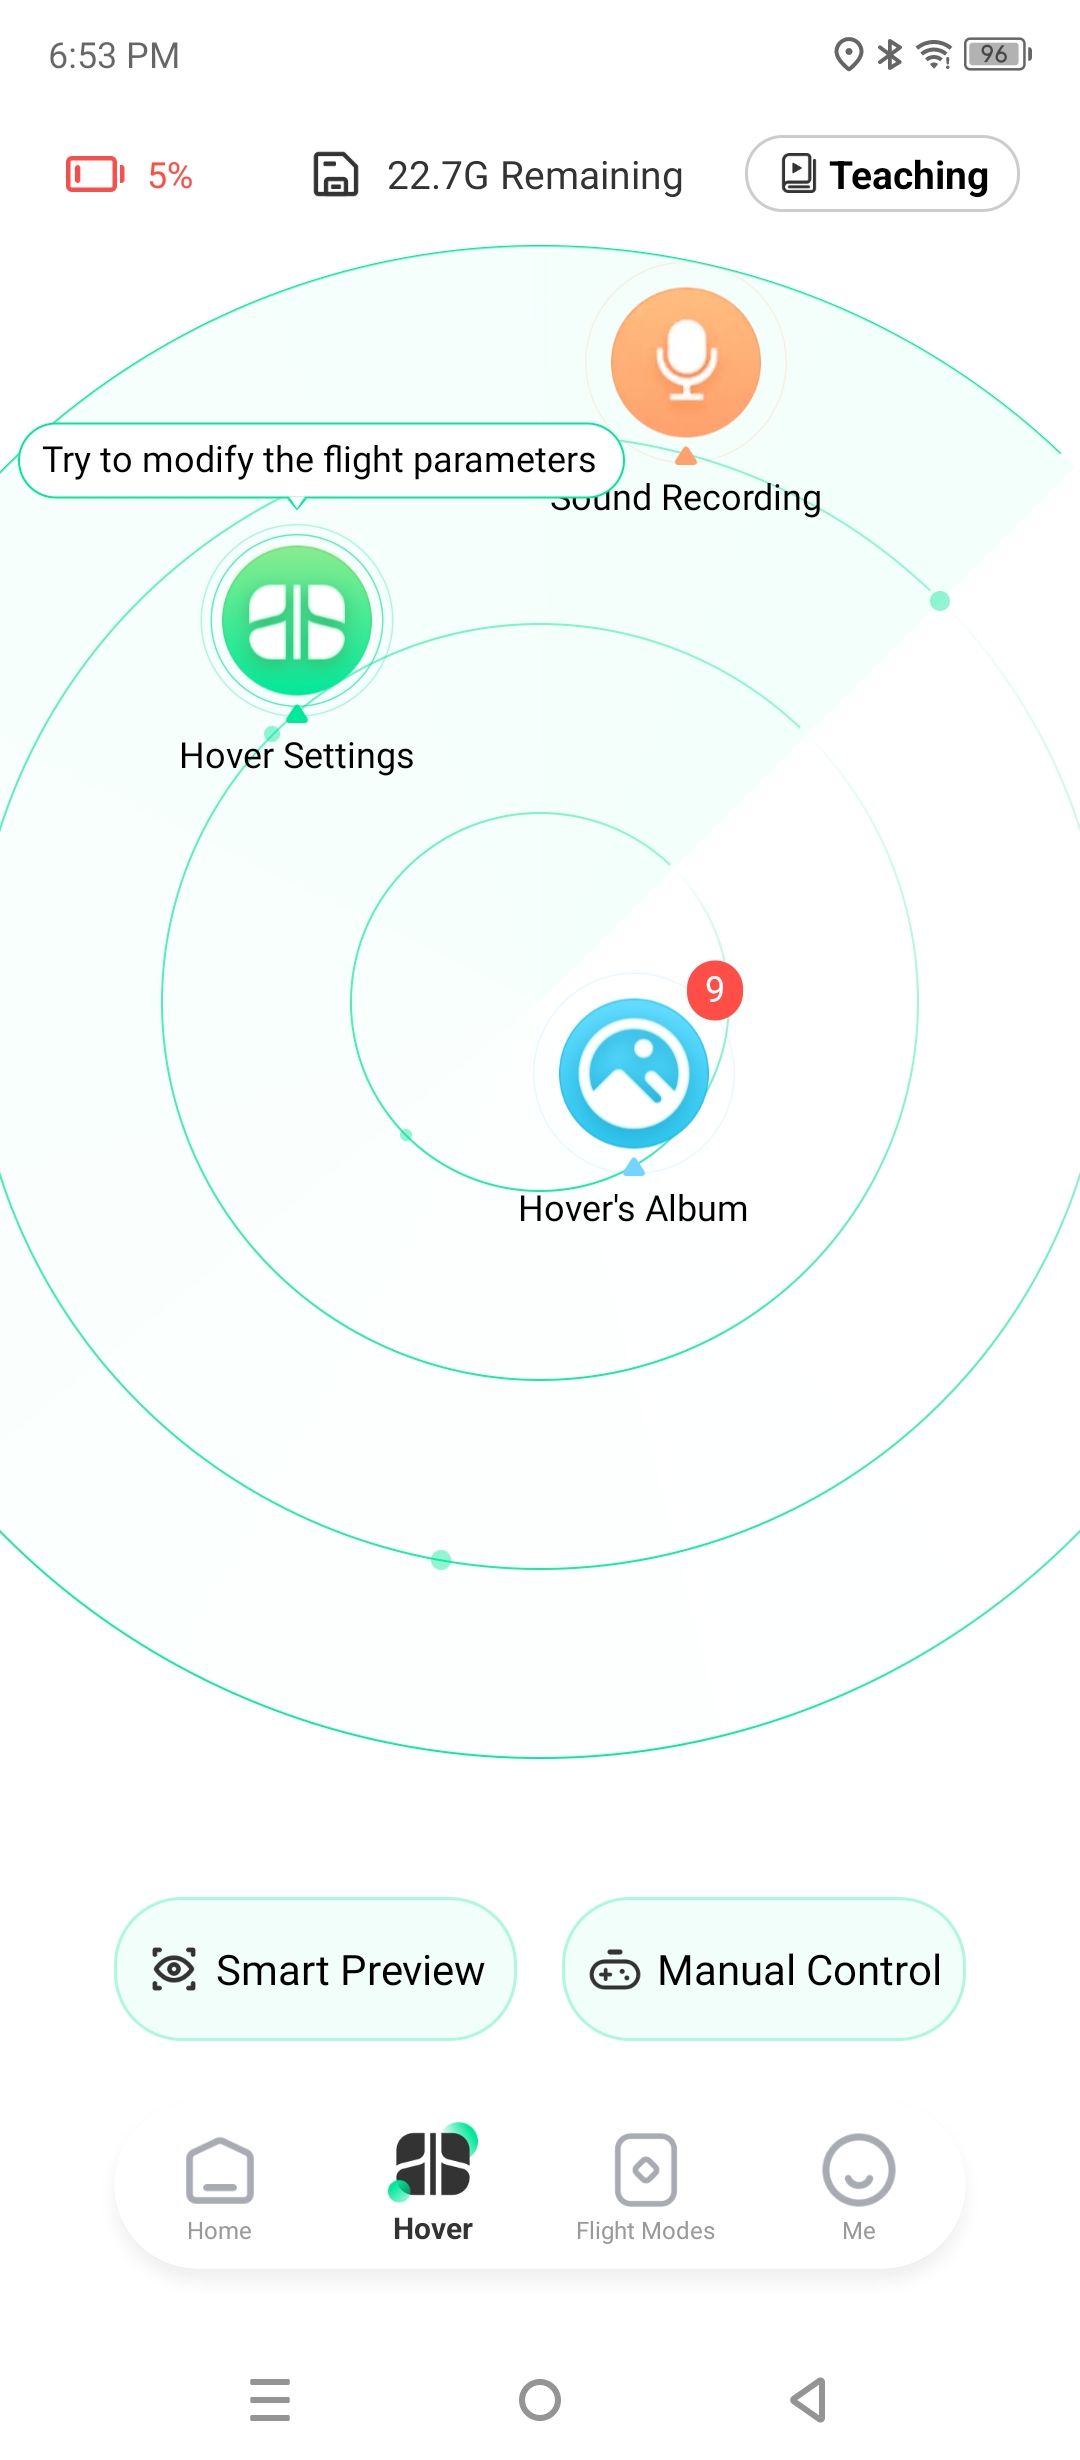
On the Hover X1 app home screen, you'll see some of the videos uploaded by other users alongside your own recorded moments. But you'll probably want to jump over to either the Hover button or settings.
If your X1 drone is already turned on and paired, the Hover X1 app will also automatically connect to it. You can then quickly access your flight settings, album, or enable sound recording. The Hover tab also allows you to jump into a smart preview mode where you can briefly look at the limited settings for both photos and video. Additionally, you can see the manual controls to get an idea about how they work before conducting a live flight.
If you aren't interested in manual control or doing an extensive sound recording, you'll likely only use the app to tweak settings or download media.
Testing Out Manual Control of the HoverAir X1
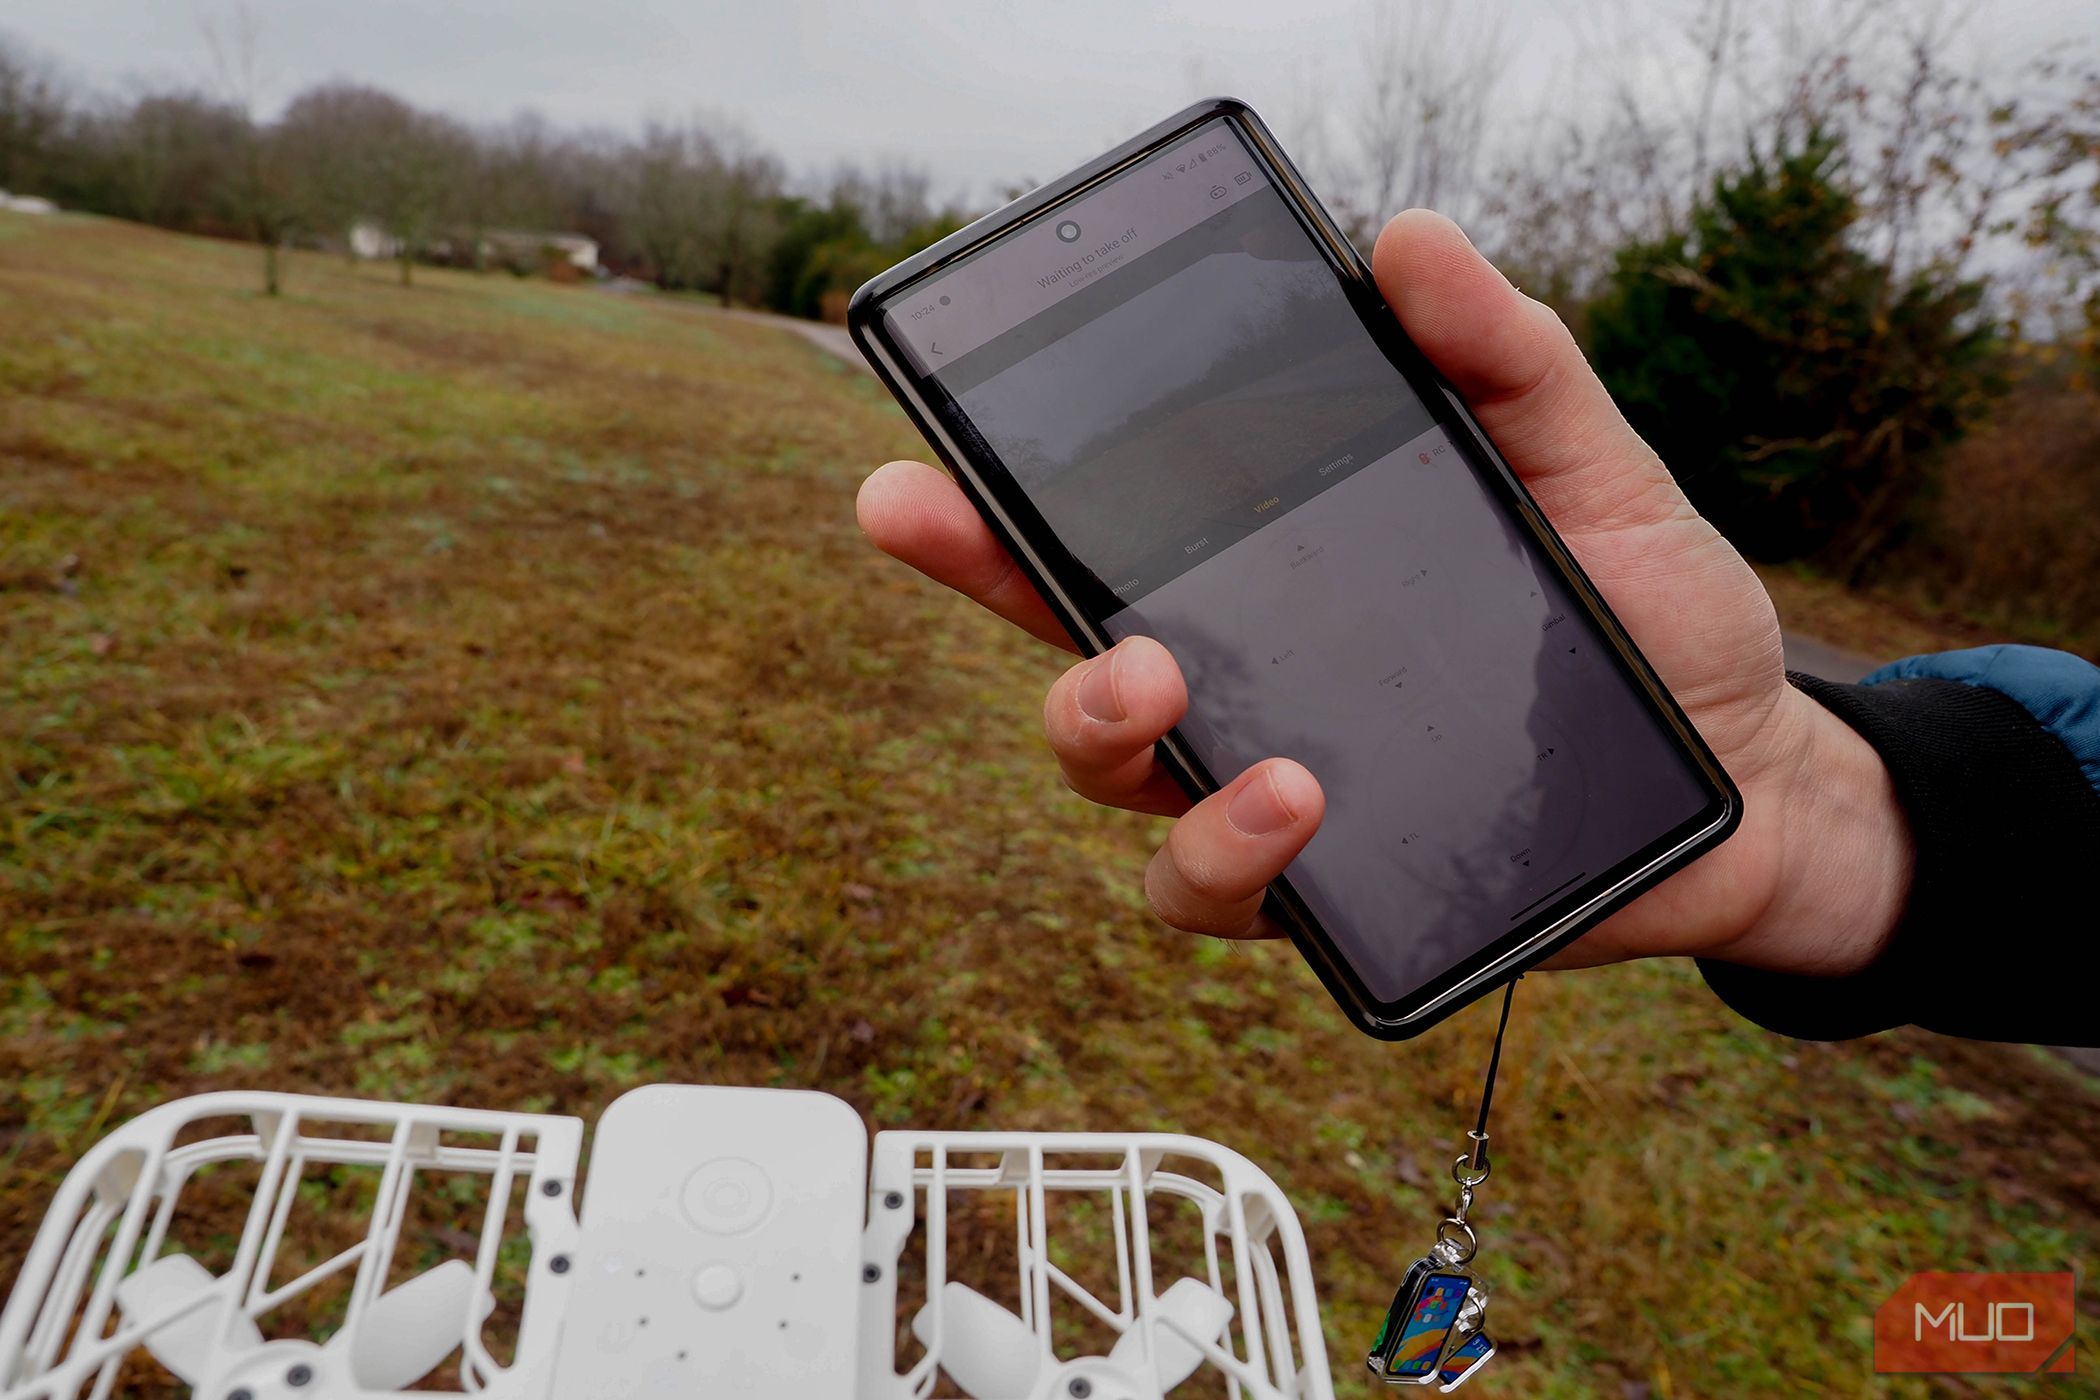
When you're ready to manually control your X1, you're advised to take off soon after activating the preview mode, as it drains the battery quickly. But before that, you'll want to set your control facing to operate either towards or away from you. During flight, the control scheme is a little odd, since the virtual touchpads are stacked on top of each other rather than placed beside each other in a more typical controller format.
If you're focused on controlling only one axis of movement for your shot, this isn't too big of a deal. But if you're trying to combine commands on each joystick, it can initially feel a bit unnatural. Meanwhile, the gimbal angle adjustment and record buttons remain on each side of the on-screen joysticks, with shooting modes and settings available at the top.
When hitting the land button, there is a small delay as it stabilizes before its descent. If you push the battery's limits, the X1 will also automatically land early to ensure it can return safely. For more control of the X1, manual flight gives the most flexibility, but it has a steeper learning curve.
Can You Fly Multiple Drones?
One of the more strict restrictions of the HoverAir X1 is that its intelligent flight pathing focuses on a single target. To bypass this and battery limits, you can purchase another X1. However, the Hover X1 app can only connect to one drone at a time, so you'll need to plan around this or launch the second X1 manually.
When I tried this out, there wasn't any flight path crossover even while using the same follow mode simultaneously on one subject. But this was more of a happy accident, as they don't communicate with each or perform any obstacle avoidance.
Camera and Video Quality: As Expected

Besides battery life, the lack of camera control is a limiting factor of the HoverAir X1. For video, you can choose between 2.7K (30fps), 1080P (60fps), and 1080P (30fps), which will all be saved as an MP4. Photos, meanwhile, are even more limited, with the option for only a single or burst shot at 4,000 x 3,000 pixels (12-megapixel) JPEG format. The camera handles everything else automatically, so there's no option to change things like ISO or shutter speeds.
As one might expect, the automatic camera system can make photos look a bit overprocessed, but you can still capture very fine details. If your main goal for your photos is personal use or social media, this is much less of an issue, but it's a trade-off again with ease of use.
Overall, the HoverAir X1 is ideally used for its tracking capabilities on video. If you're using it there, you'll get the most out of it when combined with its portability.
Should You Buy the HoverAir X1?
The HoverAir X1 specs look less impressive on paper than its $400 price tag would suggest. At a glance, you'll likely compare it to the DJI Mini 2 SE for its video and photography specs, and it performs very similarly there. However, it loses in terms of flight performance with a shorter battery life, flight range, and less wind resistance.
If you're willing to give up some control and power, the HoverAir X1 proves an incredibly forgiving introduction to a personal drone. You just need to decide if its small footprint suits your shooting situations best.
HOVERAir X1
The HoverAir X1 is a personal-use class drone designed to fly autonomously to capture video and images. It can be operated from only two buttons or taken over for manual flight within its companion app. For further convenience, it offers a fully enclosed design with safety guards while still being lightweight and foldable to allow for easy transit. In addition, its five shooting modes offer video options of 2.7K (30FPS), 1080P (60 and 30FPS), or 12MP photos to store on its internal 32GB of storage. The drone camera attempts to get the best shots while triple stabilization smooths out the process alongside level-four wind resistance.


