


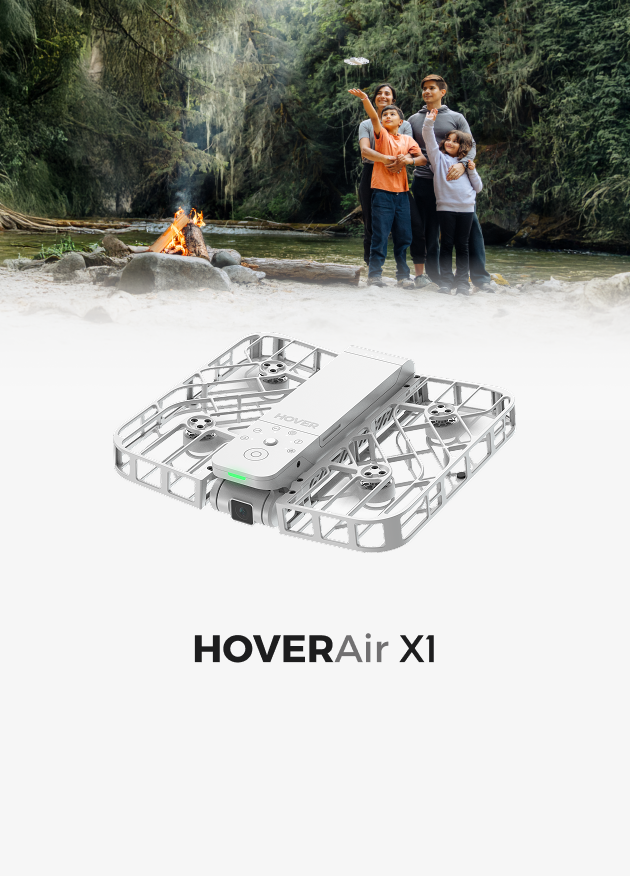


HOVERAir X1 PROMAX Drone Review

Drones can range from dollar store disposable to high end sports car or luxury watch styles. You will find The HOVERAir X1 Pro Max drone near the top of cost to feature loadouts. The drone is not an FPV drone, racing drone, or one designed to simply fly around. Instead, it is a high end camera setup with drone integrated technology to help the outdoorsy, action-packed clientele to catch the perfect shot. Portable, packable, lightweight, and durable, the HOVERAir X1 Pro Max was designed with durability and flight time in mind. Enjoy various preprogrammed modes or pair the device with the Beacon and Joysticks to gain manual mode. Enhance your flight experience and expand your flight time with HOVERAir accessories.
- DESIGN95 %
- EASE OF USE95 %
- PRICE90 %
- ACCESSORIES100 %
- POWER/FLIGHT CHARGE95 %
- User Ratings (0 Votes)0 %
PROS
- Light Weight
- Multifunction flight modes
- Take off and land from the palm of your hand
- 8K imagery
- Person tracking
- Smooth Capture Stabilization
- Easy to use/Intuitive.
CONS
- Non Retractable prongs on the HOVER charger block
- Carry Case does not hold the Charging Case and Joystick/Beacon.
- Pricey Drone but designed for high-end action.
High-Res Hands-Free Aerial Camera Drone.
Portable Camera Wingman
“Did you see that?” Who has done something cool, fun, or notable, only to find that nobody was watching or recording. Many YouTube and TikTok segments showcase amazing videos of various activities. How many repeat attempts were there? Who was recording? Did they have another person acting as a reporter, or did they set up a camera/tripod and try to find the right angle? Repeating the event may not capture the original excitement, and may record a less fun, rewarding, and truth-filled emotional status. The HOVERAir drones from ZeroZero robotics may provide just the solution to this problem. What If you could have your very own camera wingman to follow and to capture your events in real time? Like the Ghost drone from Destiny, the HOVERAir X1 ProMax will follow where you go. With the HOVERAir X1 ProMax, you can observe, capture, send the images to your phone, edit them, upload them, and remember them.
Drone Unboxing:
The HoverAir X1 ProMax kit arrived in a 10 5/16 inches Long by 7 3/4 inches tall by 3 9/16 inches thick glossy-black retail box. The product name was displayed at the top of the cover panel in glistening, shimmery, silver-iridescent font. You will find a large, slightly-raised, glossy image of the folded drone located directly beneath the product name. The cover panel was vibrant, clean, classy, and the drone looked badass. The top and right side panels listed the product name, while the left provided the ZEROZERO Robotics company name. Like the cover panel, the silver leaf font contrasted brilliantly with the background. The rear panel provided the same drone name along the top, but instead of a folded drone, it offered a large deployed drone. The bottom panel provided the company name, manufacturer information, warnings/age limitations (14+), product manufacturing labels, and barcodes.

I removed the outer slip cover, lifted the box’s top panel, and found the HoverAir X1 ProMax drone resting within a cardboard cutout. I was able to see the gold-leaf font of the HOVER name, the 1 1/4 inches wide by 5 1/2 inches long body segment, and the mesh, fan-like side panels with quad blades (2 5/8 inches wide by 5 3/4 inches long). I removed the drone from the cardboard tray and examined the outer features (11/16 diameter button, 11/16 inches wide by 3/8 inches tall LCD screen, removable battery, forward gimbal, foldable fan segments, and lightweight nature (6.8 ounces with battery and 4.6 ounces without battery). I loved the foldable, compact design and the ease with which the drone could be opened/closed. The lower hinge segments provided a smooth and easy-to-access portability to the design.
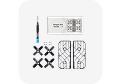
Before you dispose of the box, make sure to grip the nylon side tabs and remove the inner cardboard tray to find the drone accessories. You will find a welcome, quick set-up card with QR code and step-by-step instructions (charge it, scan the QR code, connect the APP). Beneath the card, you will find three icon-labeled boxes: 1. Bag (4 5/16 inches wide by 5 3/4 inches tall by 5/8 inches thick), charger (4 3/8 inches long by 1 1/4 inches thick by 5/8 inches tall), info (5 5/8 inches wide by 7 1/8 inches tall by 3/8 inches thick). The cable box had a 21-inch long USB-C to USB-C cable with rubberized coating, thick protected neck segments, and robust metallic USB-C prongs.
The bag’s accessory box had a light-tan 5 1/2 inches wide by 8 inches tall drawstring bag and a fragment of HEM frame with an instruction “try to tear it or break it.” After manipulating/messing with the material, I agreed with the assessment that the material was hyper-elastic and flexible. The included carry bag had an attractive light-tan color, with white-colored “HOVER” printed on the cover. The bag had nice, even stitching, a clean, white drawstring, and accommodated the drone well. I liked the bag for its dust protection, fancy aesthetic, and drawstring carry handle, but I felt that a hard-shell case would have provided more protection. Luckily, the Power Case and Carry Case accessories filled the need.

I removed the instruction manual from the manual box and the eight panels of R/L stickers. The manual’s first page was likely the most helpful with a multilingual labelled ink-outline drawing of the top (01-06) and bottom of the drone (07-14). The first image showed the battery, display screen, power button, propeller, select button, Gimbal/Camera. The second image showed the VIO sensor, prop guard, bottom TOF Sensor, speaker, heat vent, motor, rear TOF sensor, and rear obstacle sensor. The subsequent pages provided a step-by-step setup process for the drone. Before the first flight, you will need to charge the device with the included USB-C cable. Plug the USB-C cable into the small USB-C port along the back left of the drone (just above the micro-SD port). While powered, the tiny display will show the power status of the drone. I was impressed with the vibrant, bright, and crisp display of the tiny screen.
I plugged the drone into a UGREEN Nexode 100W Desktop charger and then a USB-C cable between the charger and drone. Starting at 8:00 AM at 28% power, the drone increased to 34% by 8:10 AM, and to 64% by 9:10 AM. I was a bit dissatisfied with the charging rate and decided to test the input. I plugged a Klein Tools Multimeter into the multimeter and found the USB-C’s rate of charge was 5.04V/1.55A despite the output capabilities of the charger (5V/3A, 9V/2.5A, 12V/1.87A, 15V/3A, 22.5W max). At 9:10 AM, I tried a different charger. I plugged a Klein Tools multimeter into a UGREEN 160W multi-charger. I plugged a USB-C cable between the multimeter and drone and found the drone charged at 12.12V/2.57A, which was much better The drone increased to 74% by 9:15 AM, then to 99% by 9:30 AM. I loved that it was able to charge at a faster rate. After several charge cycles, I found it was able to charge within about an hour.
You can download the zerozerorobotics.com App by scanning the QR code within the instruction manual. I was a bit surprised to find that the link took me to a website and not to either the IOS App Store or Google Play Store (the link showed IOS and Android compatibility). The webpage had an easy-to-identify, green, oval-shaped “Download App” button in the middle of the screen, and two less conspicuous “Info” and “[email protected]” buttons along the bottom. I pressed the “Download App” button and found that the link redirected me to the App Store. I downloaded the 3.3* App and found it was fully installed in about twenty seconds.
Hover X1 App:
When I opened the App, several other screens quickly popped open to enable notifications, to learn more about winning a $2500 contest, and to agree/disagree to the Privacy Policy. I selected “Log in,” agreed to the user agreement/privacy policy, and then followed the prompts and entered my email. I waited for about five minutes for the email to arrive and then found it had been sent to my junk folder. I entered the six-digit code, an 8-16 character passcode, allowed location sharing while using the App, and then allowed access to Bluetooth. If the drone is not powered on and you select “Tap to activate/connect,” you will find an image of the drone at the bottom of the screen with instructions to power on the drone. It will then ask you to select your device from a list of images (HOVERAir X1, HOVERAir X1 Smart, HOVERAIR X1 PRO, HOVERAIR X1 PROMAX).

Deploy/open the drone, power on the drone by pressing the small button adjacent to the LCD screen, and then open the Hover X1 App. Place the drone in the palm of your hand and allow it to run through the intelligent flight modes. It will make a series of chimes akin to a racetrack start timer and a female announcer will vocalize the subsequent steps. You can adjust the modes by pressing the select button on the front of the drone. Activate/deactivate OmniTerrain, and select one of the available smart flight modes and parameters (follow, side track, Bird’s Eye, zoom out, orbit, dolly track, 360 spin). When done, the HOVERAir X1 ProMax will return to its original take off location. Place your hand beneath the drone and it will land in your hand. The App will walk you through the five initialization/learning steps to learn how to take off, adjust the modes, and land. Once completed, you are free to peruse the App.
Even though most of the flight modes and mode selections can be toggled on the drone, the APP provides more control. The lower panel of the App provided Home, Store, Hover, Flight Modes, and buttons. The Home button showcased the new HOVERAir Aqua drone and user videos. The Store button provided access to accessories, HOVERCare insurance, and additional drones. The Hover button provided a background green sonar-like screen and had centralized, bouncing buttons to activate/connect the drone, to locate my Hover, or to access HOVERCare. A small button along the top right will take you to a tutorial/education page. Even if you are a seasoned drone expert, I would highly recommend that you watch the videos as they provided helpful information.
The Flight Mode button was perhaps my favorite part of the App. Each of the tiles had a cute image of the program specifics, labeled basic versus skilled mode, and when tapped, rotated to provided a cute animation, a mode use button, and a “Take a Look” feature. If you tap the “Take a Look” button, the App will take you to another page with user videos and a “Create” option (share video access). You can tap the yellow Use [specific mode] Mode button to pair/link with the drone and gain functionality similar to the front button. Lastly, the Me button will allow you to modify your profile, link your Hover drones, update Beacon firmware, review beginner tutorial, access HOVERCare (ProMax 1 year $89.90 and 2 year $129.90. Discounted repair and free two way shipping). Lastly, the profile tab will allow you to see restricted flight areas to learn about No-Fly zones, Authorization Zones, and Altitude Restricted Zones. I personally loved this feature because it helped to provide available public data in a single location.

My kids and I played with the follow, hover, orbit, and birds eye view and found that the device had approximately thirty minutes of flight time per battery charge. My son/daughter wanted to create chase sequences and ran up/down my driveway, while the drone chased them. We repeated the tests with their E-bikes and enjoyed the follow function the most. I was amazed that the drone was able to maintain distance, tracking, and abruptly stopped when they did. The drone’s Mode selection was quite intuitive. You can short press either the left or right select buttons to adjust the modes. You can hold the left button down to change the left parameter or the right button down to change the right parameter. Short-press the select buttons to adjust the modes, and then press the central button to select the mode. Once ready, place the drone on your hand, press the button and run the program/mode. Place your hand under the drone to again and it will land.
There were a few instances where the drone lost the leader (my daughter/her friend) and slowly landed onto the ground before turning off. Luckily, we maintained line of sight and were able to see where it landed. I never had to rely on the App or directions to find the drone. Each battery will last ~30 minutes depending on activities/speeds, etc. This setup has a lot to offer for those looking to add a camera wingman. Enjoy the broad 107-degree field of view, up to 48MP JPG/DNG (PROMAX) image, and smooth capture 2.0 for less jostling/jiggling of the video/ambient footage. Adjust the image capture with 4K@120fps, 10-bit HLG HDR for bright color capture, H-Log mode to gain better color contrast and dynamic range, vertical mode to capture like a smartphone at 4K/30FPS, and gain up to 2x zoom without sacrificing image resolution.
Accessory Carrying Case/Components:
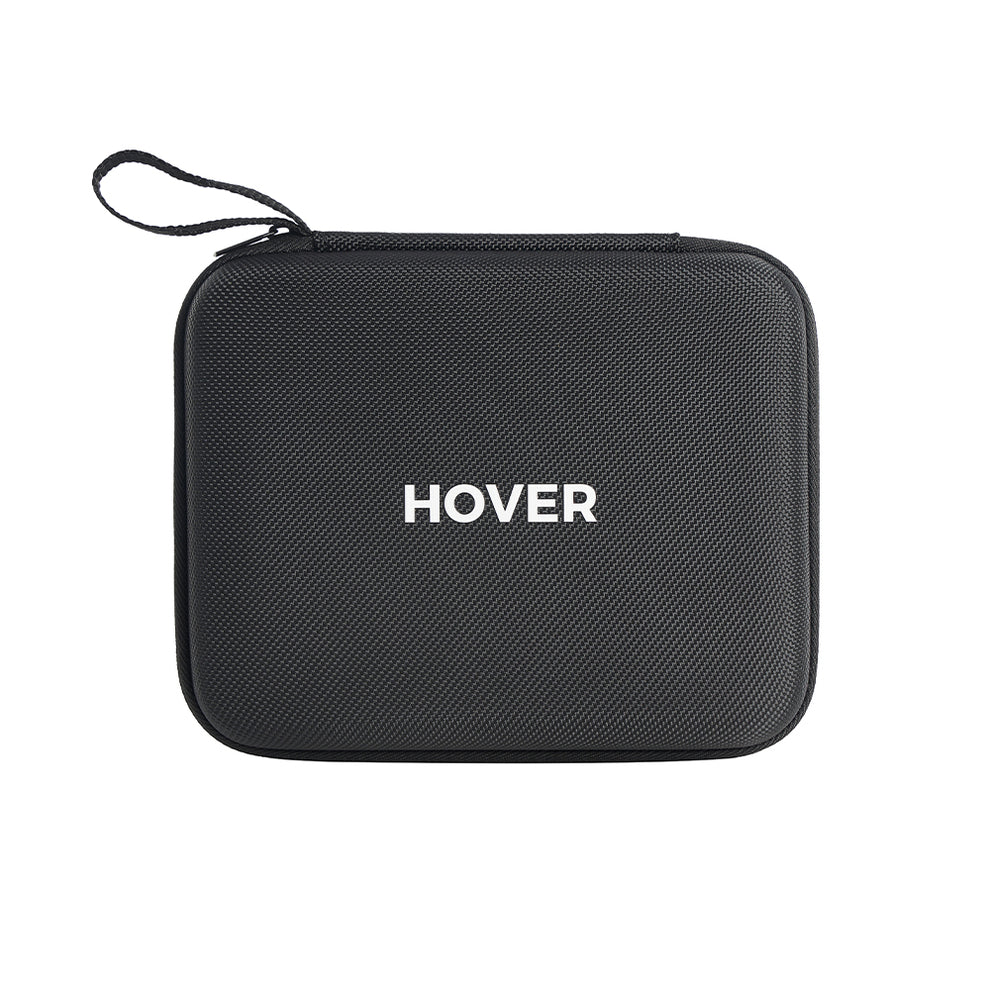
I received a secondary black-colored box with silver-font “HOVER” listed on the cover. The dimensions matched those of the main drone. I opened the box, removed the plastic-wrapped bag, and then removed what looked like a pair of black-nylon saddle bags (2 pounds 2.1 ounces). Each of the side bags measured 7 1/8 inches long by 4 7/8 inches tall by 2 1/2 inches thick and was connected by a 2 1/8 inches tall by 5 5/8 inches long black-nylon spine/bridge. The front panel of one of the side compartments had HOVER in large white font, while the other side had a 1 1/8 inches wide by 6 1/2 inches long retention strap. At the top of each of the side bags, you will find an 11-inch-long water-resistant zipper with a metallic zipper and a rubberized-zipper pull. Additionally, if you orient each of the bags facing you, you will find a D-ring double-stitched into a nylon brace.

Placing the carry bag face down, I found that my initial impression was incorrect, and that the setup was shipped as an unzipped bag. The inner surface of the bags had several strips of 1-inch wide hook-loop material, with two strips running up/down and 1 strip running from side to side (6 1/4 inches long). The outer rim of the back panels had a circumferential water-resistant zipper, a single zipper-pull with rubberized grip, and measured ~24 inches long. Once you align the lower zippers, you can zip the case closed.
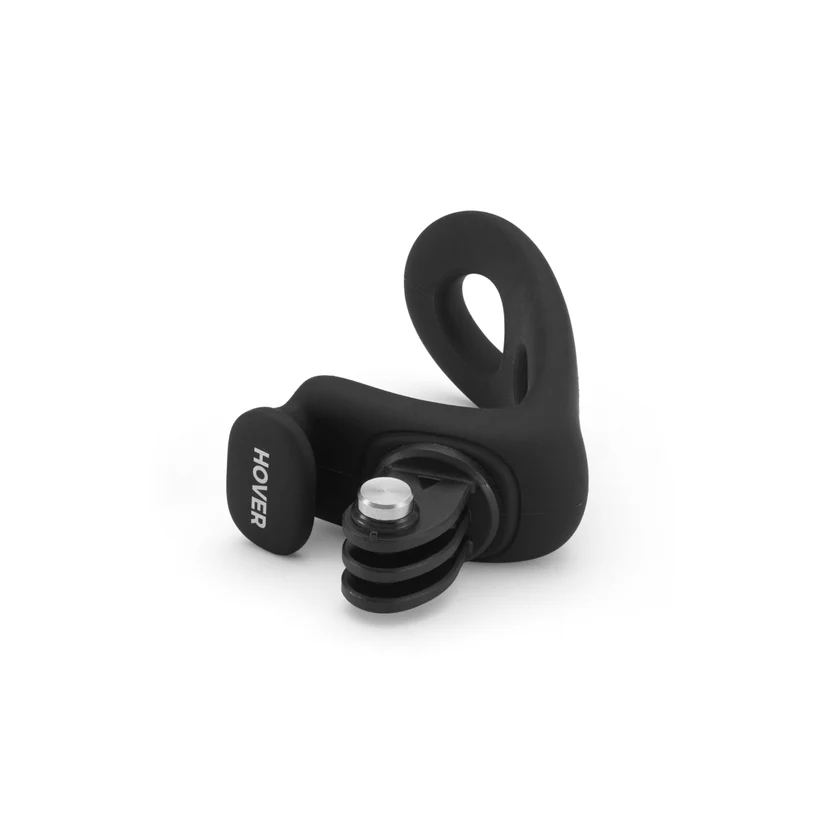
Within the front portion of the bag (HOVER side), you will find a 1-inch wide adjustable shoulder strap (1.5 ounces). The strap had a hook-and-loop attached to the end of the leather clasps, and connected easily to the D-rings on the carry bag. The black strap had an adjustable buckle in the middle and could expand from 26 1/2 inches long to 64-inches long. The adjustable buckle was easy to adjust on-the-fly, connected easily and securely to the D-rings, listed “HOVER” etched/sewn into the strap (three of them), had a cable management strap to prevent twisting, and had a stop stitch to prevent separation from the buckle. Additionally, I found several beacon accessories within the pouch: 1. Magnetic Clip for Beacon (0.6 ounces), 2. Magnetic adapter mount for beacon (0.5-ounces), 3. Handlebar Mount (2.4 ounces), 4.Beacon Wrist Strap for Beacon (1.3 ounces). Each of the boxes had the product name at the top, an image of the product along the mid section, and UPC barcodes plus product information on the back (accessory name, model number, manufacturing information, address, contact information, and product manufacturing labels). I removed each item from their individual boxes and placed them back into the front compartment (more to review below).
The rear panel had three boxes that included ND filters for HoverAir X1 Pro (1.7-ounce), a 65 W power brick (6-ounces, 2 1/2 inches long by 2 3/16 inches tall by 1 1/8 inches thick), and a battery charging hub (2 11/16 inches long by 1 1/8 inches thick and weighed 8-ounces). I loved that the ND filters were inside of a plastic case and had an included microfiber cloth. The thick plastic served as a nice insulator against drops/damage. The inner portion had foam cutouts that allowed a thumb/finger nail to remove the filters, without scratching them or struggling. I appreciated the USB-C input on the battery charging hub, the inclusion of two additional batteries (Each weighed 2.2-ounces and measured 3 1/4 inches tall by 1 5/16 inches wide by 5/8 inches thick). The charging hub had a nice bank of LED’s, a 3/8 inches diameter power button, and lower rubberized feet. I was pleased that the 65W power brick had USB-C over USB-A, but was displeased that it only had a single USB-C port on the front and that the rear prongs were not retractable. Having snagged several backpacks/bags historically with metallic prongs, I believe the feature was a missed opportunity. Lastly, no USB-C cable was present within the accessory boxes.
Power Case:
There is no doubt that the ZeroZero Robotics team designed the kit for maximal flight time. The Power Case arrived in 5 7/16 inches wide by 7 3/16 inches tall by 2 1/2 inches thick retail case. The black background paired nicely with the white product name at the top and the white/gold label along the bottom. However, it was a bit dark for the image of the case. The rear panel showed a picture of the case in an open position with the drone inside of the case. The lower segment listed product manufacturing labels, model number, and address. I would like to note that several of the accessories could have been reviews of their own, but were included with this setup as it came as part of the accessory loadout for the HOVERAIR X1 ProMax.

I was very impressed with the design and feel of the 1-pound 1.8-ounce by 2 1/8 inches thick by 6 1/8 inches long by 4 5/16 inches tall Power Case. The outer surface had a premium leather-like feel, a subdued, grey-colored HOVER along the front cover, and a sleek silver-colored HOVER accent on the front, back and top panels. The top and front panel had a 1-inch wide leather strap with magnetic closure buckle and an open window to view the battery charging % timer. To open the Power Case gently remove the magnetic closure at the top of the panel and open the case like a book. Within the case, you will find a 1-inch wide by 48-inches long shoulder carry strap with grey-stitched HOVER, and a power case instruction manual.
The manual did a good job at describing/reviewing the power case. The first panel showed how to insert the Velcro attachment of the carry strap into the side panels of the Power Case. The next three panels provided labeled diagrams of the charging case (USB-C charging port, battery display button, battery indicator LED, Viewing screen, shoulder strap hooks, charging port c2, c2 port adapter) and the installation process. The third panel provided most of the specification information with a helpful charging indicator table. The Power case is also able to provide power output via the USB-C port (45W max). To test this process, I plugged a Klein Tools Multimter into the USB-C output port and a USB-C cable into my iPhone 16 pro max (14.85V/1.83A). Starting at 2:18PM at 20% power, my iPhone increased to 34% by 2:26 PM, and to 58% by 2:55 PM. I started the test with 2 LED present and was able to gain ~50% power on my iPhone.
I plugged a Klein Tools multimeter into the HOVER 65W charging brick and the included USB-C cable form the multimeter into the charging case (19.77V/2.16A). The bank of LED lights along the front of the case will show the charging level (1 LED 0-25%, 2LED 25-50%, 3LED 50-75%, and 4 LED 100%). I started charging the case at 3:00 PM and found it was fully charged by 4:50 PM. The 12000 mAh battery was more than fair for the drone, and could provide enough power to charge an iPhone 16 ProMax (4685mAH battery) ~2 times. While charging another device via USB-C, power will be diverted from the drone to the USB-C port. Once fully charged, the case will resume power delivery to the drone. Specifications: input 5V/3A, 9V/3A, 12V/3A, 20V/3A. Charging Port C1 output DC 5V/3A, 9V3A, 12V3A. C2 output DC 12V/2.5A. 2×6000 mah battery capacity (46.2Wh).
Before you can use the Power Case to charge your drone, you will need to insert the C2 USB-C adapter. Unfortunately, the instructions did not clearly demonstrate how to remove the C2 adapter. Thankfully, YouTube videos provided the necessary information. When you open the case, look to either side for a small 3/8 inches tall by 3/16 inches wide black plastic piece, with six golden circular pins. The kit included two adapters and a metallic adapter removal tool, which was held in place magnetically. You can remove the adapter from the case, insert it into the USB-C port on the drone, and then power the drone via the case. Use the included magnetic removal tool to remove the adapter and then insert it back into the case. After seeing the video, the intent and idea of the adapters made sense. I loved that they knew that someone would potentially lose the adapter and included a spare.

Other than the minor/limited confusion regarding the C2 adapter, I believe the Power Case was an integral part of the setup. I loved the leather design/feel, the magnetic closure strap, the shoulder sling, the clear window, and the LED bank. For a test of the cases output, I ran the drone down to 8%, inserted the adapter into the USB-C port, inserted the drone into the case like a VHS tape into an old camcorder, and then closed the port. The drone’s battery illuminated and showed clearly through the case’s clear window. The drone battery started at 8% power at 4:50 PM, increased to 54% by 5:11 PM and was full by 5:40 PM. The case lost a single LED worth of power during the process and I found that I could charge the drone/battery at least 3-4X. Additionally, I was impressed that it took only about an hour to fully charge the drones battery. I loved the carry strap, the protective shell, the outer leather feel, and the thought/design of the Power Case.
Beacon:
Once you have flown at least five test-flights and enjoyed the basic/skilled flight modes, you can move onto the more advanced features of the drone/setup. The Beacon arrived in a 2 13/16 inches wide by 3 15/16 inches tall by 1 3/4 inches thick black-colored box. The white-font-colored BEACON name and grey image of the beacon contrasted nicely against the black background. The rear panel listed the model number, contact information, and product manufacturing labels. Within the box, you will find a 2.6 ounce, 1 1/2 inches wide by 2 1/2 inches tall by 1-inch thick Beacon device and a few extra items: 2 7/8 inches wide by 3 3/4 inches tall black-colored microfiber cloth, a 19 3/4 inches long USB-C to magnetic Beacon charger (proprietary 7-pin), a rubberized attachment/wrist loop, and an instruction manual.
The manual showcased the beacon, joysticks, motion controls, single joystick and dual joystick modes, and provided a labeled diagram of the beacon device and the various uses. You can pair the beacon with a single joystick, with both joysticks, or with both joysticks and a phone. The Beacon had a 1 5/16 inches wide by 1 11/16 inches LCD screen, a lower left D-button/select button ( 7/16 inches square), and a 3/8 inches wide by 7/16 inches tall function button on the front. The left side panel had a 1/8 inches thick by 1/2 inches long power button, while the other side had a speaker cutout. The bottom had a multi-pin input connector for the right joystick, while the top had dual multi-pin input connectors for the left joystick.
Before using the device, you will need to charge the Beacon with the included proprietary multi-pin charger. Press the side button to power on the device and follow the onscreen instructions. You can insert one joystick onto the Beacon to gain motion movement like the Nintendo Wii controller. Or, you can install a thumbstick and enjoy D-pad movements.
Joystick:
The Joystick arrived in a 4 1/2 inches wide by 6 3/8 inches tall by 2 5/16 inches thick box. Like the other accessories above, the device listed the JOYSTICK name at the top of the panel in bold white-font and provided an image of the joystick along the bottom of the cover panel. The rear panel listed the model name, contact information, product manufacturing labels, and UPC barcode. Within the box, you will find a 12.1-ounce, black-leather, clamshell-style zipper pouch (6 1/8 inches long by 4 3/8 inches wide by 2 1/2 inches thick). The textured-leather pouch had the HOVER name in silver-metallic font, a 1/2 inch wide by 5-inches long carry strap, 15 1/2 inches long water-resistant zipper. I unzipped the zipper and found an upper panel with the instruction manual, two 4 3/4 inches long 90-degree USB adapters (USB-C to USB-C and USB-C to lightning) within a 5 1/2 inches wide by 1 3/4 inches tall mesh pouch. The lower panel contained the pair of grips (1 1/2 inches wide by 3 3/4 inches tall by 1 1/4 inches thick), and a foam block with two pairs of thumb sticks. The lower compartment had felt dividers for the grips, thumb sticks, and an open spot for the beacon.
The left joystick had magnetic and plastic clips that securely affixed to the top panel of the Beacon. The right joystick had magnetic and plastic clips that affixed securely to the bottom of the Beacon. Once you attach the joysticks, you can screw in the thumb posts, extend each of the joystick bodies, then rotate the right stick 90 degrees counterclockwise, and the left 90 degrees clockwise. The joystick design felt like a combiner Transformer, Power Rangers Zord, or Voltron. The lower section of each thumbstick had an extendable grip, which could accommodate my iPhone 16 Pro Max inside of a case.
Summary:
My only complaint was that the Carry Case was not sufficient enough to carry the drone, Beacon/joysticks, and Power Case. If desired, you could choose to bring a few of the accessories with the carry case. For example, you can put the Beacon/joysticks inside of the side panel of the Carry Case and still have the battery charging hub on the other. You would likely need to leave many of the Beacon’s accessories behind.
I loved the smooth flight, the drone-controls, App controls, manual controls, and the built in safety features. If you press the drone’s button while the device is folded, the speaker will alert the status of the drone (folded) and to unfold the drone before next steps. During the flight process, the drone/App will keep track of the remaining battery and will vocalize “low battery return to home.” The feature will repeat several times to let you know of the need to land. If you disregard the warnings, the drone will try to return to the initial take-off location before attempting to land in a flat/safe area. The main benefit of this drone is the hands-free, hands-off wingman feature. The flight modes will allow you to capture fun, action-packed memories of your activities. Enjoy real-time thumbnails or download videos, capture snippets, and create /use preset modes or adjust dozens of parameters to capture that perfect shot. If you are looking to jazz up your outside activities, look to the HOVERAir X1 ProMax. Paired with a few extra batteries, charging case, and the drone/App combo, you can enjoy your activity as if you have your very own portable, pocketable, and reliable cameraman.
For more information, visit hoverair.com
Original Source: This article was originally published by Jon Walters on macsources, available at https://macsources.com/hoverair-x1-promax-drone-review/


